> ## Documentation Index
> Fetch the complete documentation index at: https://zuperinc-section23.mintlify.site/llms.txt
> Use this file to discover all available pages before exploring further.
# Clyr
The Zuper-Clyr integration automates expense management for field service businesses, combining Zuper’s job and customer management with Clyr’s AI-driven expense tracking. Key features include:
* **Expense Tracking**: Add credit card details in Clyr to automatically track expenses. Capture receipts via the Clyr mobile app, which sync as Parts & Services in Zuper jobs.
* **Job-to-Project Sync**: Zuper jobs sync as Clyr projects, enabling seamless expense association.
* **Customer-to-Client Sync**: Zuper customers sync as Clyr clients for consistent data.
* **User Sync**: Zuper users sync to Clyr, supporting role-based expense submission and approvals.
* **Cost Visibility**: Expenses mapped to Clyr projects appear in Zuper jobs, improving job costing and budget tracking.
This integration minimizes manual entry, ensures policy compliance, and boosts efficiency for mobile workforces (e.g., HVAC, plumbing).
## Integrate and Use Clyr with Zuper
To set up and use the integration, follow these steps.
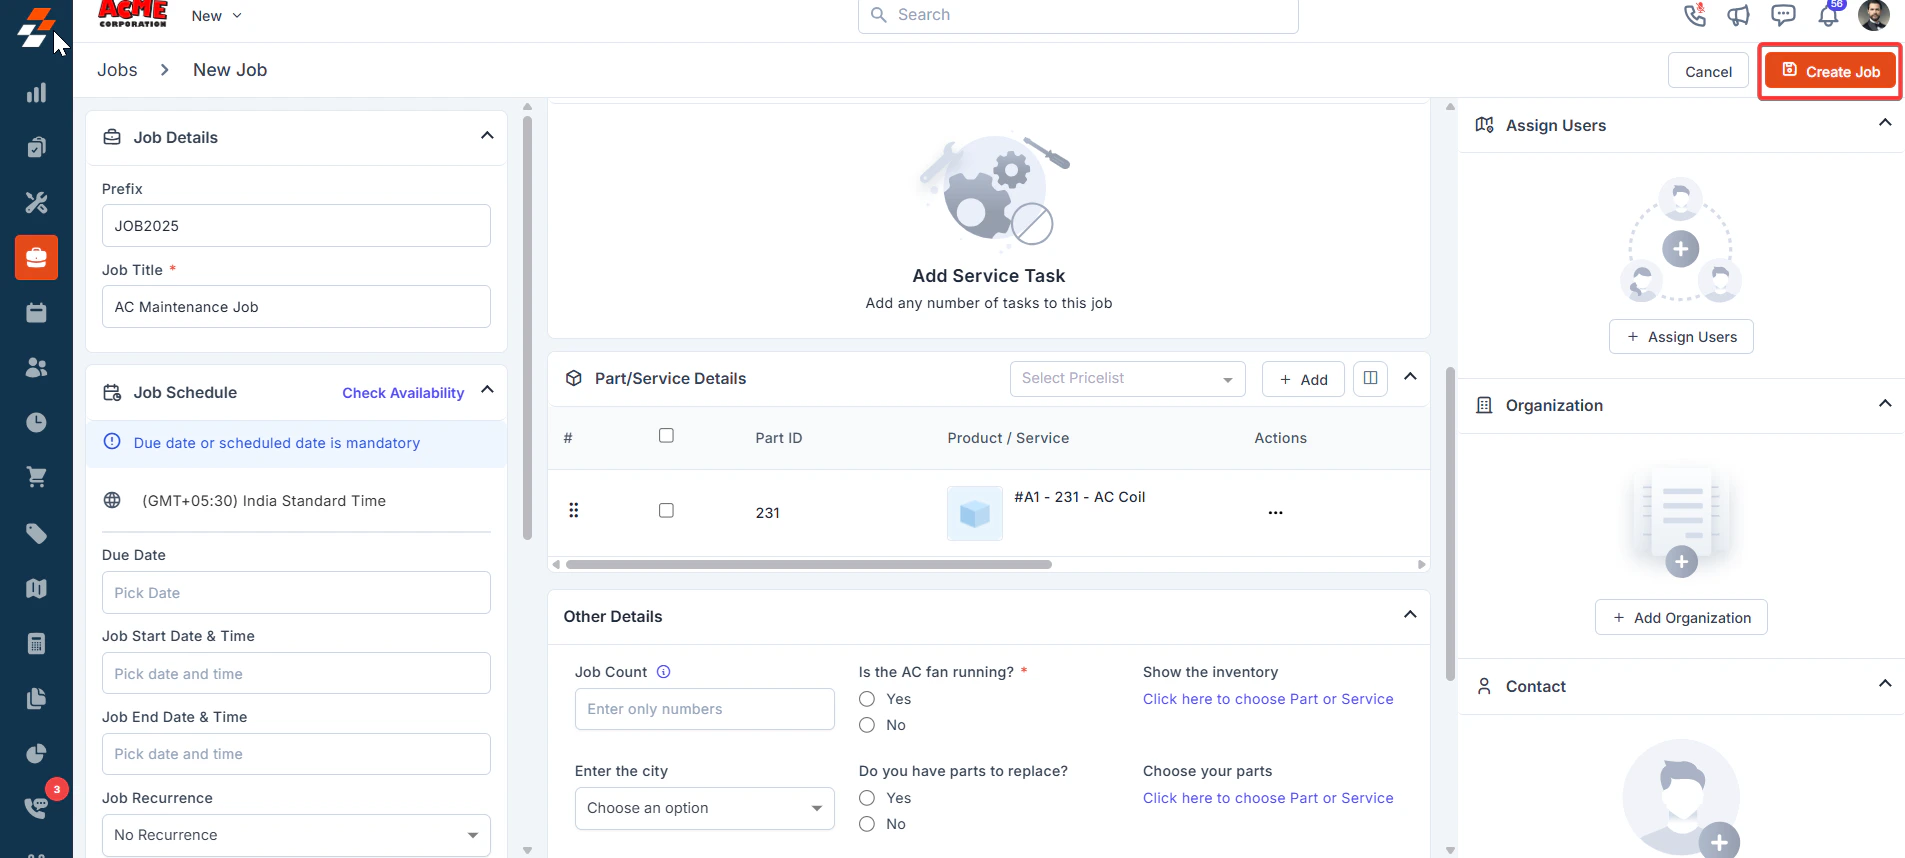
1. On Zuper, select the “**Jobs**” module from the left navigation menu and create a new job by filling in the necessary details.
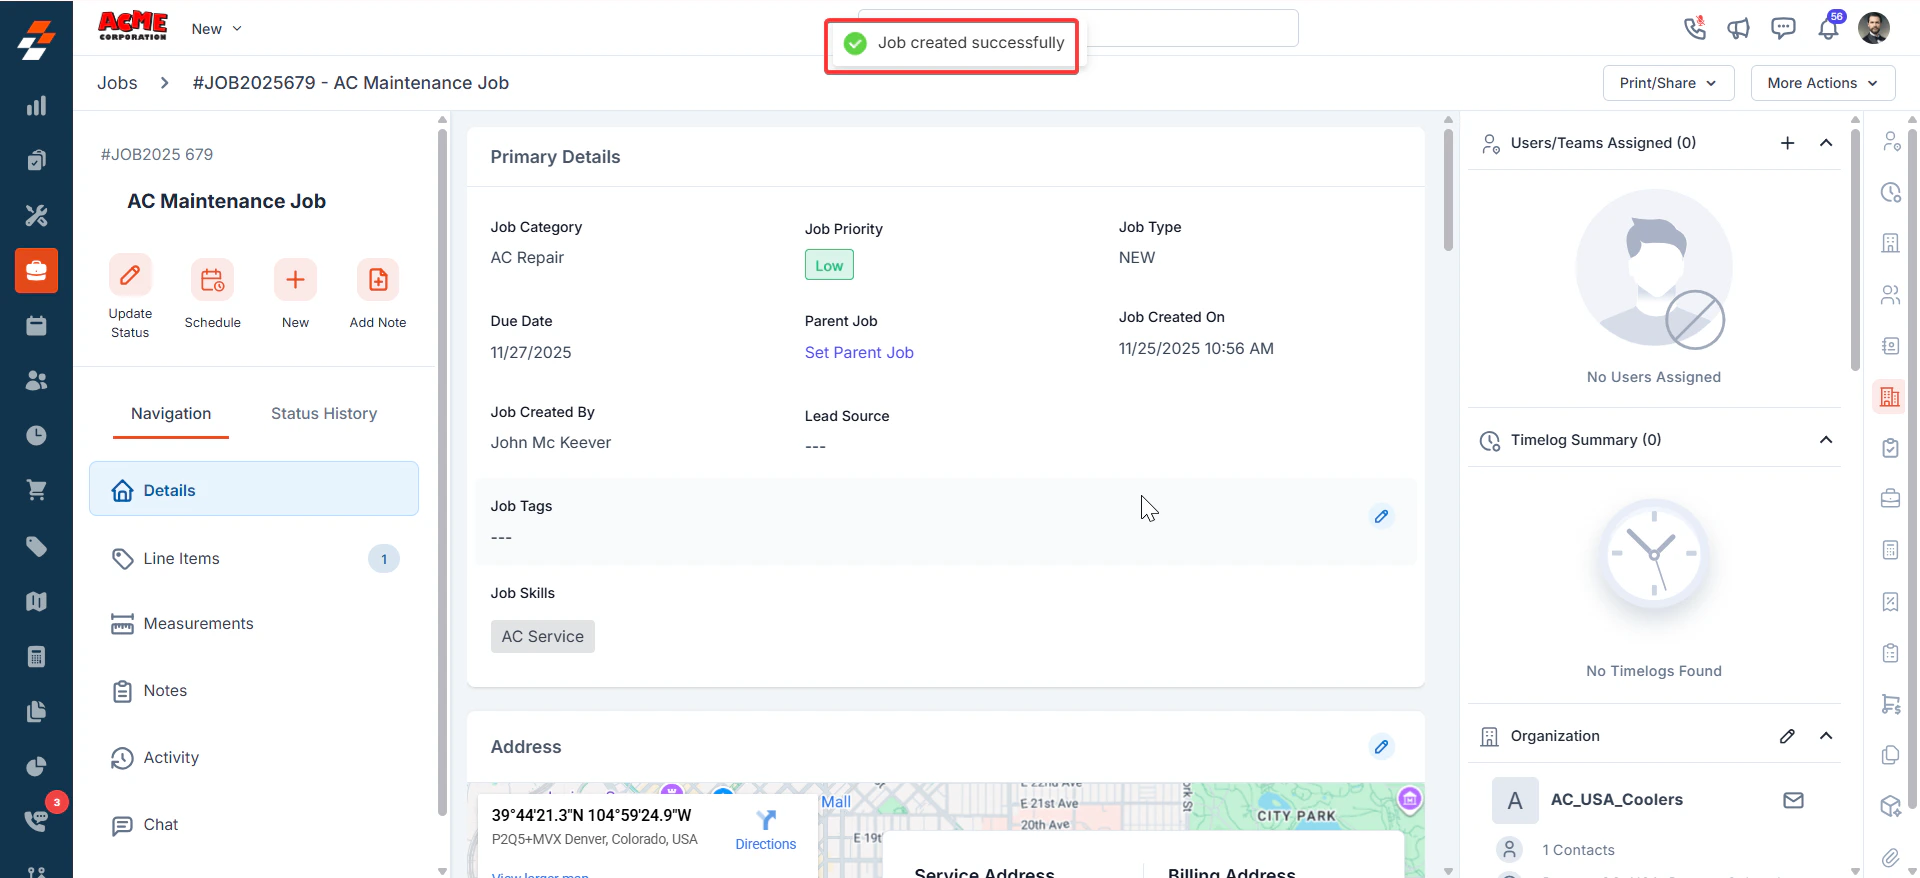
 2. The new job is created successfully.
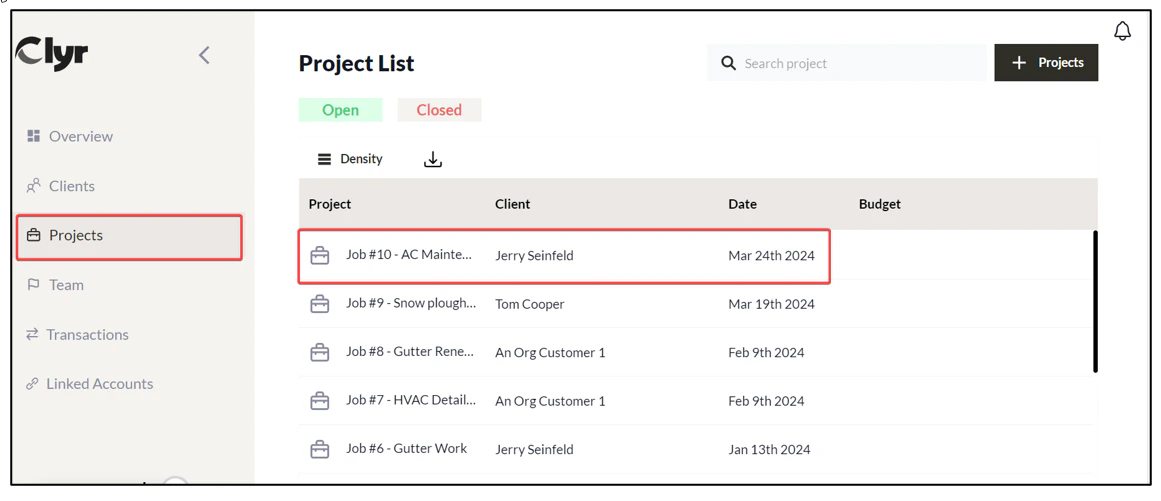
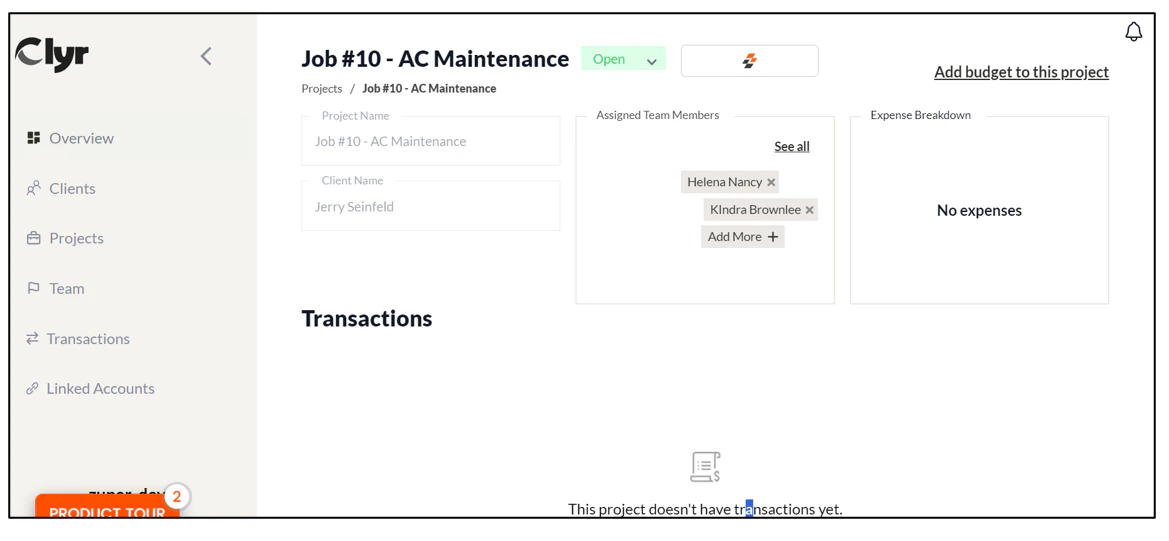
 3. On Clyr, click Projects in the left navigation menu. Choose the Zuper Job that is captured as a project.
 4. Select the Transactions module and choose the exact transaction for which the project needs to be assigned.
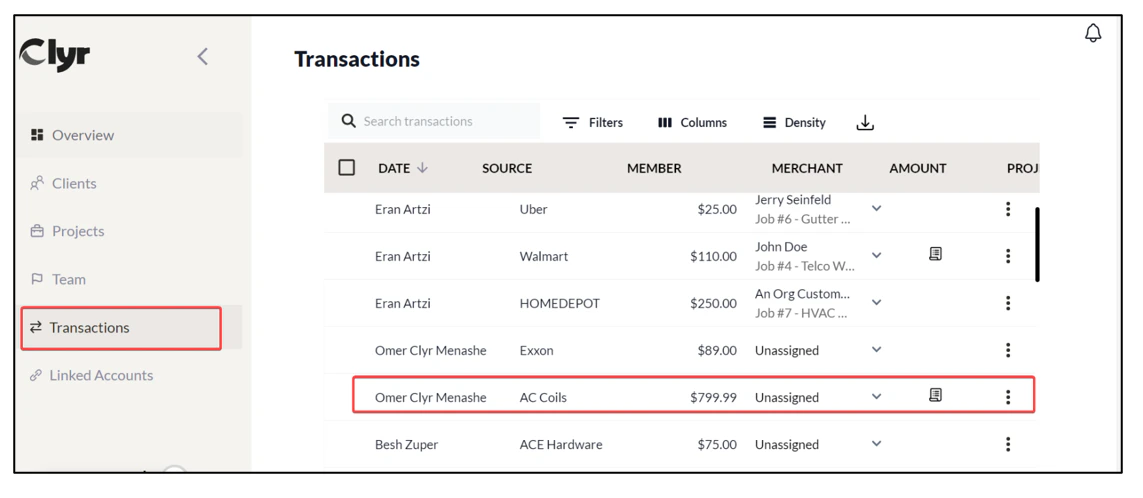 5. Choose the project and map this to the transaction.
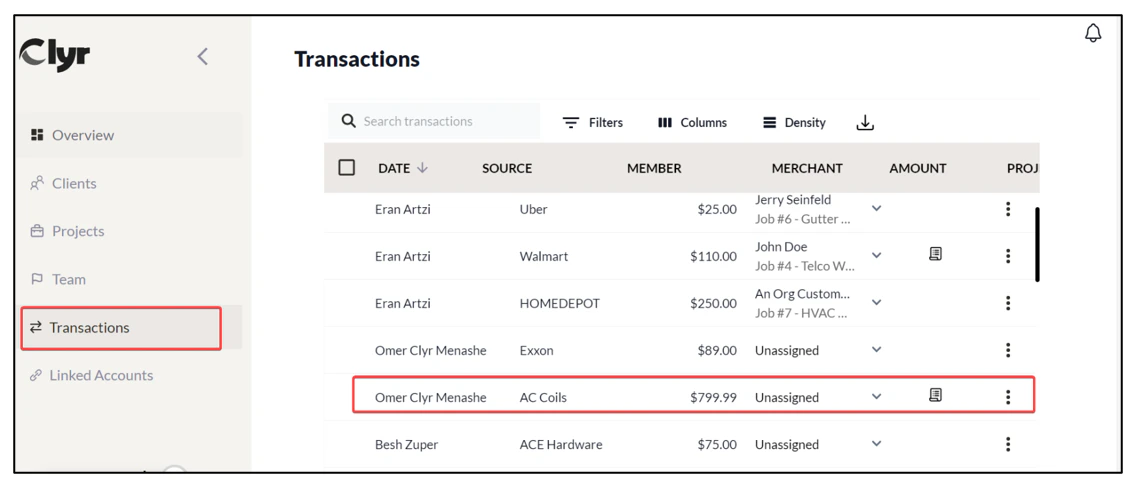
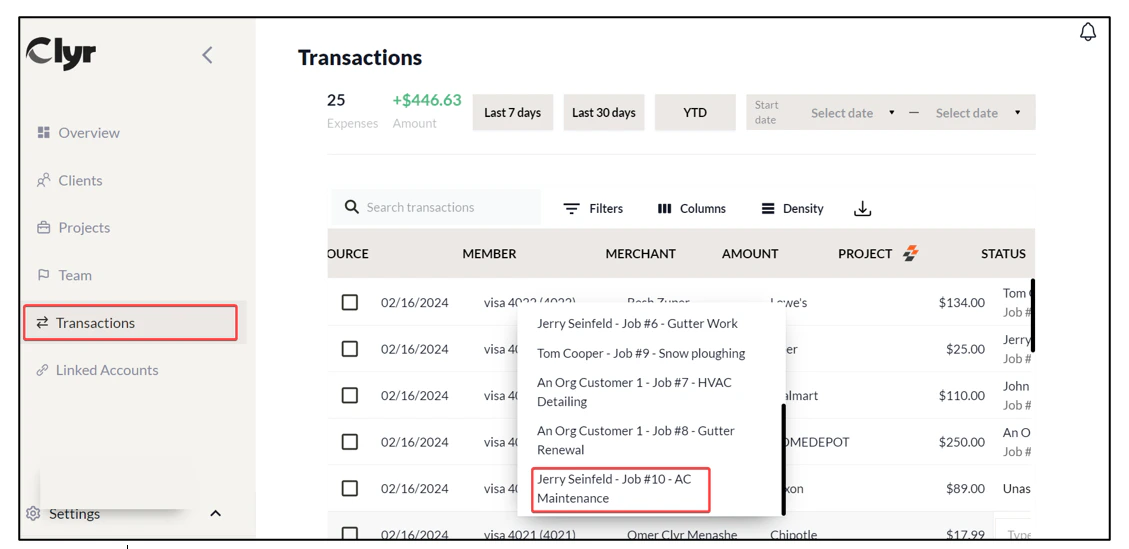 6. The transaction is mapped to the project successfully.
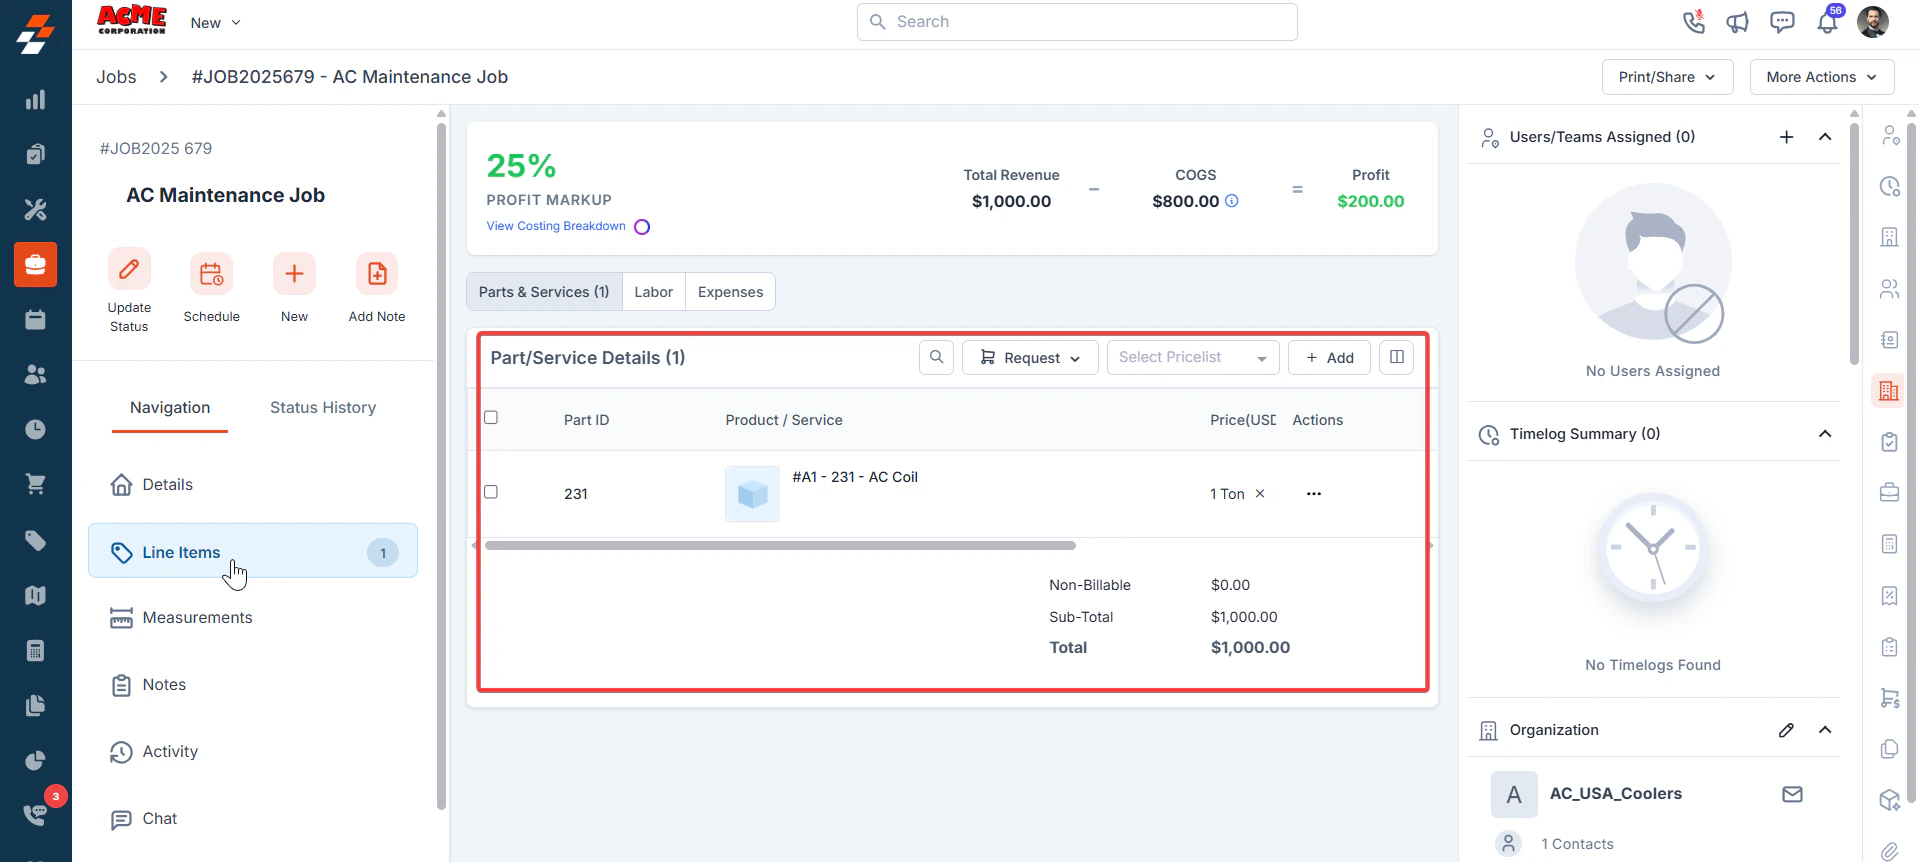
 7. Switch to Zuper. You can view the transactions under the parts and services section in the job.
 **Note**: Users on Zuper are synced as users on Clyr. The customers on Zuper are synced as clients on Clyr.