> ## Documentation Index
> Fetch the complete documentation index at: https://zuperinc-section23.mintlify.site/llms.txt
> Use this file to discover all available pages before exploring further.
# Mailchimp
The Mailchimp integration with Zuper enables users to automatically build and update a customer mailing list in Mailchimp using customer information from the Zuper platform. This integration streamlines marketing campaign execution by syncing customer data uni-directionally from Zuper to Mailchimp.
## **Prerequisites**
* Ensure you have API keys from Stripe App and Zuper app.
## Installing Mailchimp in Zuper
Follow these steps to connect your Mailchimp account with Zuper:
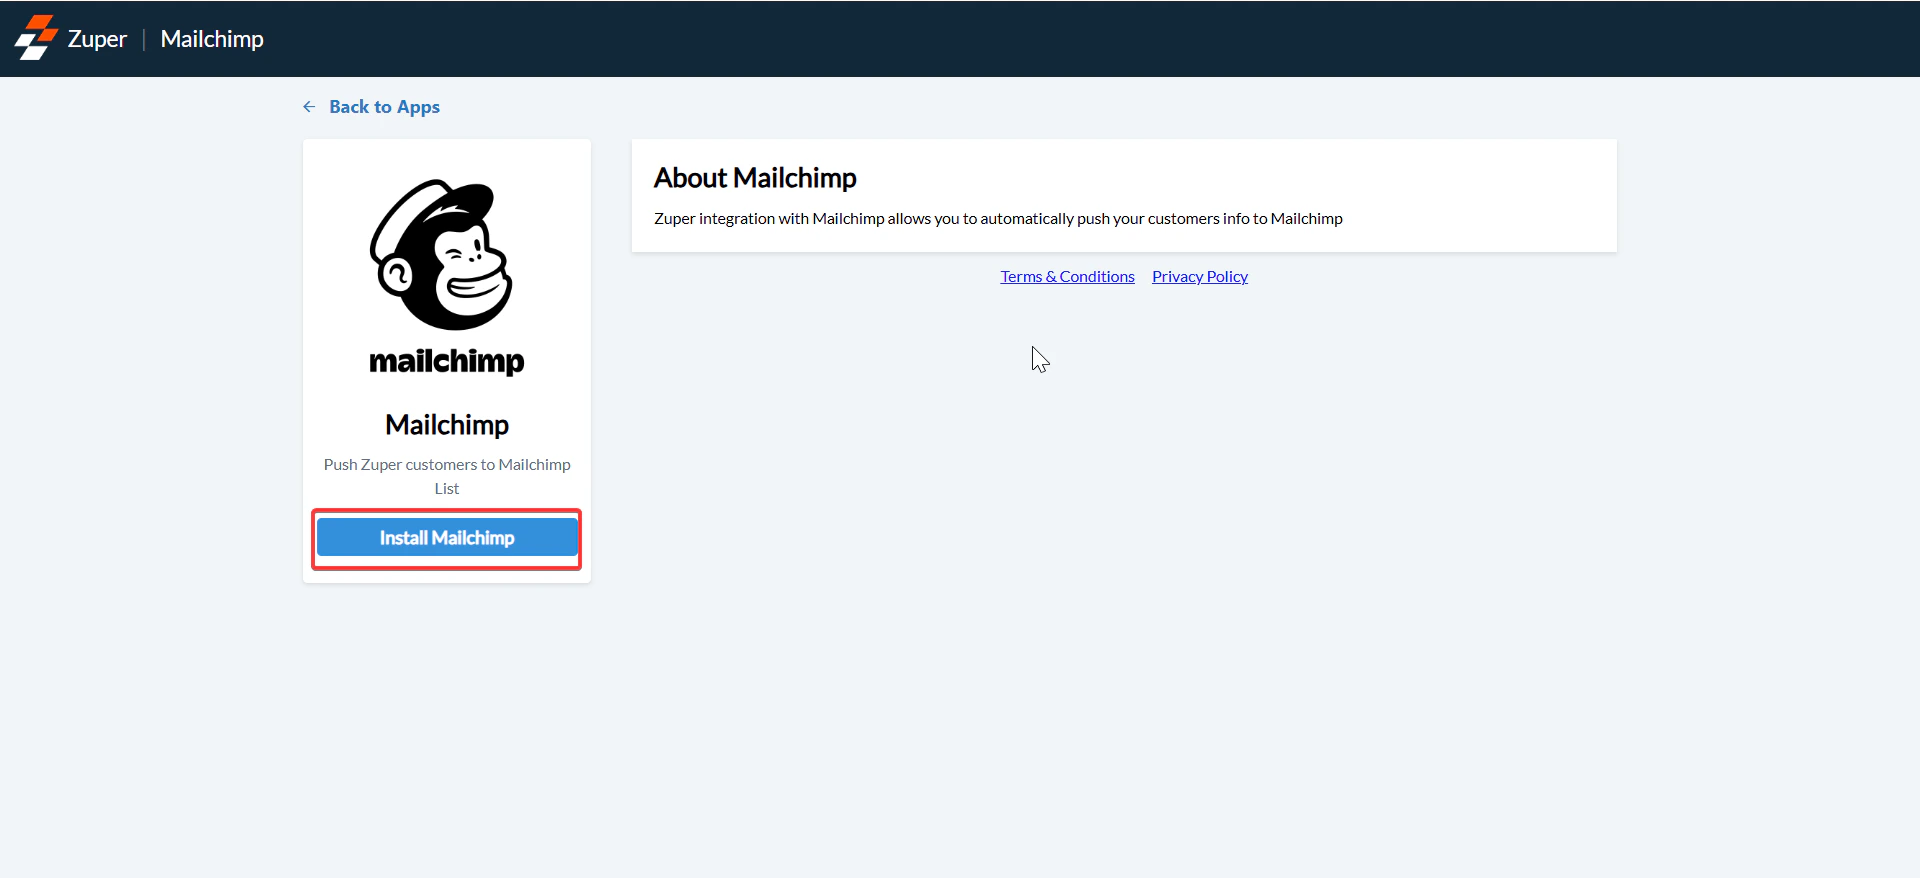
1. Log in to your Zuper account. Click your profile picture in the top-right corner and select **App Store**.
 2. Under the “**Browse by Category**,” select the “**Marketing & Survey**” option and choose “**Mailchimp**.”
 3. Click the “**Install Mailchimp**” button.
 4. Open a new browser tab and log in to your Mailchimp account.
Collect the following information:
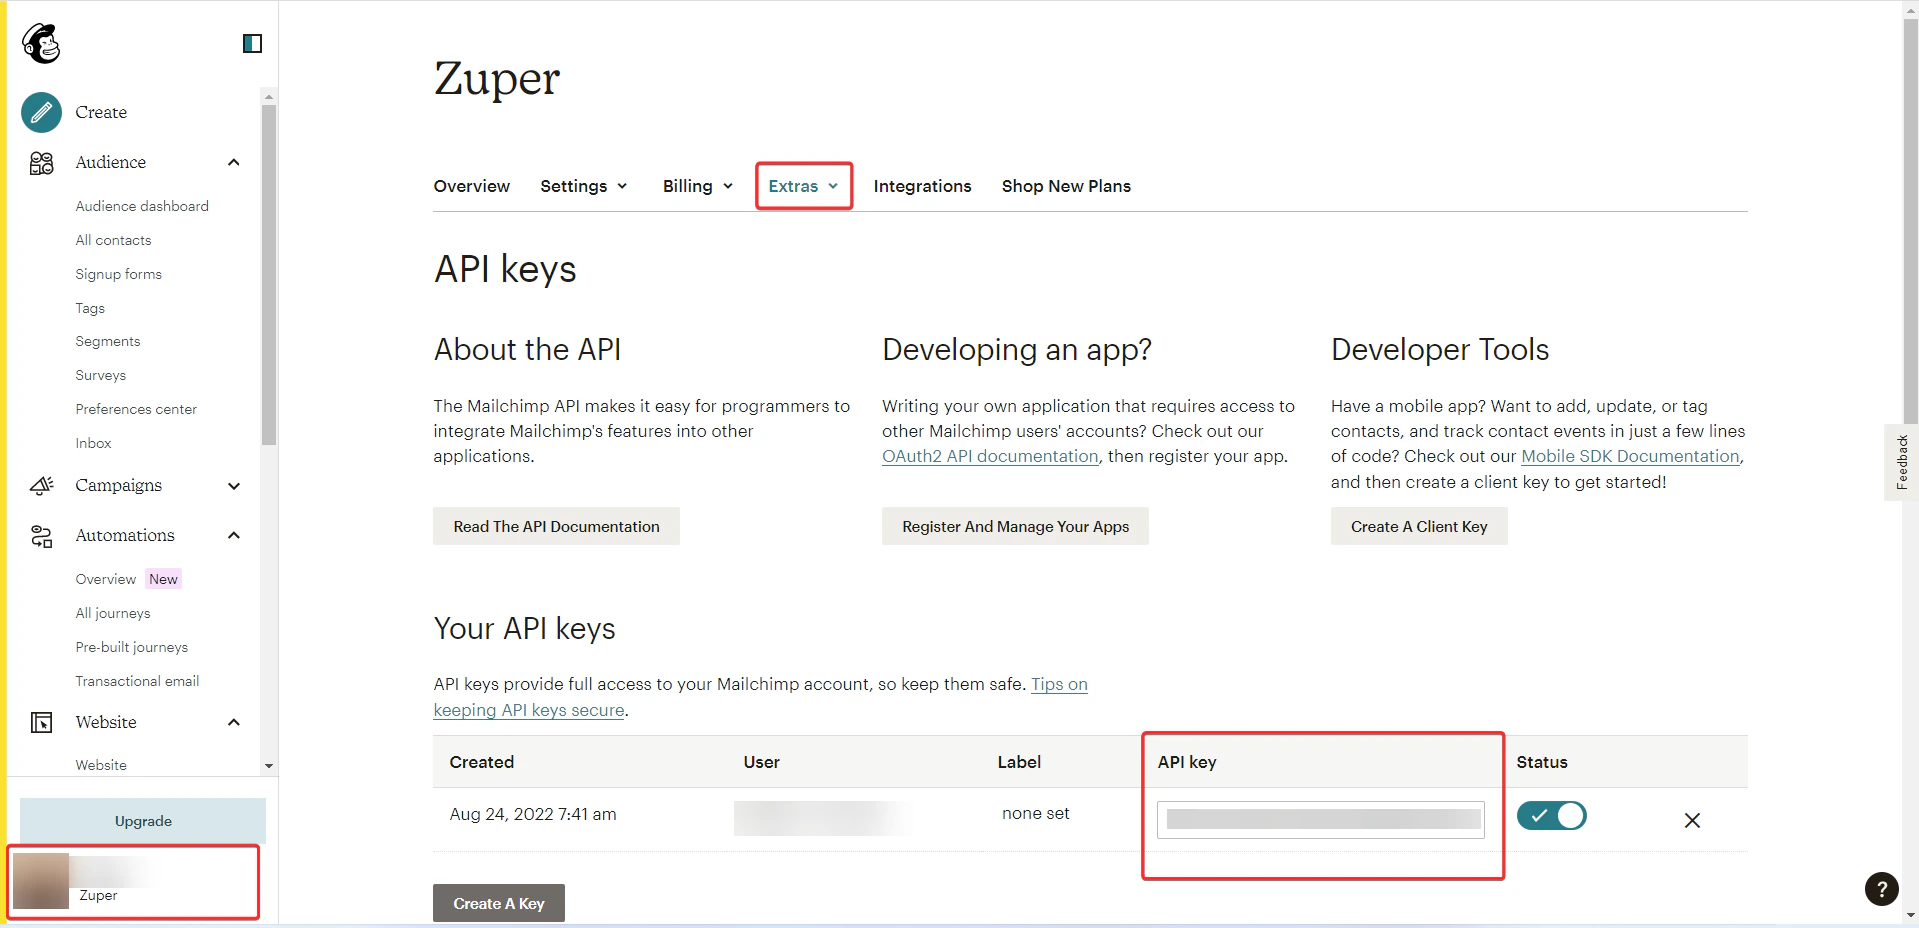
* **Mailchimp API Key**:
* Navigate to **Account & Billing** > **Extras** > **API Keys**.
* Copy your API key. If none exists, click **Create A Key** to generate one.
4. Open a new browser tab and log in to your Mailchimp account.
Collect the following information:
* **Mailchimp API Key**:
* Navigate to **Account & Billing** > **Extras** > **API Keys**.
* Copy your API key. If none exists, click **Create A Key** to generate one.
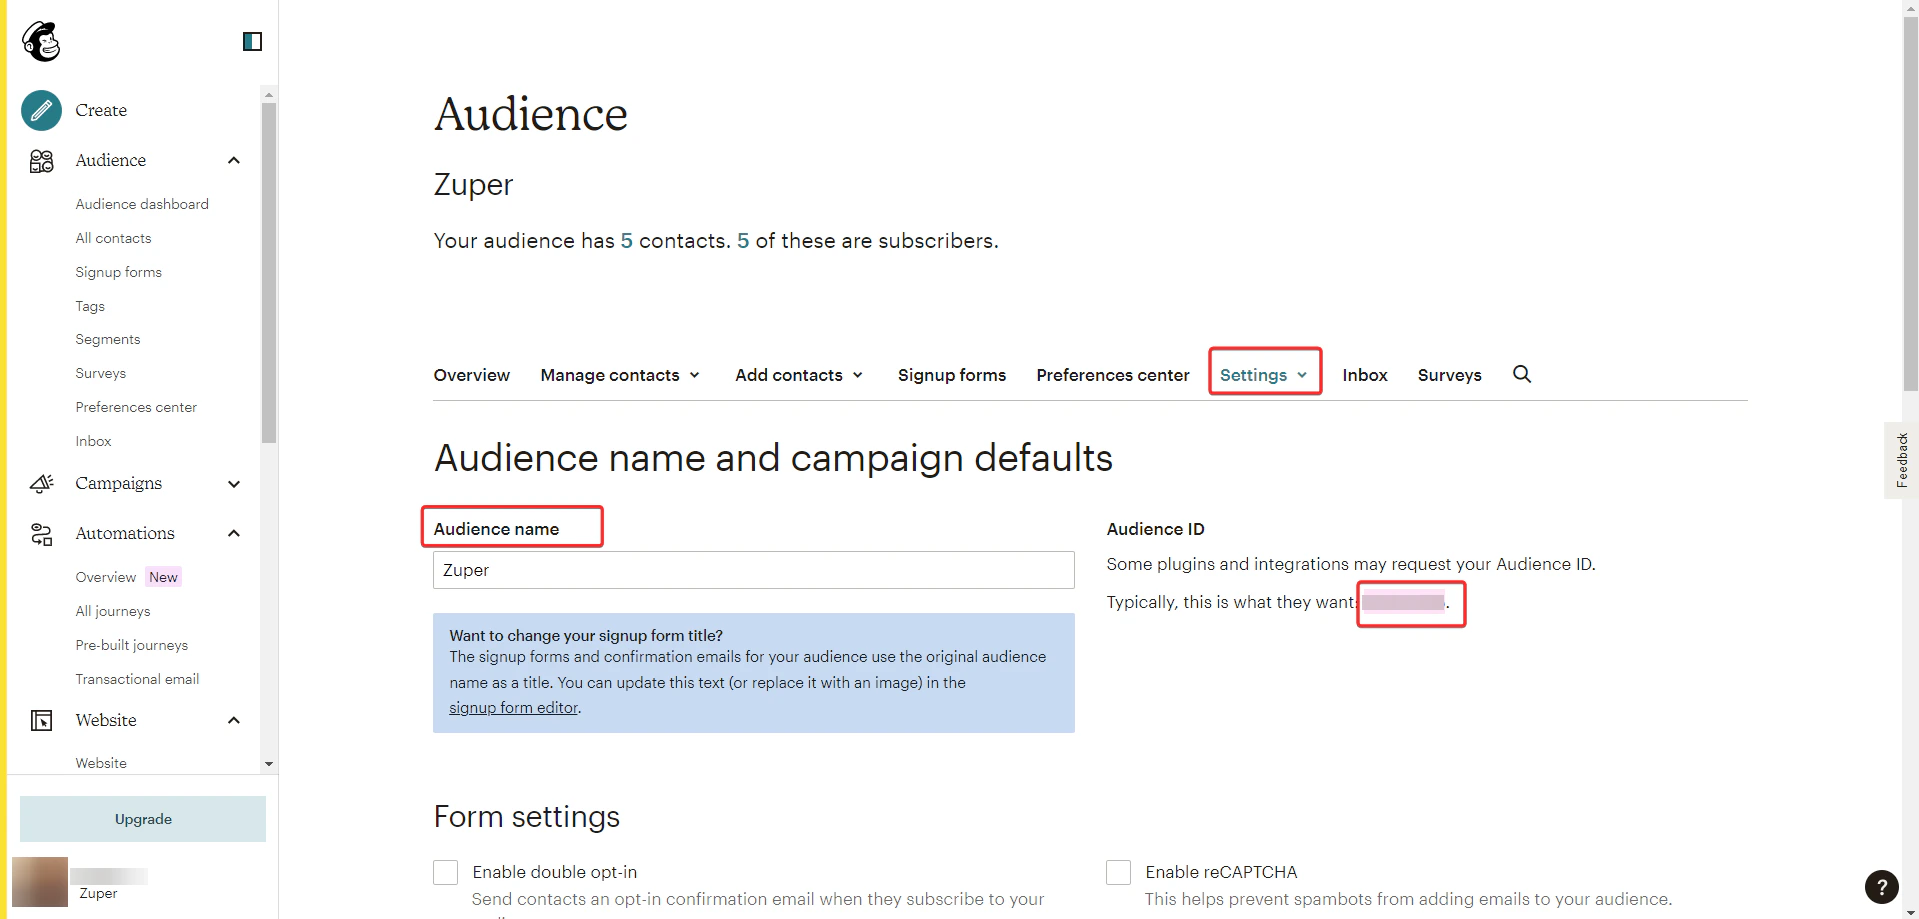
 * **Audience ID**:
* Navigate to **Audience** > **Settings**.
* Copy the **Audience ID** from the settings page.
* **Audience ID**:
* Navigate to **Audience** > **Settings**.
* Copy the **Audience ID** from the settings page.
 * **Server Prefix**:
* From your Mailchimp browser URL (e.g., [https://us87.admin.mailchimp.com/](https://us87.admin.mailchimp.com/)), copy the server prefix (Here us87 is the prefix).
* **Server Prefix**:
* From your Mailchimp browser URL (e.g., [https://us87.admin.mailchimp.com/](https://us87.admin.mailchimp.com/)), copy the server prefix (Here us87 is the prefix).
 **Note**: Keep both Zuper and Mailchimp tabs open to switch between them during setup.
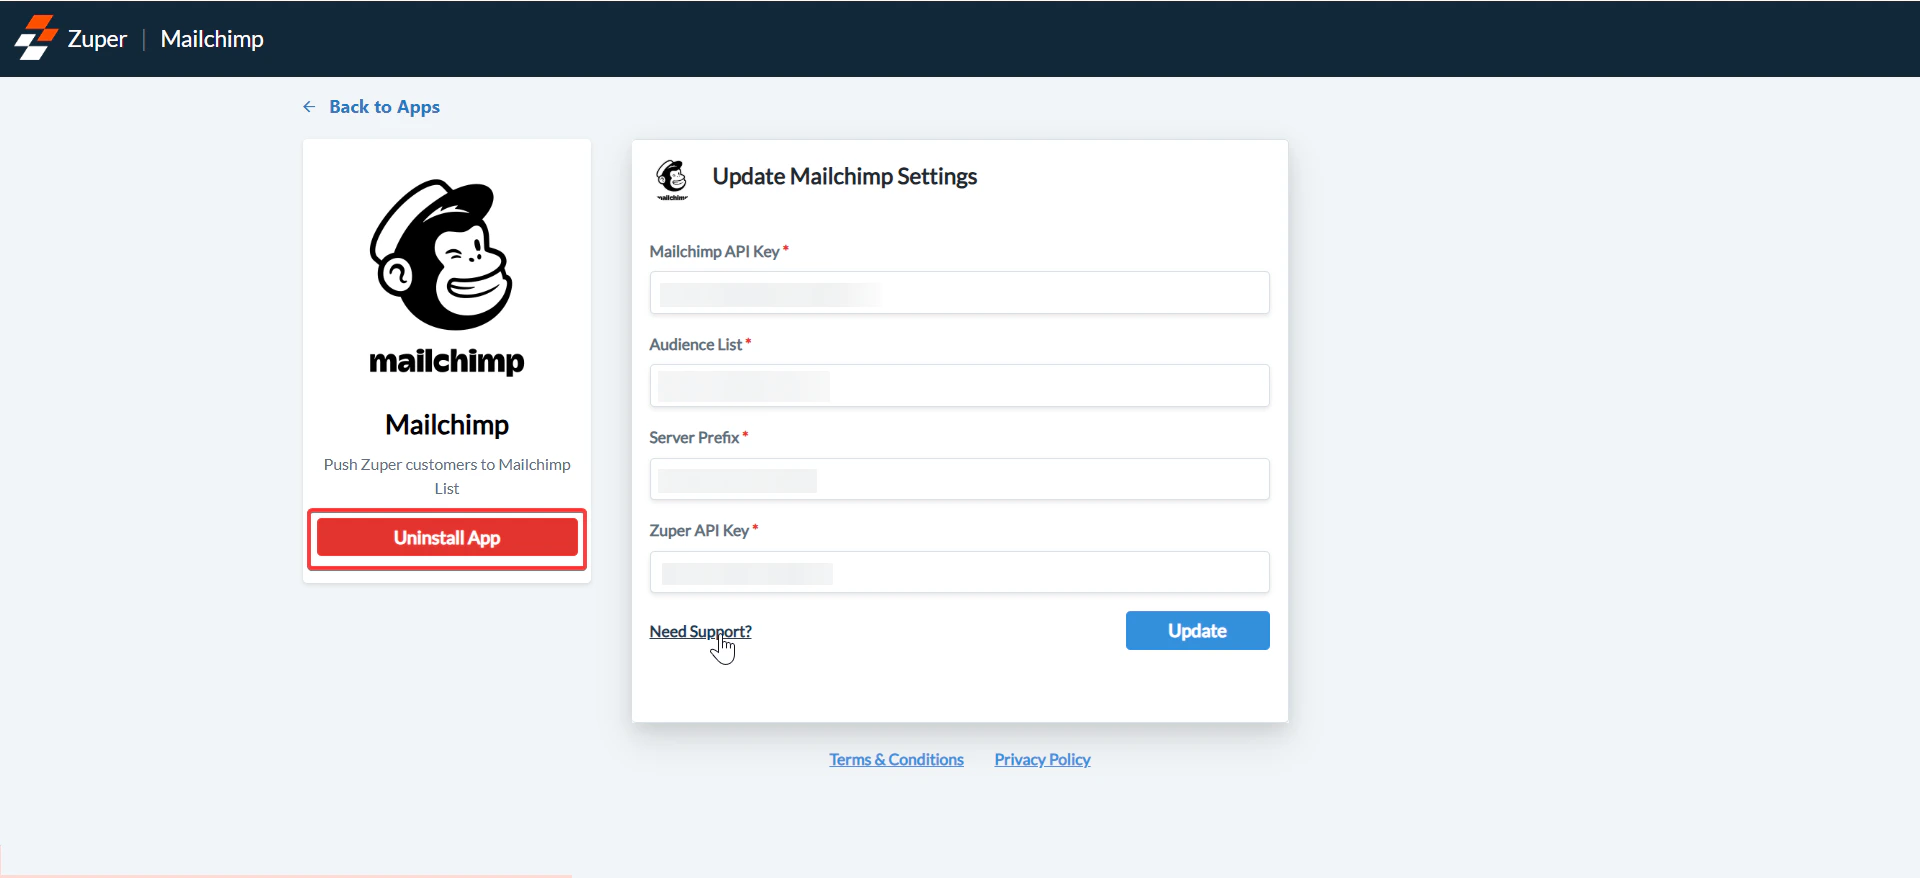
5. In Zuper’s Mailchimp integration settings, enter the following:
* **Mailchimp API Key** (Mandatory): Paste the API key from step 4.
* **Audience List** (Mandatory): Paste the Audience ID from step 4.
* **Server Prefix** (Mandatory): Paste the server prefix from step 4.
* **Zuper API Key** (Mandatory): Enter your Zuper API key. Refer to [How to Generate a Zuper API Key](https://docs.zuper.co/Settings/Developer_Hub/API_Keys#api-keys) for guidance.
**Note**: Keep both Zuper and Mailchimp tabs open to switch between them during setup.
5. In Zuper’s Mailchimp integration settings, enter the following:
* **Mailchimp API Key** (Mandatory): Paste the API key from step 4.
* **Audience List** (Mandatory): Paste the Audience ID from step 4.
* **Server Prefix** (Mandatory): Paste the server prefix from step 4.
* **Zuper API Key** (Mandatory): Enter your Zuper API key. Refer to [How to Generate a Zuper API Key](https://docs.zuper.co/Settings/Developer_Hub/API_Keys#api-keys) for guidance.
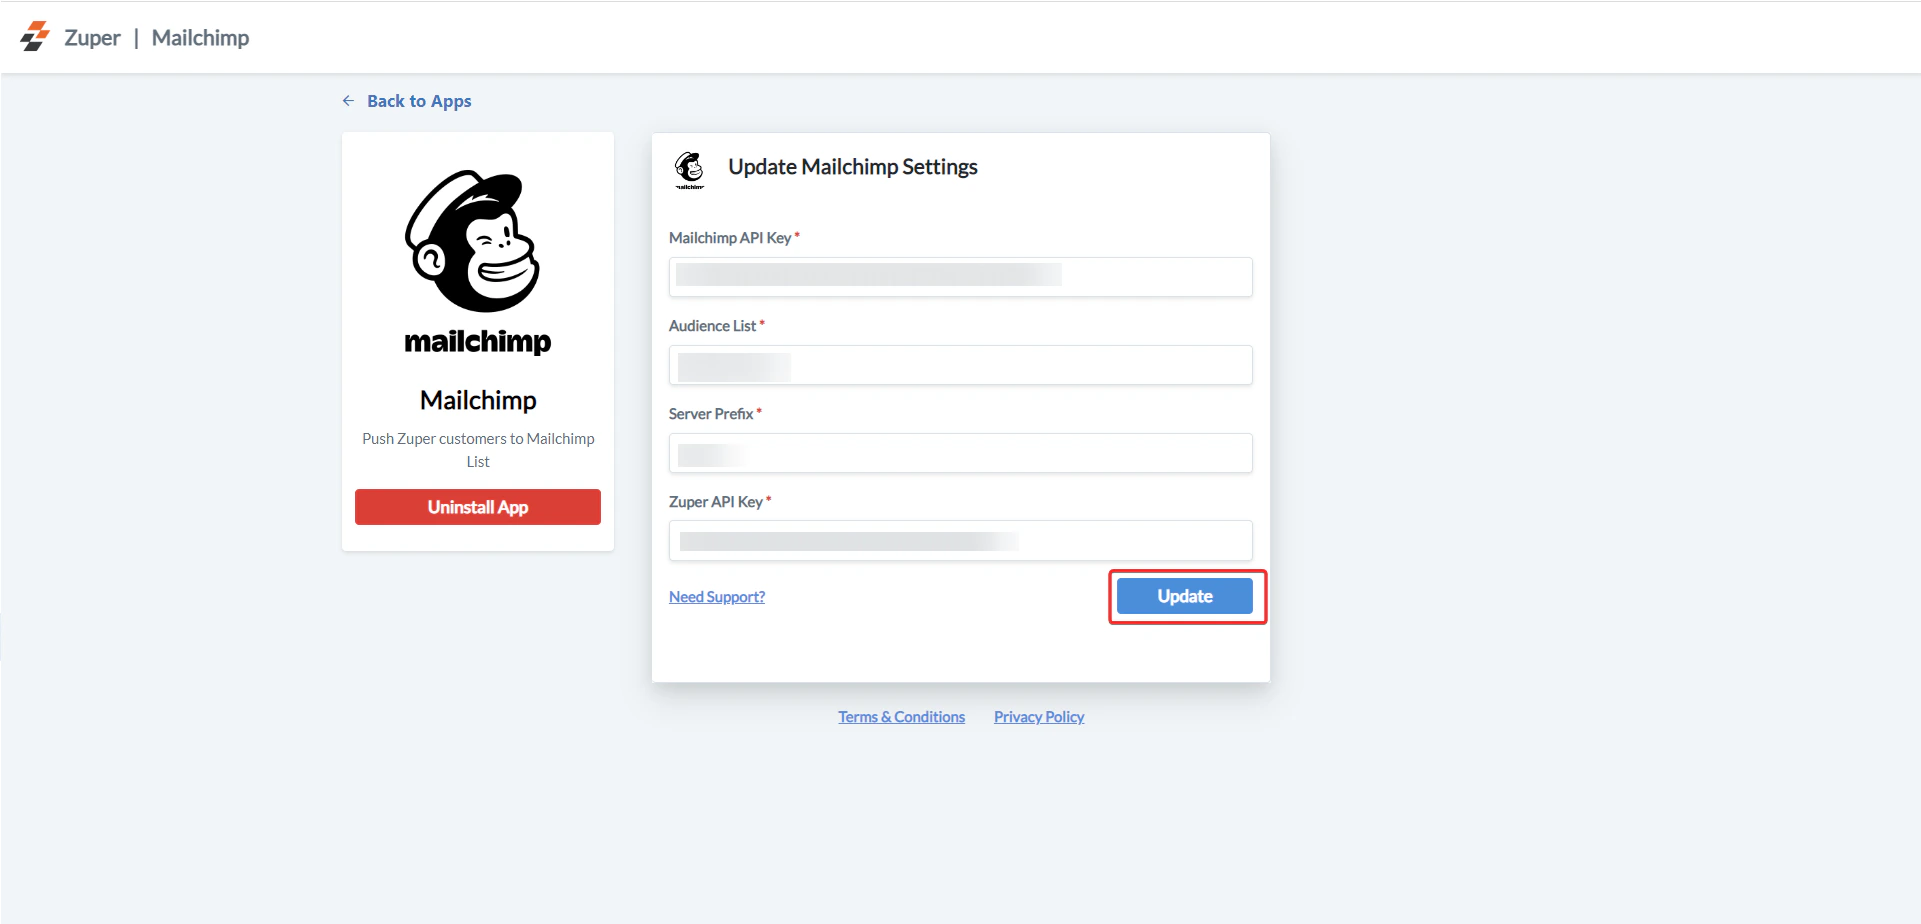 Click **Update** to complete the integration.
## How the Zuper-Mailchimp Integration Works
The integration automatically syncs customer data from Zuper to Mailchimp, creating or updating audience records for marketing campaigns.
1. **Customer Data Sync**:
* When a new customer is created or an existing customer is edited in Zuper, their information is synced to Mailchimp as an audience member.
- **Navigation in Zuper**: *Customers > New Customer or Edit Customer.*
**Important**: The customer’s email address is mandatory in Zuper for syncing to Mailchimp. If the email is missing during customer creation, it must be added later. Editing an email in Zuper creates a new audience member in Mailchimp, rather than updating the existing one.
2. **Viewing Synced Data in Mailchimp**:
* In Mailchimp, navigate to **Audience** > **Manage Contacts**.
* View the synced customer data (from Zuper) listed as an audience member in Mailchimp.
Click **Update** to complete the integration.
## How the Zuper-Mailchimp Integration Works
The integration automatically syncs customer data from Zuper to Mailchimp, creating or updating audience records for marketing campaigns.
1. **Customer Data Sync**:
* When a new customer is created or an existing customer is edited in Zuper, their information is synced to Mailchimp as an audience member.
- **Navigation in Zuper**: *Customers > New Customer or Edit Customer.*
**Important**: The customer’s email address is mandatory in Zuper for syncing to Mailchimp. If the email is missing during customer creation, it must be added later. Editing an email in Zuper creates a new audience member in Mailchimp, rather than updating the existing one.
2. **Viewing Synced Data in Mailchimp**:
* In Mailchimp, navigate to **Audience** > **Manage Contacts**.
* View the synced customer data (from Zuper) listed as an audience member in Mailchimp.
 * Click an email address to view detailed profile information under **Profile Information**.
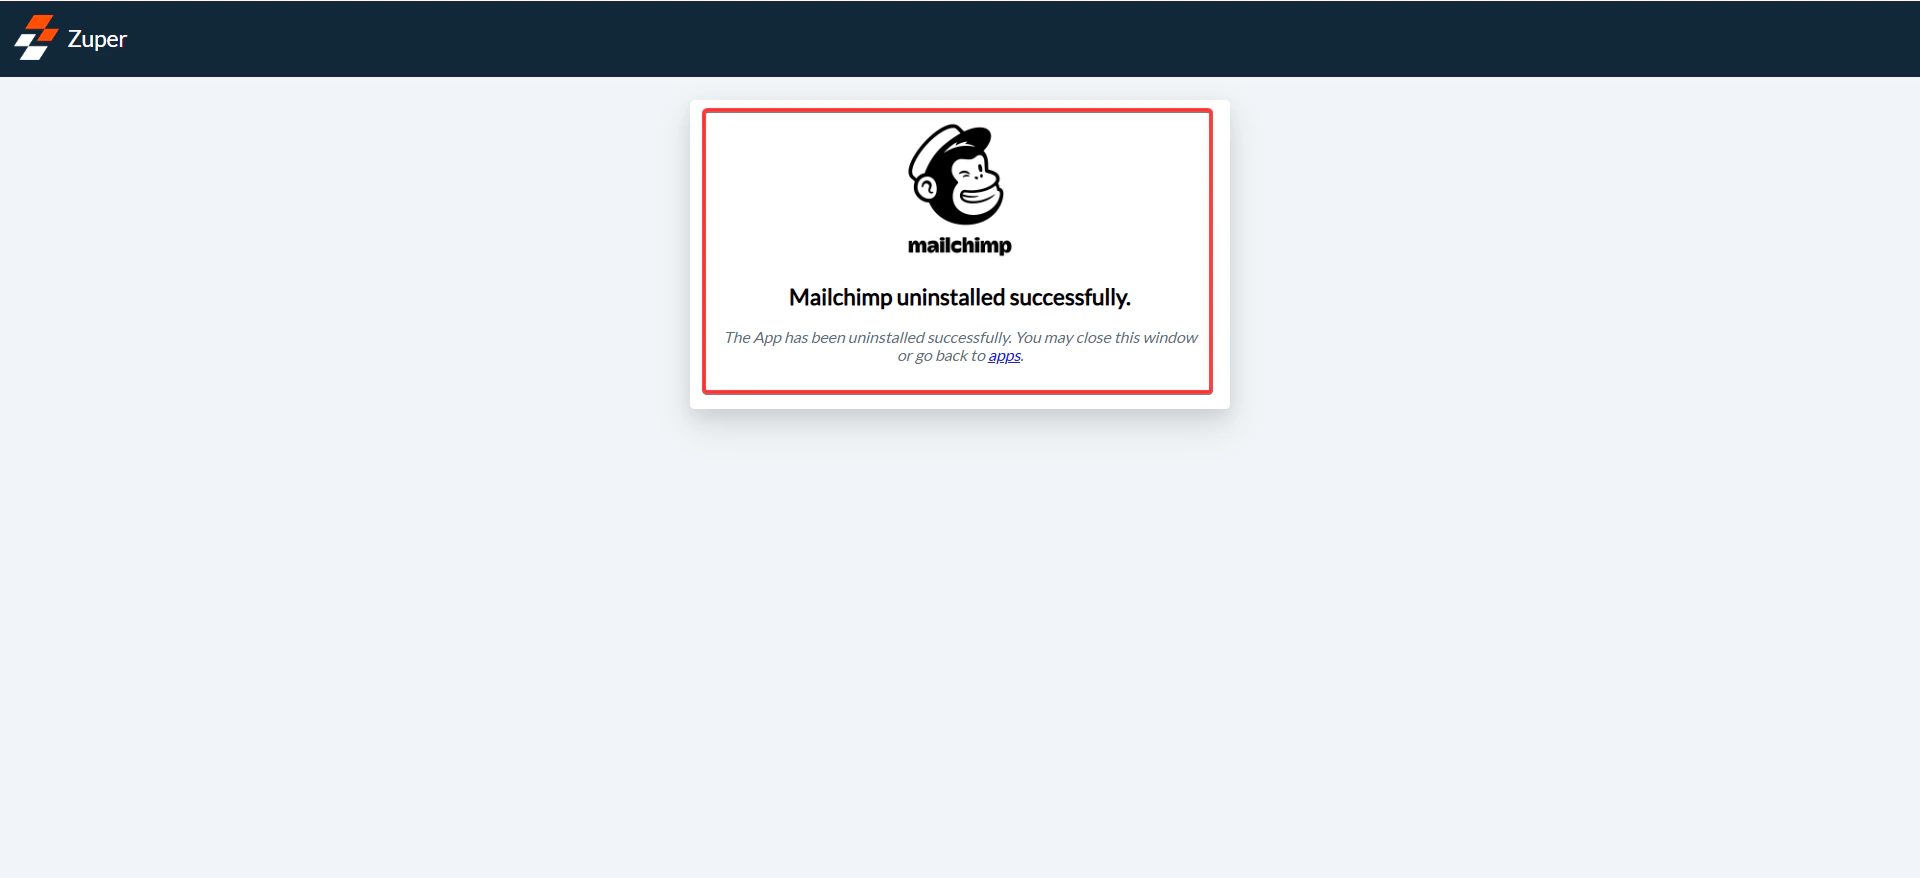
 ## Uninstalling Mailchimp for Zuper
1. Log in to your Zuper account. Click your profile picture in the top-right corner and select **App Store**.
2. Under the “**Browse by Category**,” select the “**Marketing & Survey**” option and choose “**Mailchimp**.”
3. Click "**Uninstall App**."
## Uninstalling Mailchimp for Zuper
1. Log in to your Zuper account. Click your profile picture in the top-right corner and select **App Store**.
2. Under the “**Browse by Category**,” select the “**Marketing & Survey**” option and choose “**Mailchimp**.”
3. Click "**Uninstall App**."
 4. The Mailchimp app will be uninstalled successfully.
 For marketing campaigns, email IDs and customer details are essential. With the unidirectional Zuper to Mailchimp data flow, you can add your audience list to Mailchimp. The database will sync and get automatically updated every time new customers are created on Zuper.