> ## Documentation Index
> Fetch the complete documentation index at: https://zuperinc-section23.mintlify.site/llms.txt
> Use this file to discover all available pages before exploring further.
# Creating a new project
The projects module in the Zuper web app allows you to create and manage multiple complex projects, namely construction, interior designing, cleaning, and more. These projects often involve multiple jobs it and can take several months to complete. With the new projects module, you no longer need to create separate quotes and invoices for each job to proceed. Instead, you can easily create and track a project, associate multiple jobs with it, send a quote, and collect invoice payments from the customer, all in one place.
Let’s get started with creating a new project in Zuper!
## Create project
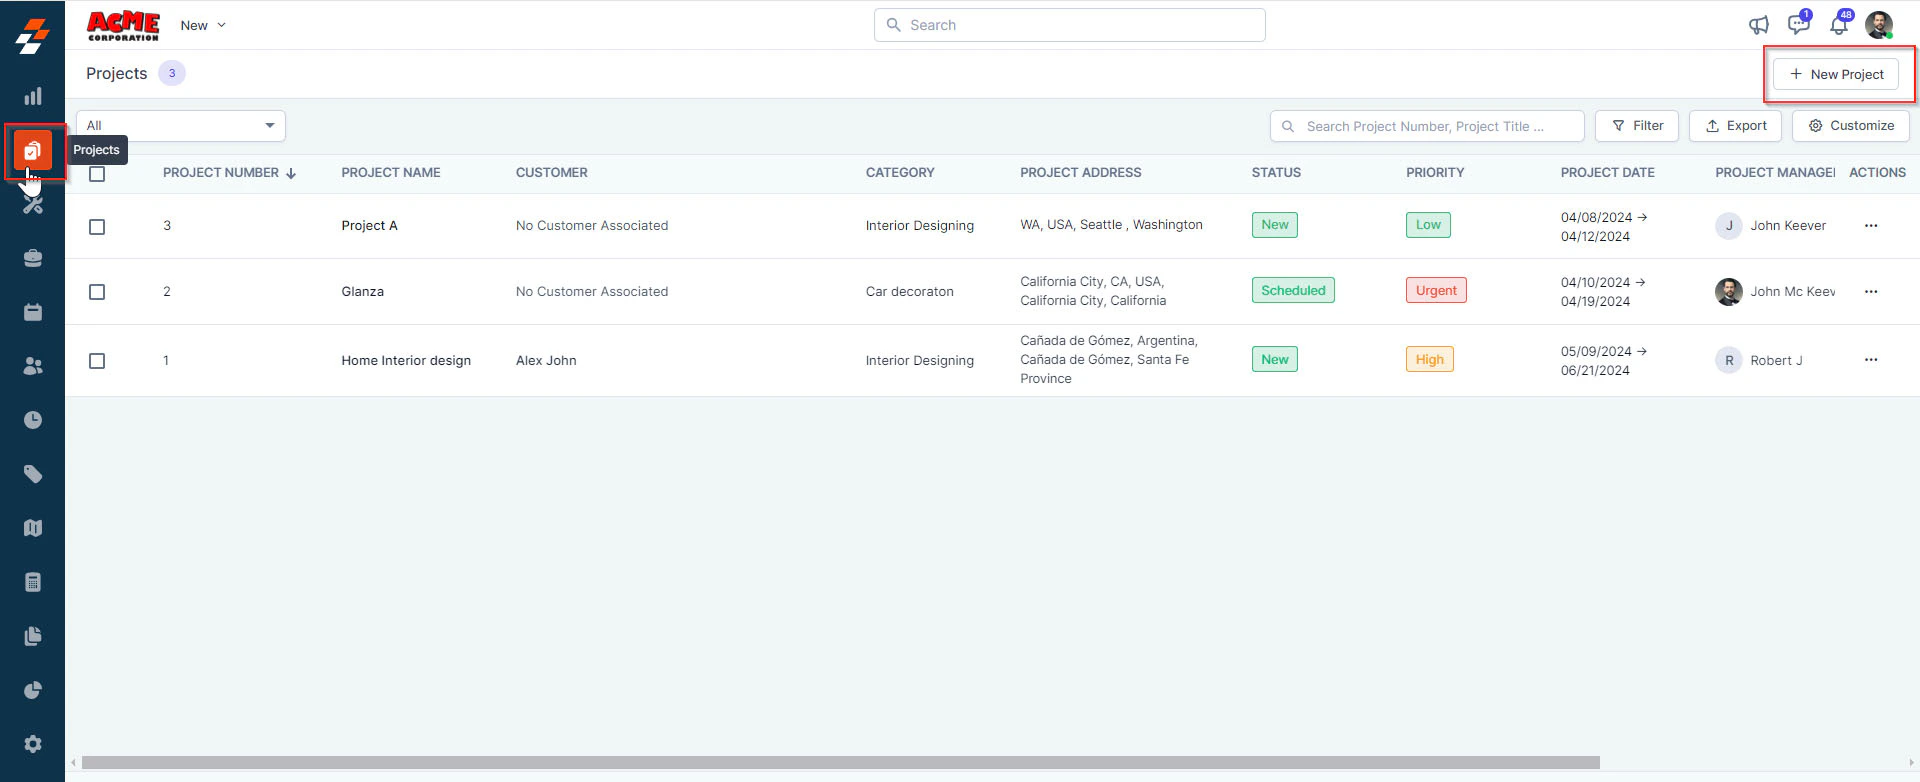
**Navigation**: *Projects -> Projects listing page -> + New Project*
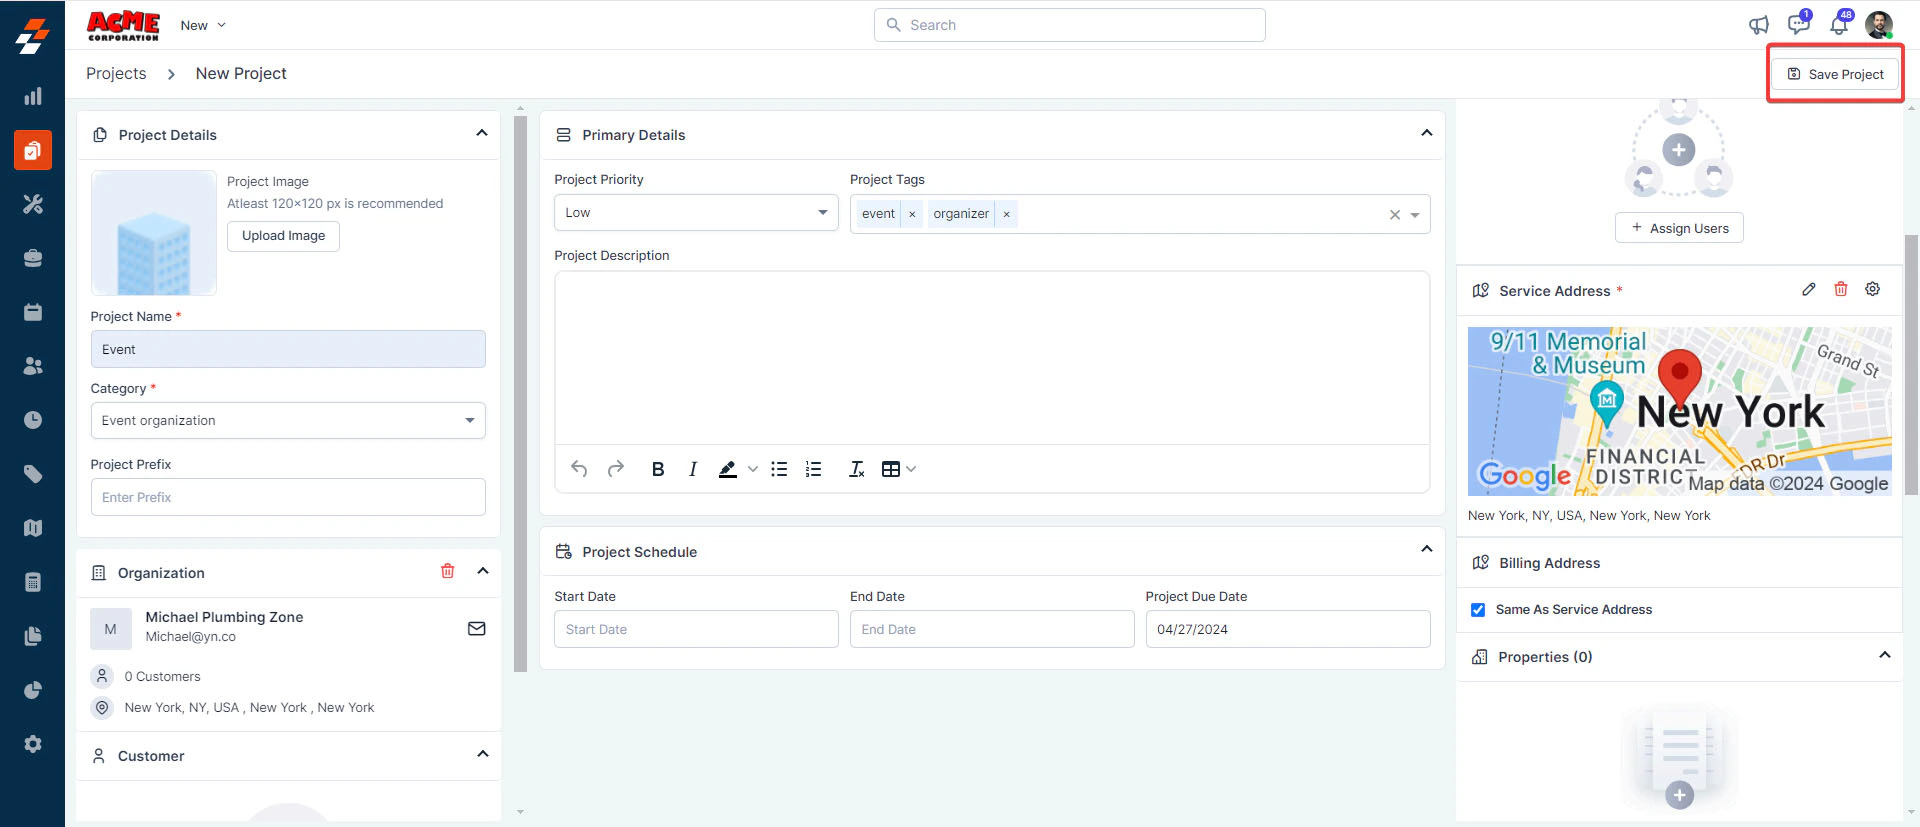
1. Click the "**Projects**" icon from the left navigation menu. You can view the list of projects created earlier on the listing page. To create a new project, click the “**+ New Project**” button at the top right corner of the page.
 2. A new project creation page appears. Fill in the following sub-sections:
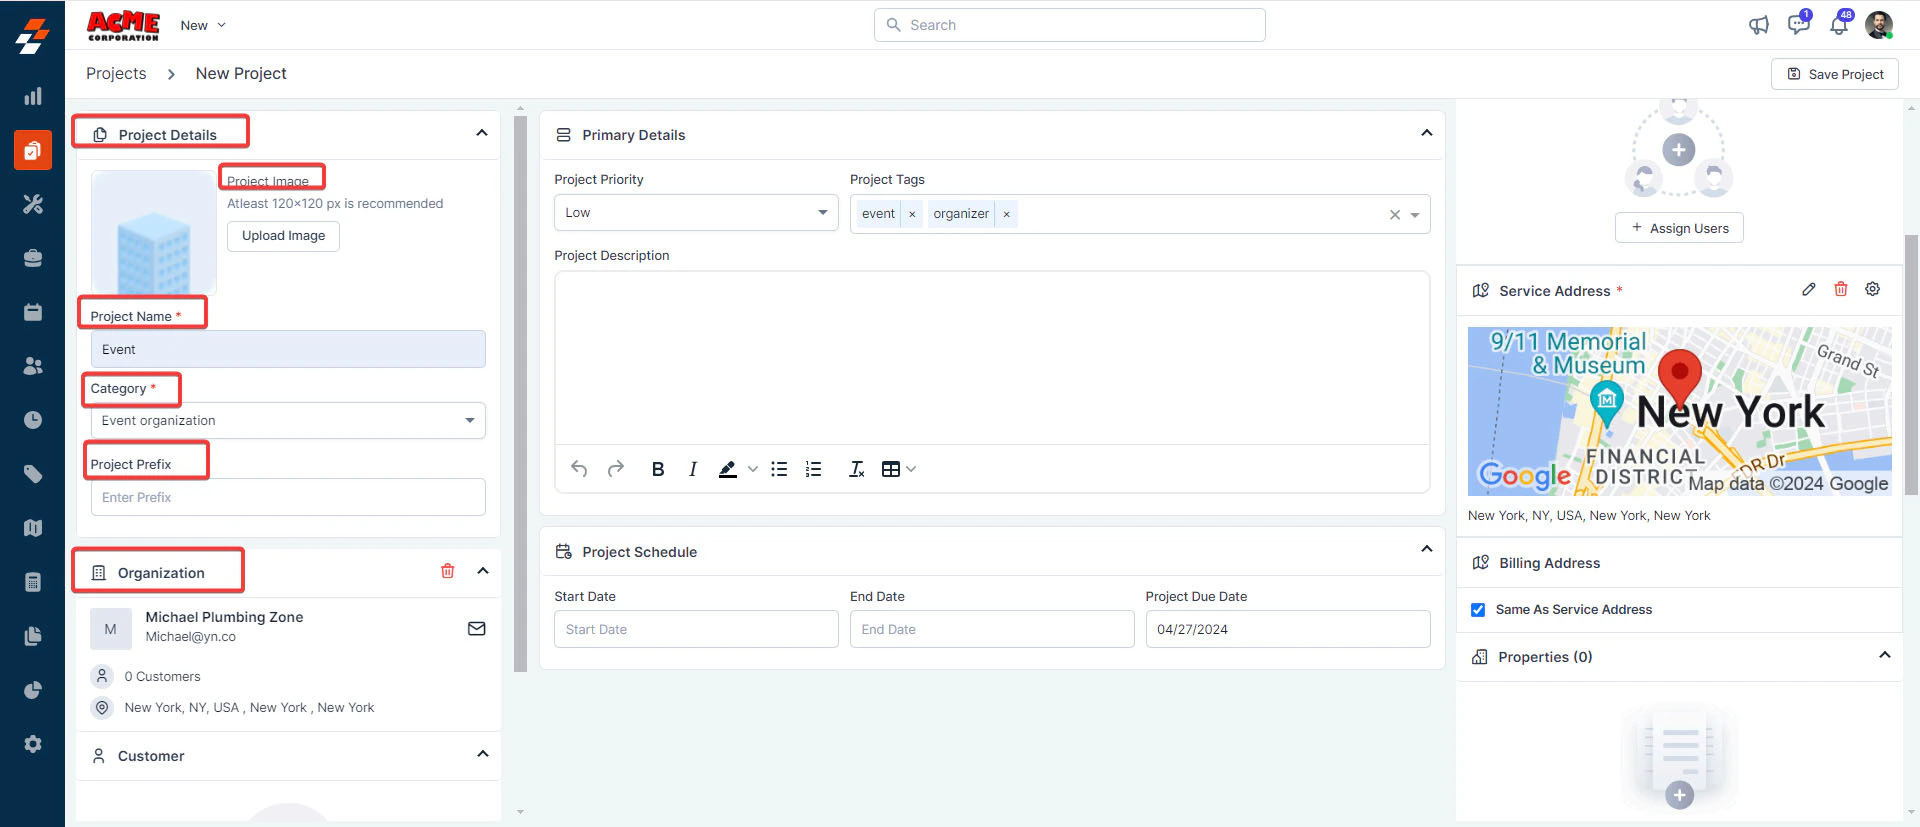
## A. Project Details
Project image (*Optional*): Upload an image with dimensions of 120x120 px. Having an image helps in
project identification.
* **Project name**(*Mandatory*): Provide a name for the project.
* **Category** (*Mandatory*): Choose the category to which this project belongs from the dropdown menu.
* **Project Prefix:** Provide any Prefix that will then be displayed as Project number.
**Note:** The available categories are those configured in the project settings.
2. A new project creation page appears. Fill in the following sub-sections:
## A. Project Details
Project image (*Optional*): Upload an image with dimensions of 120x120 px. Having an image helps in
project identification.
* **Project name**(*Mandatory*): Provide a name for the project.
* **Category** (*Mandatory*): Choose the category to which this project belongs from the dropdown menu.
* **Project Prefix:** Provide any Prefix that will then be displayed as Project number.
**Note:** The available categories are those configured in the project settings.
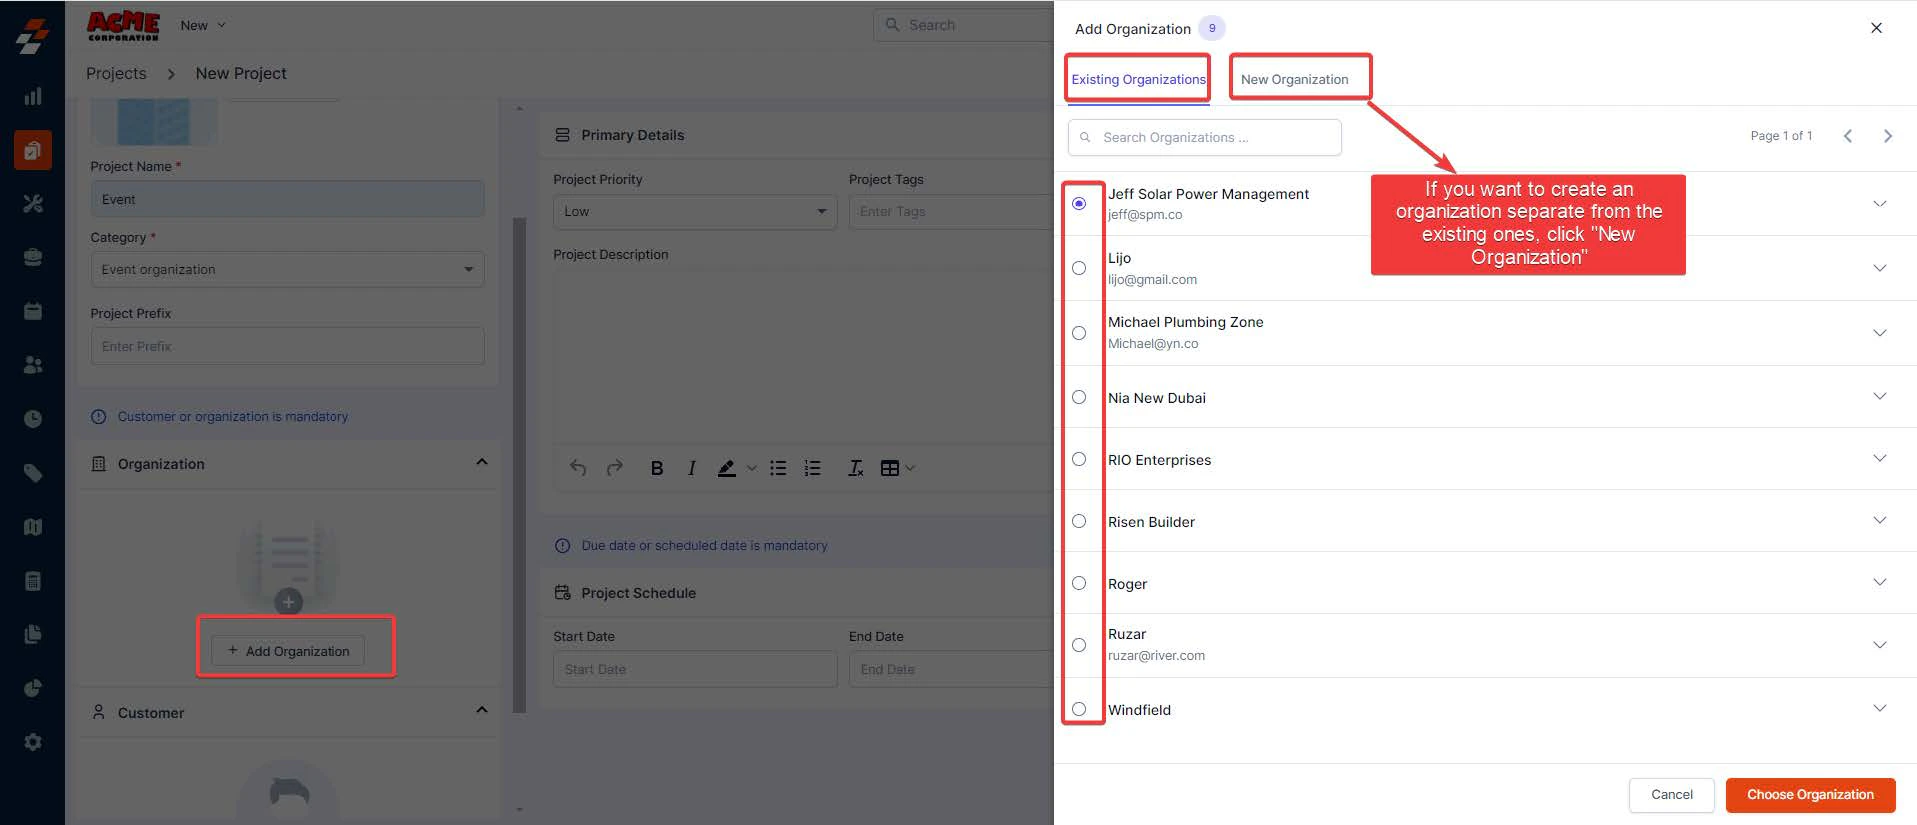
 * **Organization/Customer**: Add an organization/customer. To add one, click the "**+ Add Organization/Customer**" button under "**Organization/Customer**" and choose from the existing list. Alternatively, click the "**New Organization/Customer**" tab to add a new one.
 ## B. Primary Details
* **Project Priority**: Select the project's priority level from the dropdown menu. By default, the priority levels are low, medium, high, and urgent.
**Note**: When an organization is selected, the service address will be auto-filled. You can use the same
address as the billing address or add a new one by the "**Edit** " icon next to the billing address.
* **Project tags**: Click Enter to add several tags to this project. Adding tags helps organize and search for projects.
## B. Primary Details
* **Project Priority**: Select the project's priority level from the dropdown menu. By default, the priority levels are low, medium, high, and urgent.
**Note**: When an organization is selected, the service address will be auto-filled. You can use the same
address as the billing address or add a new one by the "**Edit** " icon next to the billing address.
* **Project tags**: Click Enter to add several tags to this project. Adding tags helps organize and search for projects.
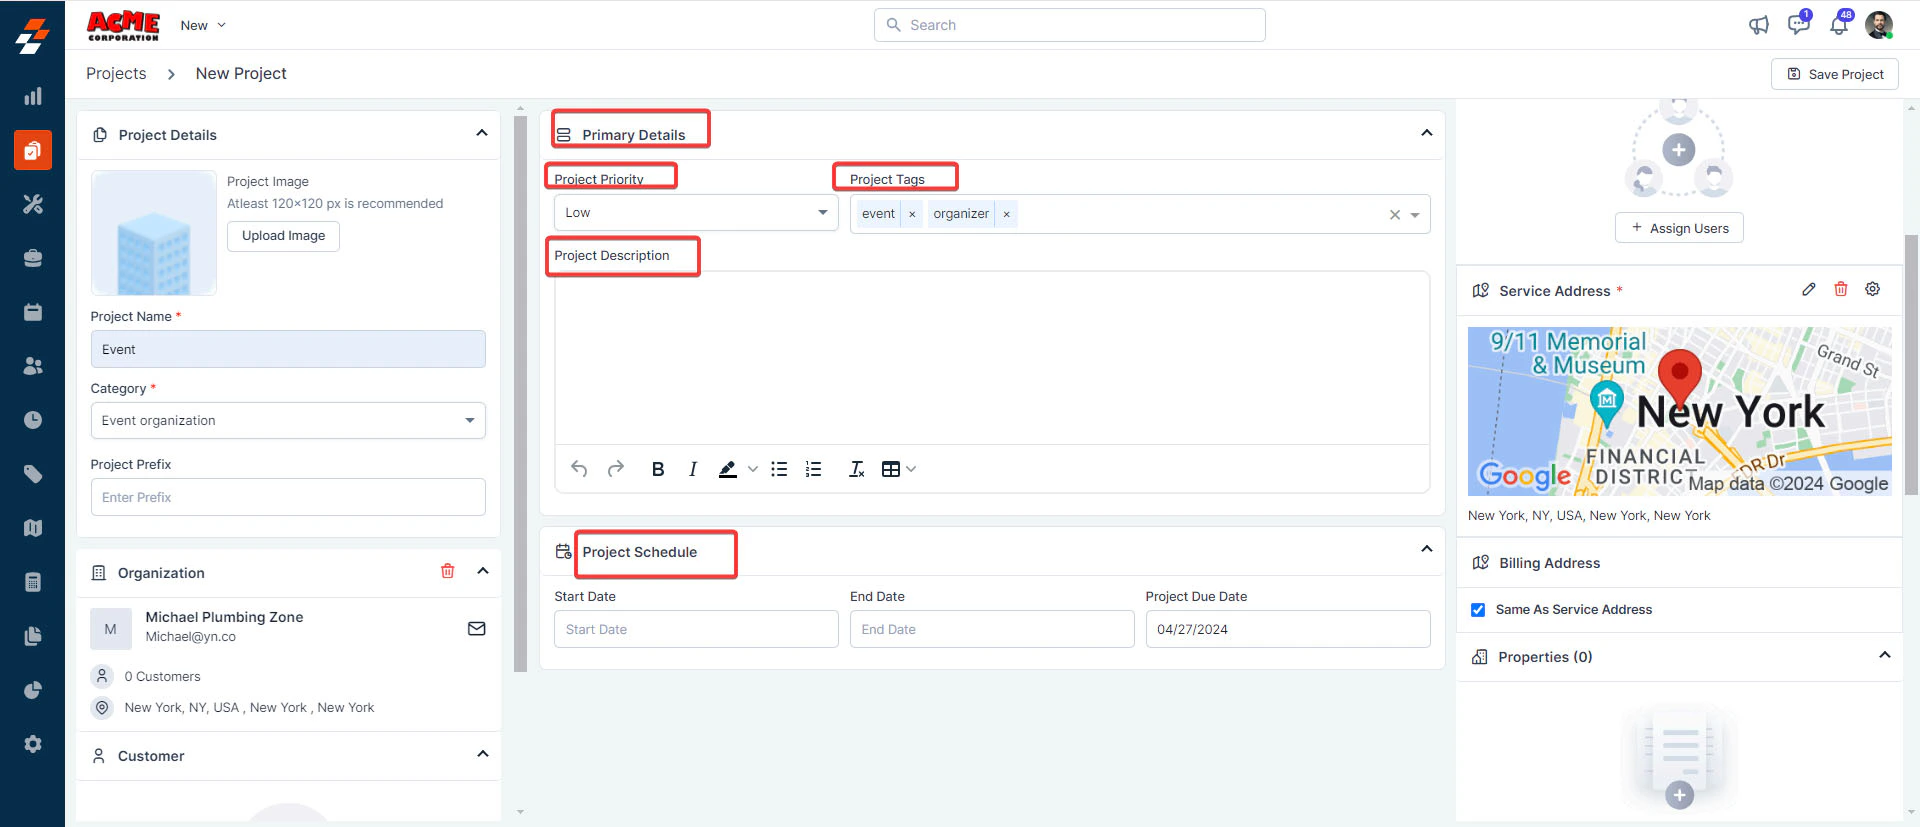 * **Project Description**: Add a brief description explaining the purpose or scope of this project.
* **Project schedule** (*Mandatory*): Specify either the project's due date or its start and end dates.
3. Once you have completed all the mandatory fields, click the "**Save Project**" button at the top right corner of the page.
* **Project Description**: Add a brief description explaining the purpose or scope of this project.
* **Project schedule** (*Mandatory*): Specify either the project's due date or its start and end dates.
3. Once you have completed all the mandatory fields, click the "**Save Project**" button at the top right corner of the page.
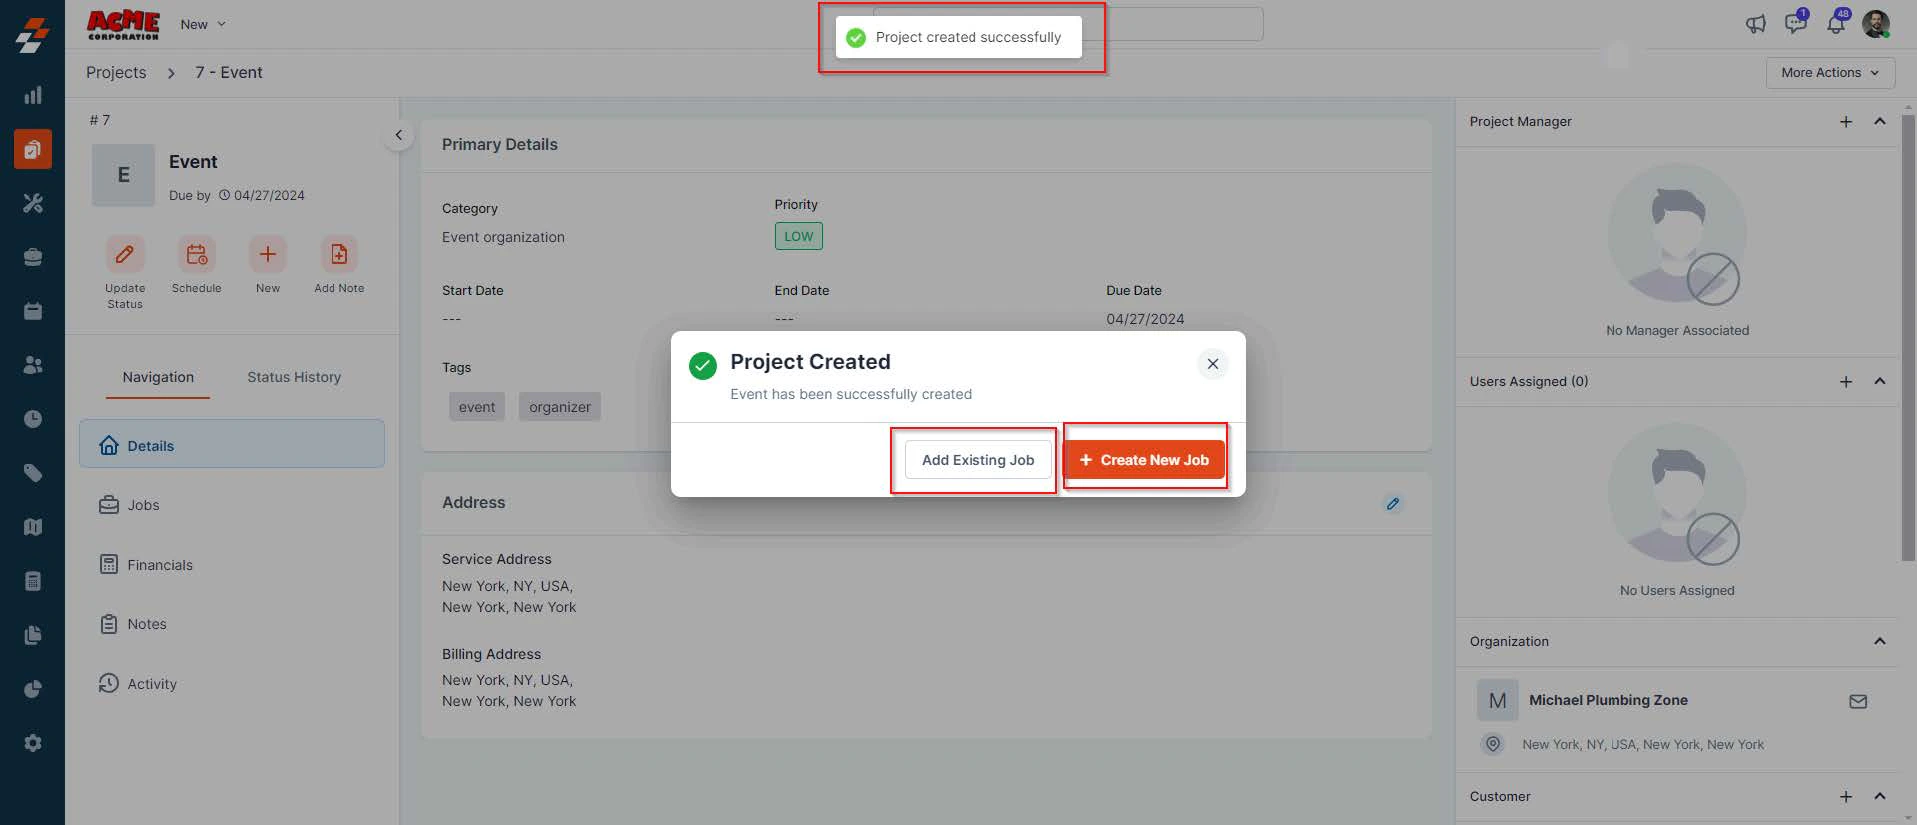
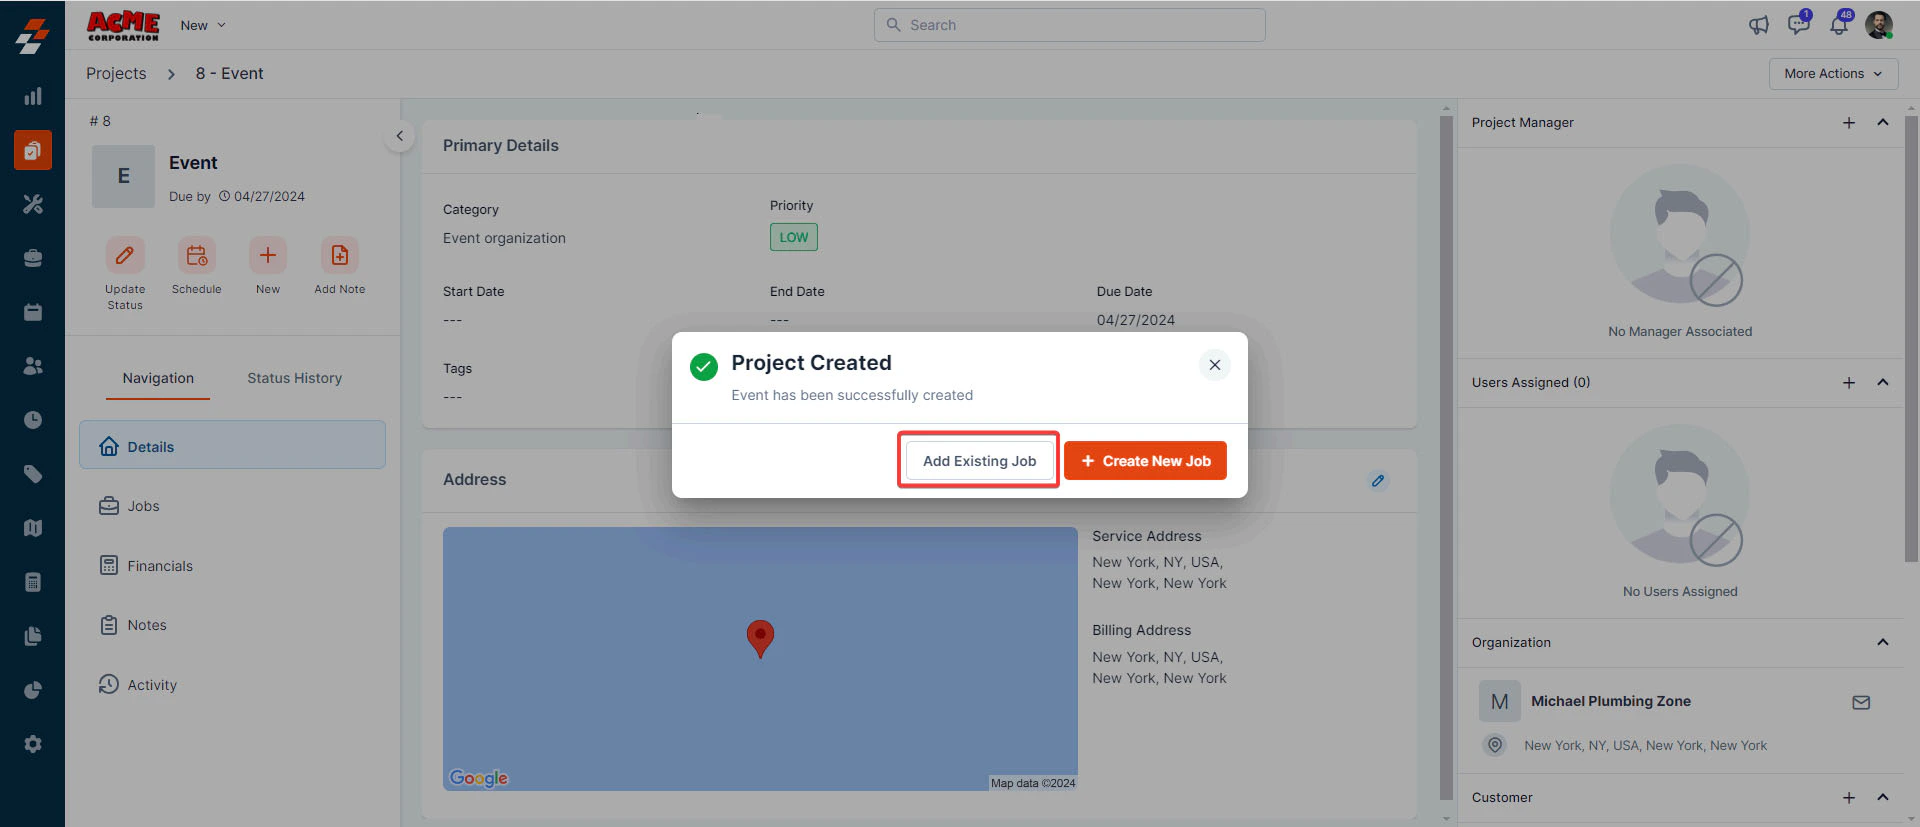
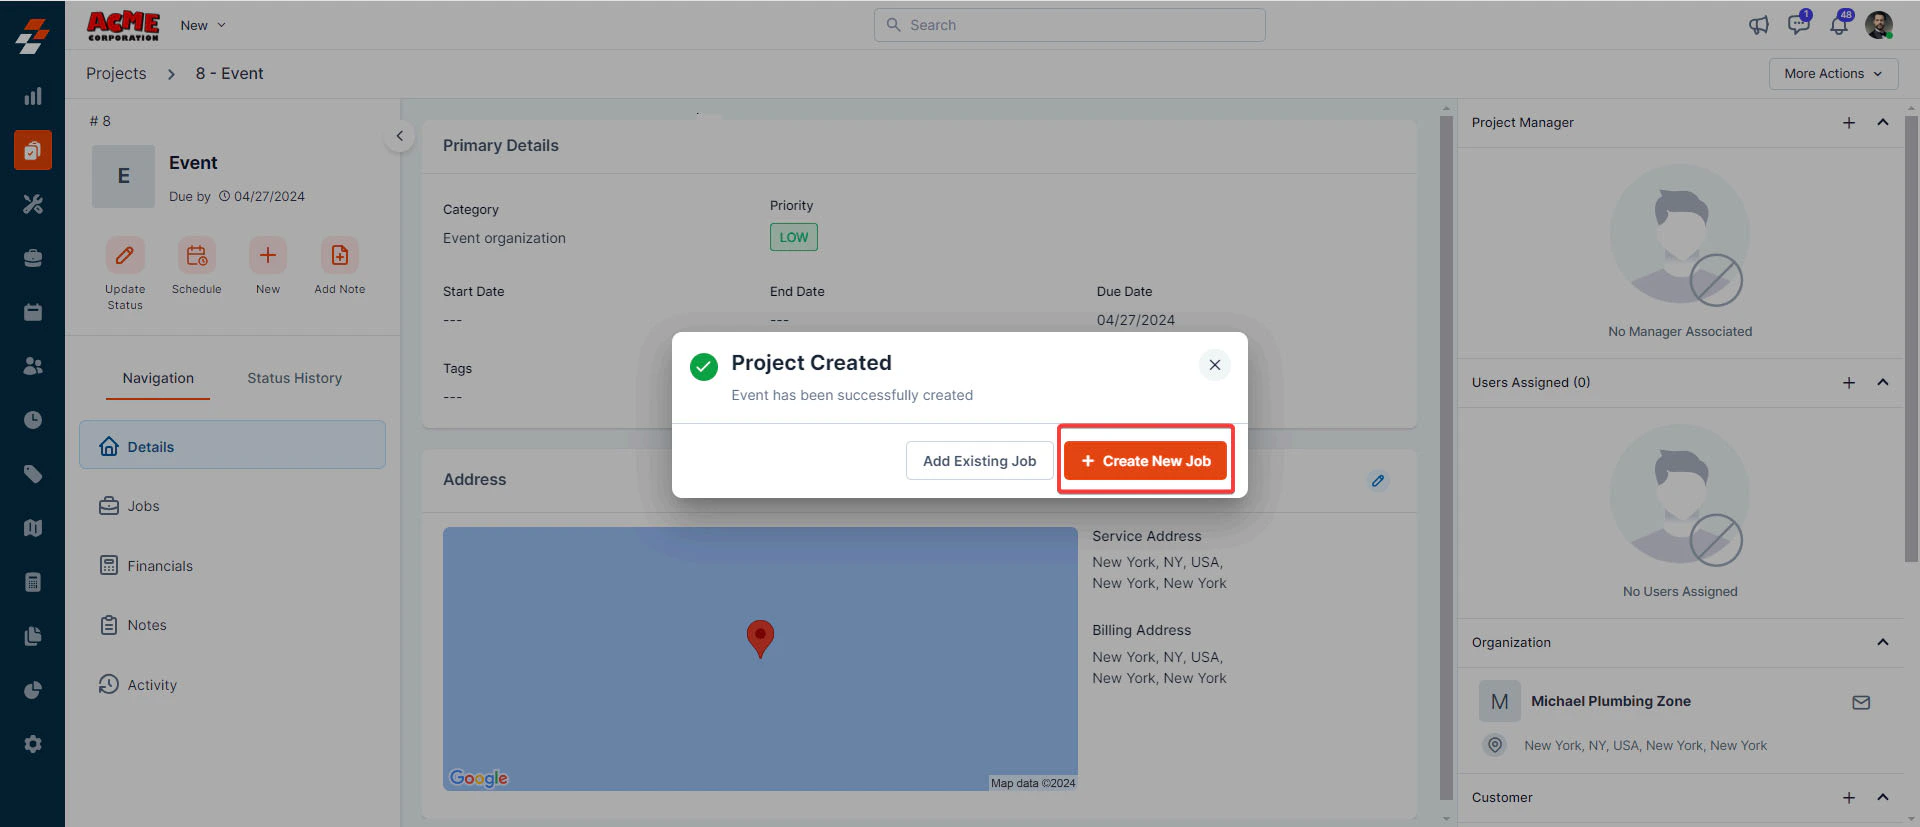
 4. A new project is created successfully, and you'll be prompted to add a job. You have the option to either add an existing job or create and add a new one. You can close this pop-up if you prefer not to add a job now.
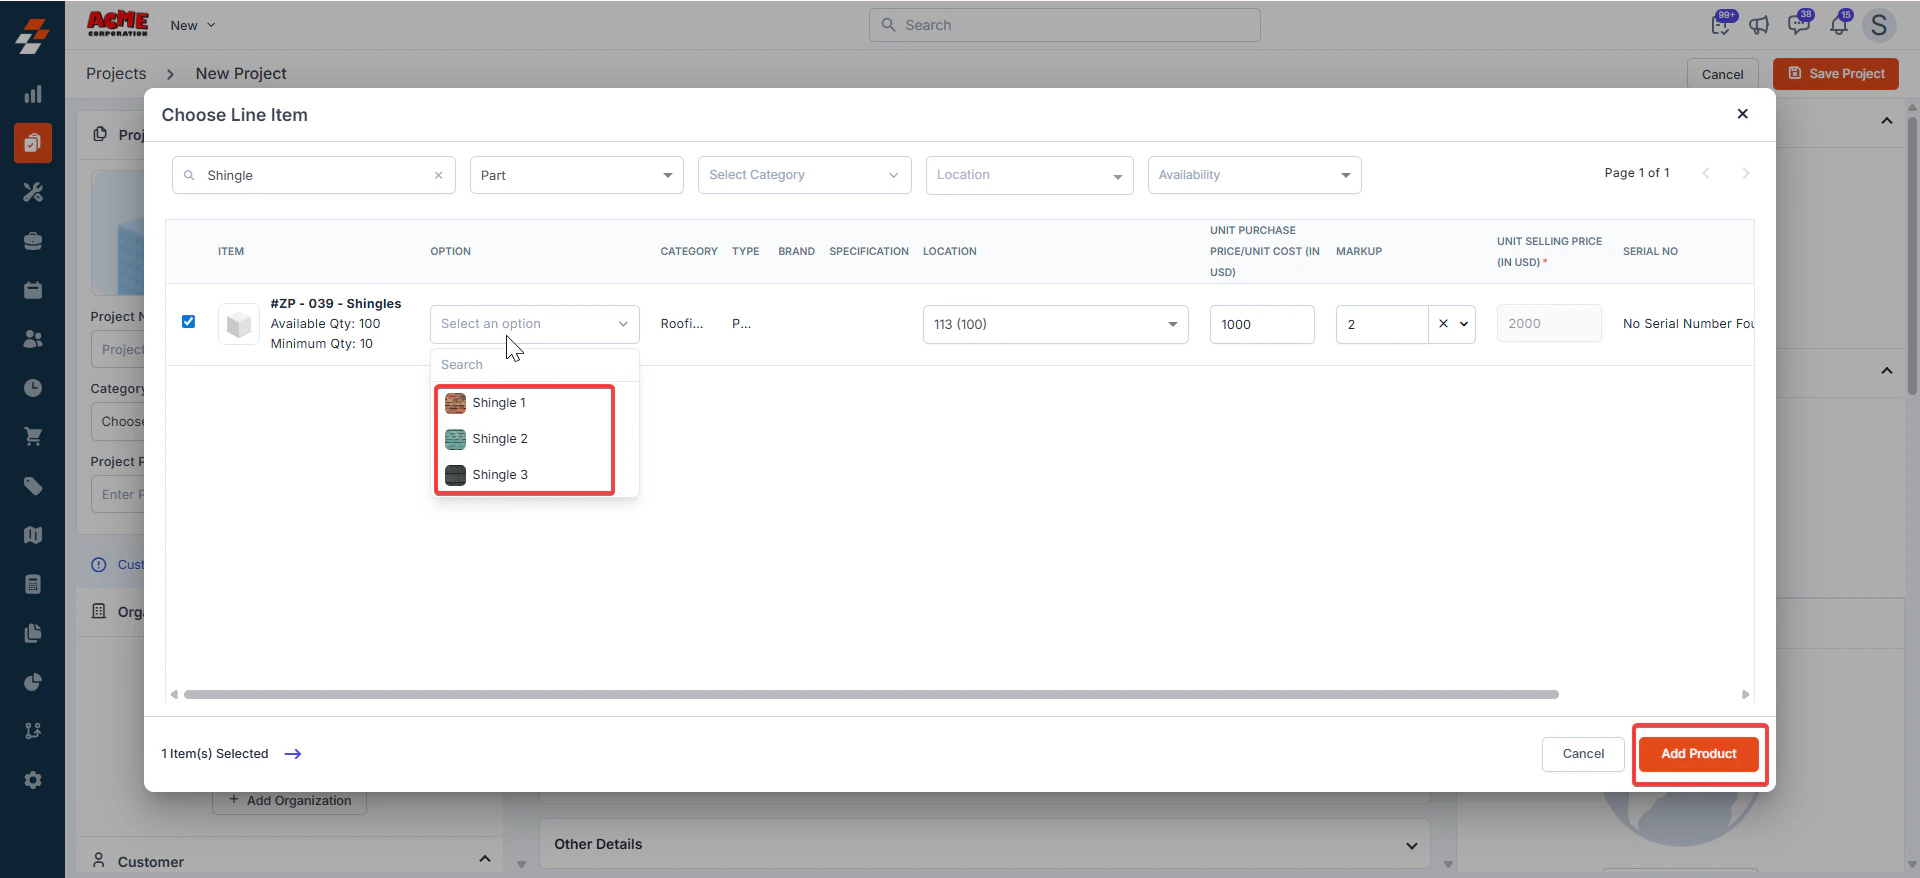
 ### Options
When adding a new part or product to a project, you can select the available **Options** configured for that specific item.
### Options
When adding a new part or product to a project, you can select the available **Options** configured for that specific item.
 ## Add job to the project
You can add a Job to the project through either of the following ways:
1. Existing Job
2. Create New Job.
### Add existing job
To add an existing job, follow these steps:
1. In the dialog box, click "**Add Existing Job**"
## Add job to the project
You can add a Job to the project through either of the following ways:
1. Existing Job
2. Create New Job.
### Add existing job
To add an existing job, follow these steps:
1. In the dialog box, click "**Add Existing Job**"
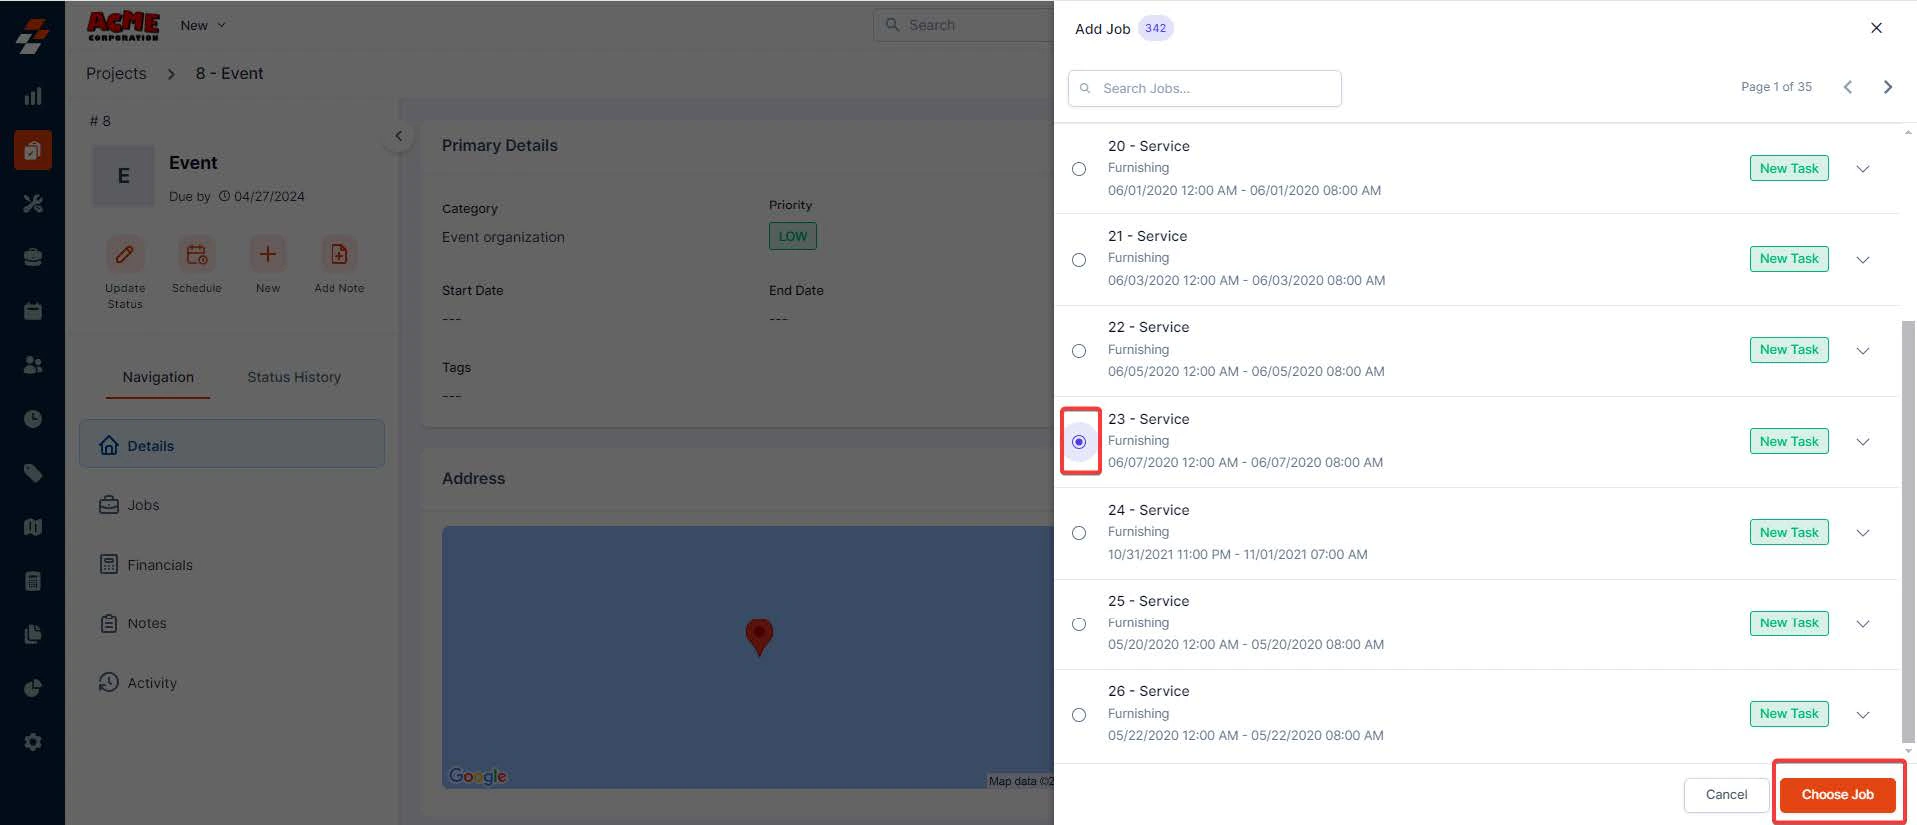
 2. A sidebar appears with existing jobs (which you've created earlier). Search and select a job from the list. Upon selection, click the "**Choose Job**" button.
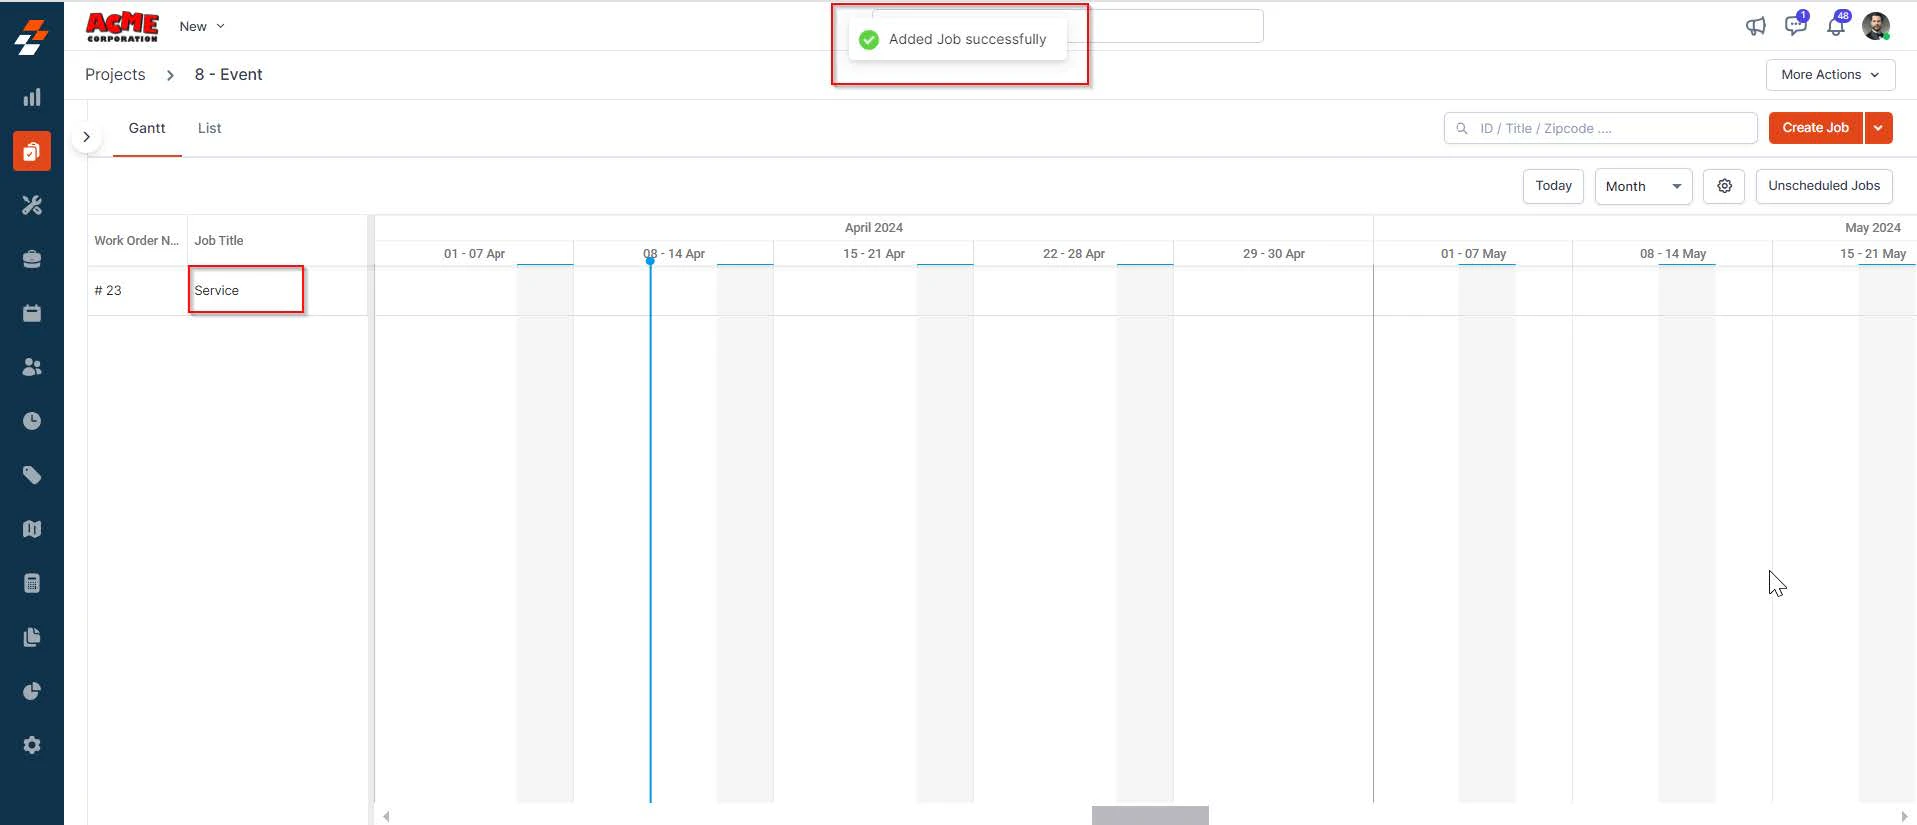
 3. The Existing job will be added to the project successfully. You can then click the **"Job Title** " to view the job's primary details and notes associated with the job.
 ### Create new job
To create and add a new job to the project, follow these steps:
1. Click the "**+ Create New Job**" button in the pop-up.
**Note**: For detailed step-by-step instructions on creating a Job in Zuper Web App, click here.
### Create new job
To create and add a new job to the project, follow these steps:
1. Click the "**+ Create New Job**" button in the pop-up.
**Note**: For detailed step-by-step instructions on creating a Job in Zuper Web App, click here.
 2. A sidebar appears on the right with prefilled details such as organization/customer name, priority level, and service/billing address. You can also add details such as job title, category, and due date to these records and click the "**Create**" button. A new job will be created and associated with the project.
Add more information, such as service tasks, parts/services, assets, contracts, and any attachments, and click "**Create Job**". The job is created successfully.
2. A sidebar appears on the right with prefilled details such as organization/customer name, priority level, and service/billing address. You can also add details such as job title, category, and due date to these records and click the "**Create**" button. A new job will be created and associated with the project.
Add more information, such as service tasks, parts/services, assets, contracts, and any attachments, and click "**Create Job**". The job is created successfully.
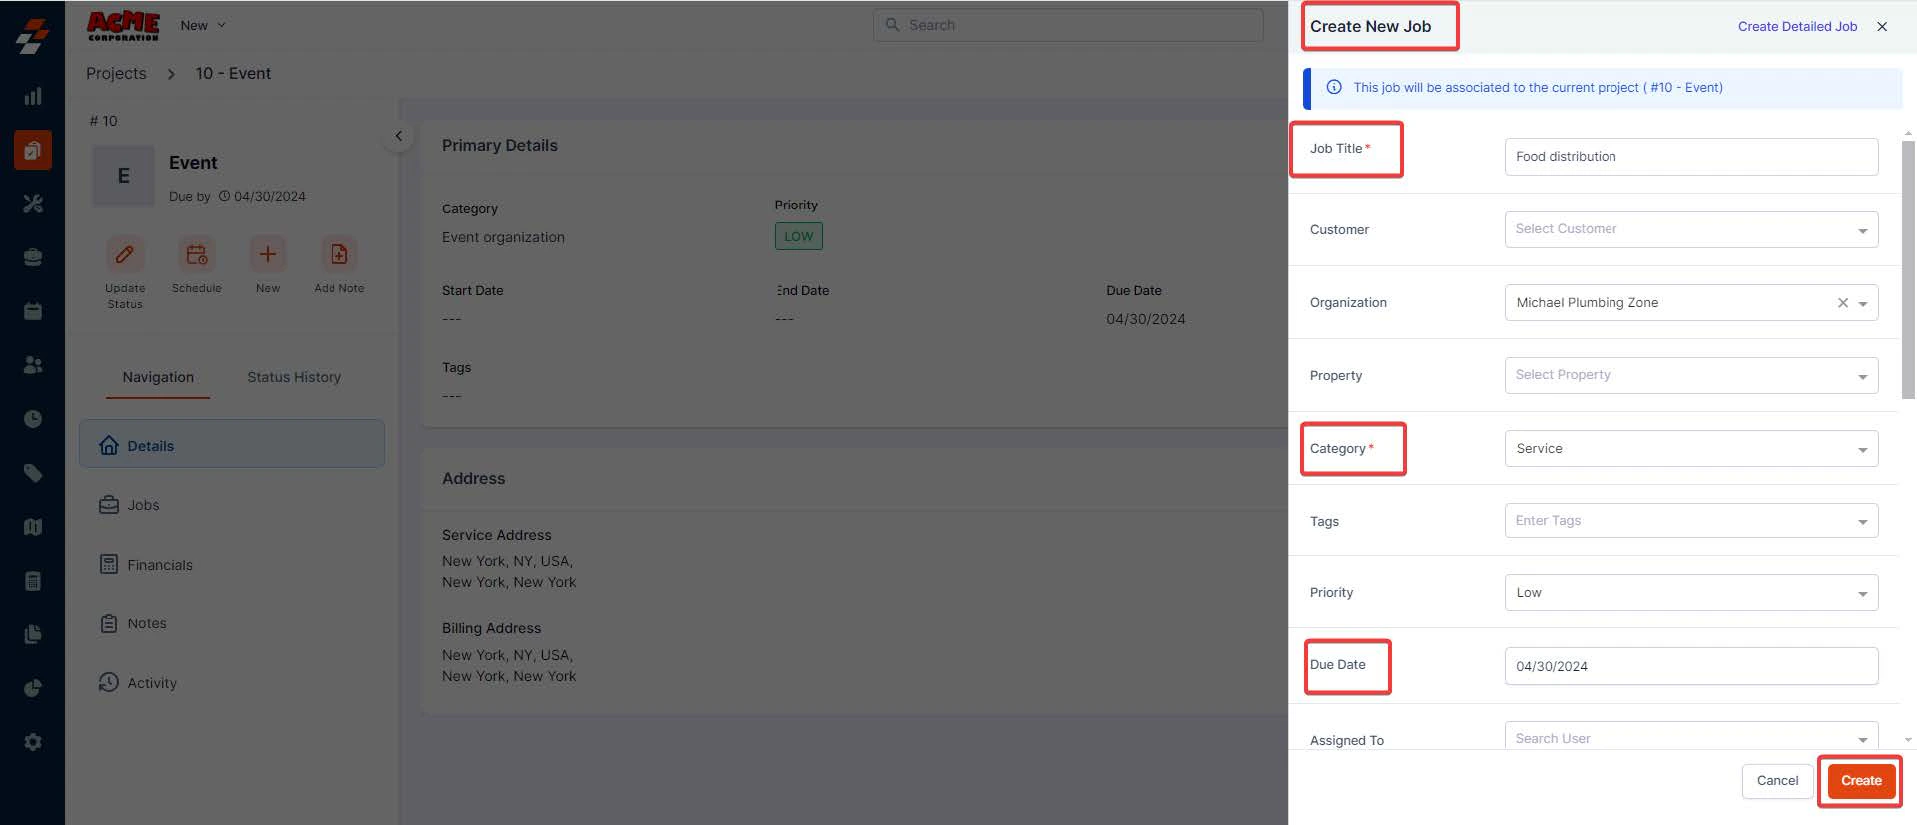 **Note**: If you want to add more details to the job, click "**Create Detailed Job**" at the top right corner of the new job creation sidebar. This will redirect you to a new page.
For detailed step-by-step instructions on how to create a Job in the Zuper Web App, click [here](https://docs.zuper.co/Work_Order_Management/Jobs/creating_a_new_job).
**Note**: If you want to add more details to the job, click "**Create Detailed Job**" at the top right corner of the new job creation sidebar. This will redirect you to a new page.
For detailed step-by-step instructions on how to create a Job in the Zuper Web App, click [here](https://docs.zuper.co/Work_Order_Management/Jobs/creating_a_new_job).