> ## Documentation Index
> Fetch the complete documentation index at: https://zuperinc-section23.mintlify.site/llms.txt
> Use this file to discover all available pages before exploring further.
# Using Conditional Rules
> If this condition is true, then perform this action. Otherwise, take another action
**Conditional Rules** control how individual line items behave when a proposal is automatically generated from a CPQ-based template. Each rule is defined directly on a product, service, bundle, or service package in the **Package Configuration** stage of the template. While generating a proposal, Zuper checks real job data, such as measurement token values, checklist responses, and job details, and then automatically decides whether that line item should be added, removed, or markup should be adjusted.
For example, if the roof pitch is greater than 6/12, you can set the rule to add the premium underlayment line item to the proposal automatically; otherwise, the standard underlayment option is included instead.
In this guide, we will explore how to access and define the condition rule for the line item in the CPQ proposal template.
## Accessing the Conditional Rules
You’ll find **Conditional Rules** when you’re setting up your **CPQ Proposal template** in the Quote Builder.
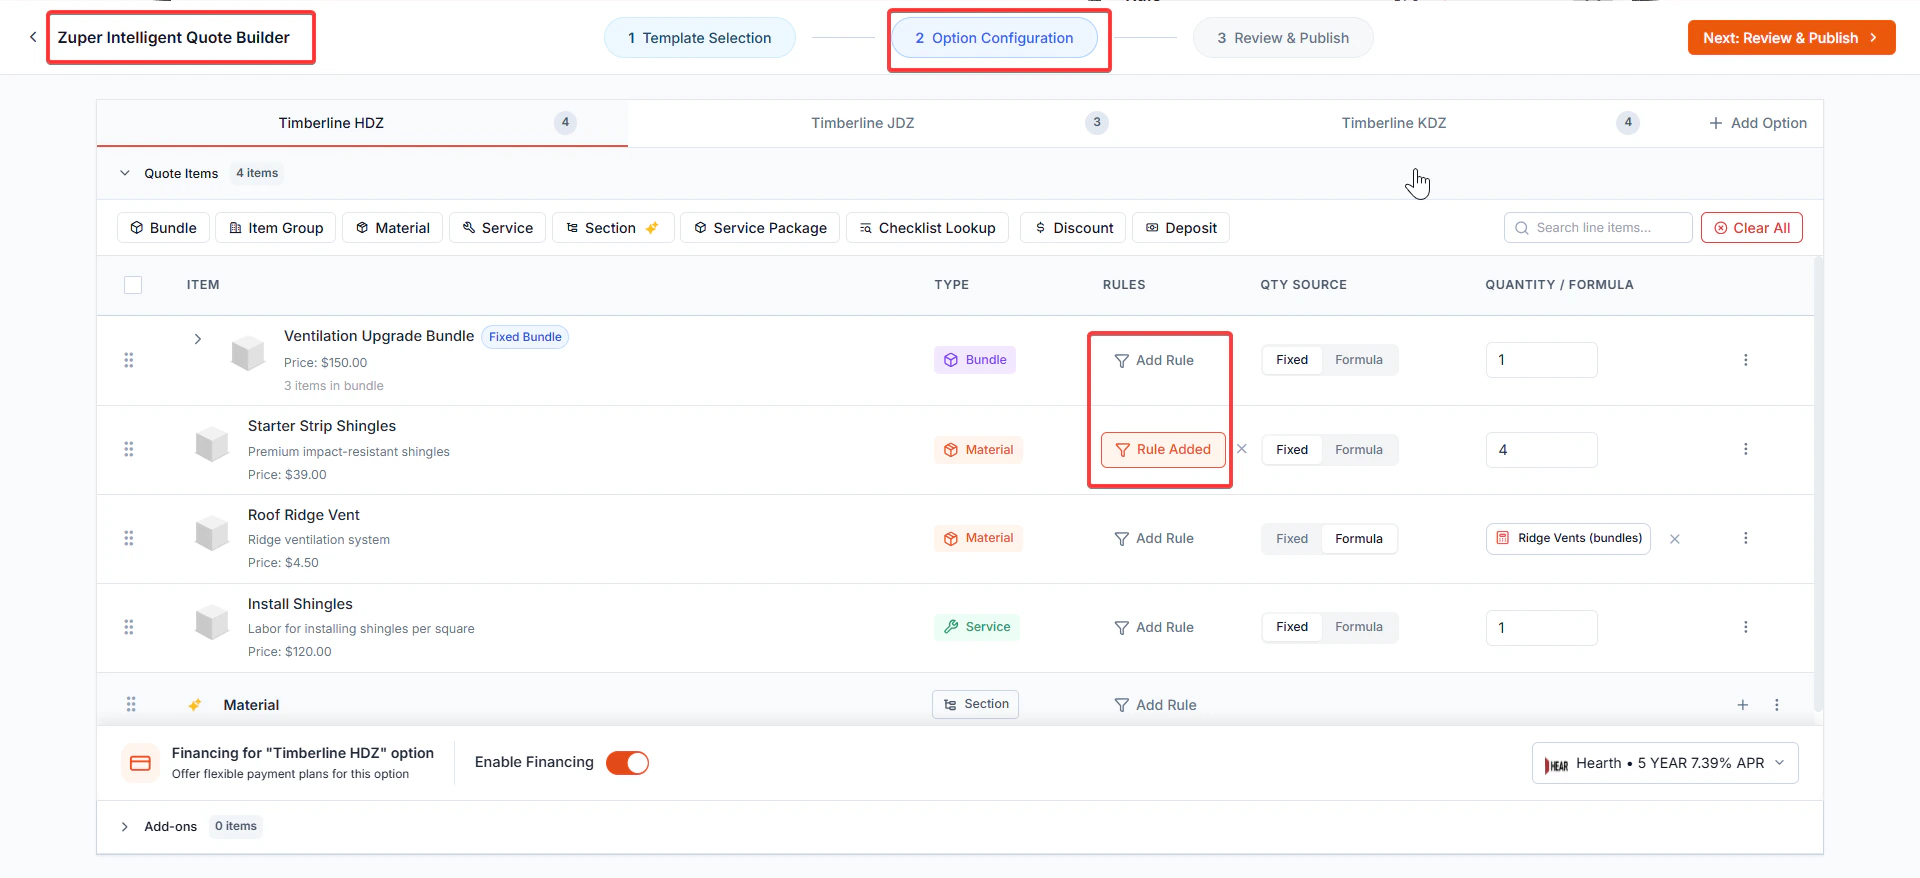 When you add a material, service, or bundle, you’ll see an **Add Rule** option beside it. Click that, and the **Conditional Rule** panel will open.
 **Note:** For a **fixed bundle**, the Conditional Rule logic is applied at the bundle level. For a **roll-up bundle**, the logic is stored against the individual constituent items.
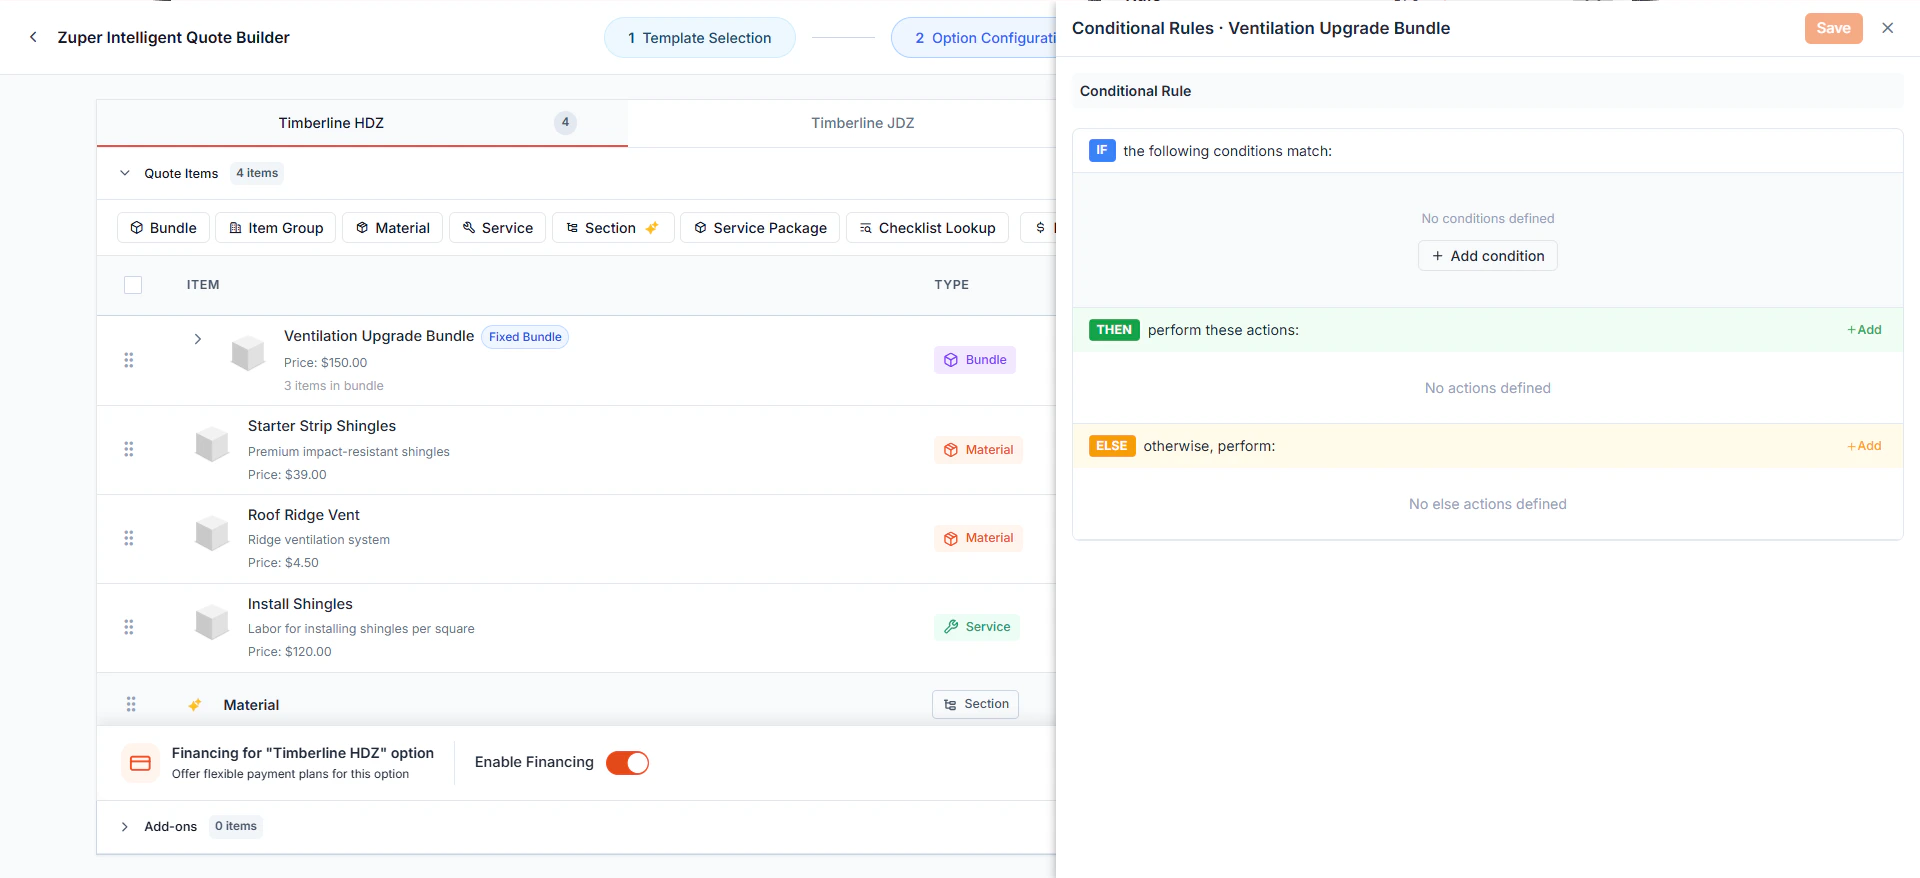
That’s where you’ll build your rule, and it’s divided into three simple sections: **IF**, **THEN**, and **ELSE**.
### **Set the Condition (IF section)**
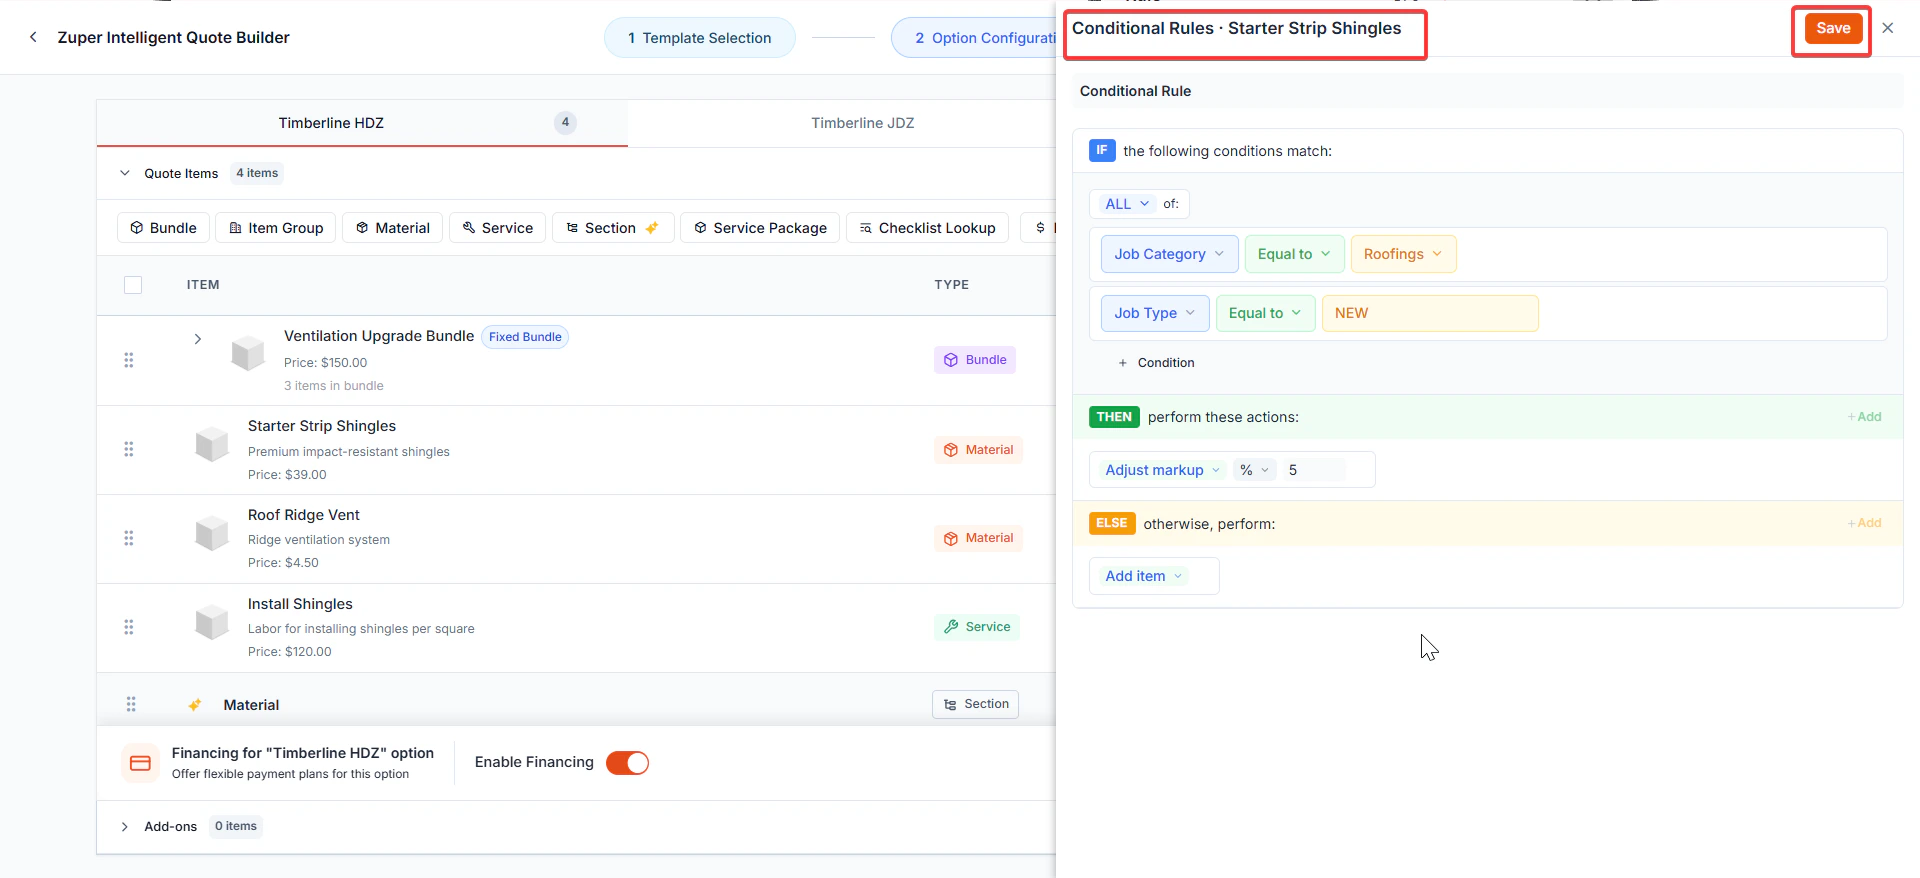
In the **IF** section, you define what should be checked before deciding how to handle the line item. You can add multiple conditions using **ALL (AND)** or **ANY (OR)** logic.
* Click “**+ Add condition**”.
* Choose the **data source** (*Job, Checklist, or System*) and select the **field** .
* Set an **operator** such as *is*, *is not*, *greater than*, *less than*, etc.
* Enter a comparison **value** .\
\
`IF Job Category = Roofing ALL “New Job” = Yes`
### **Define the Action (THEN Section)**
The **THEN** section tells what to do with the line item when the IF condition is true.\
Available actions include:
* **Add Item**
* **Remove Item**
* **Adjust Markup**
`THEN Adjust markup = 5`
### **Define the Alternate Action (ELSE Section)**
The **ELSE** section defines what happens if the condition is not met.\
Similar to then actions:
`ELSE Add item`
When you’re finished, use the **Rule** toggle at the top to enable or disable the rule, then click **Save.**
**Note:** For a **fixed bundle**, the Conditional Rule logic is applied at the bundle level. For a **roll-up bundle**, the logic is stored against the individual constituent items.
That’s where you’ll build your rule, and it’s divided into three simple sections: **IF**, **THEN**, and **ELSE**.
### **Set the Condition (IF section)**
In the **IF** section, you define what should be checked before deciding how to handle the line item. You can add multiple conditions using **ALL (AND)** or **ANY (OR)** logic.
* Click “**+ Add condition**”.
* Choose the **data source** (*Job, Checklist, or System*) and select the **field** .
* Set an **operator** such as *is*, *is not*, *greater than*, *less than*, etc.
* Enter a comparison **value** .\
\
`IF Job Category = Roofing ALL “New Job” = Yes`
### **Define the Action (THEN Section)**
The **THEN** section tells what to do with the line item when the IF condition is true.\
Available actions include:
* **Add Item**
* **Remove Item**
* **Adjust Markup**
`THEN Adjust markup = 5`
### **Define the Alternate Action (ELSE Section)**
The **ELSE** section defines what happens if the condition is not met.\
Similar to then actions:
`ELSE Add item`
When you’re finished, use the **Rule** toggle at the top to enable or disable the rule, then click **Save.**
 Your rule will now automatically evaluate every time a user interacts with that item.