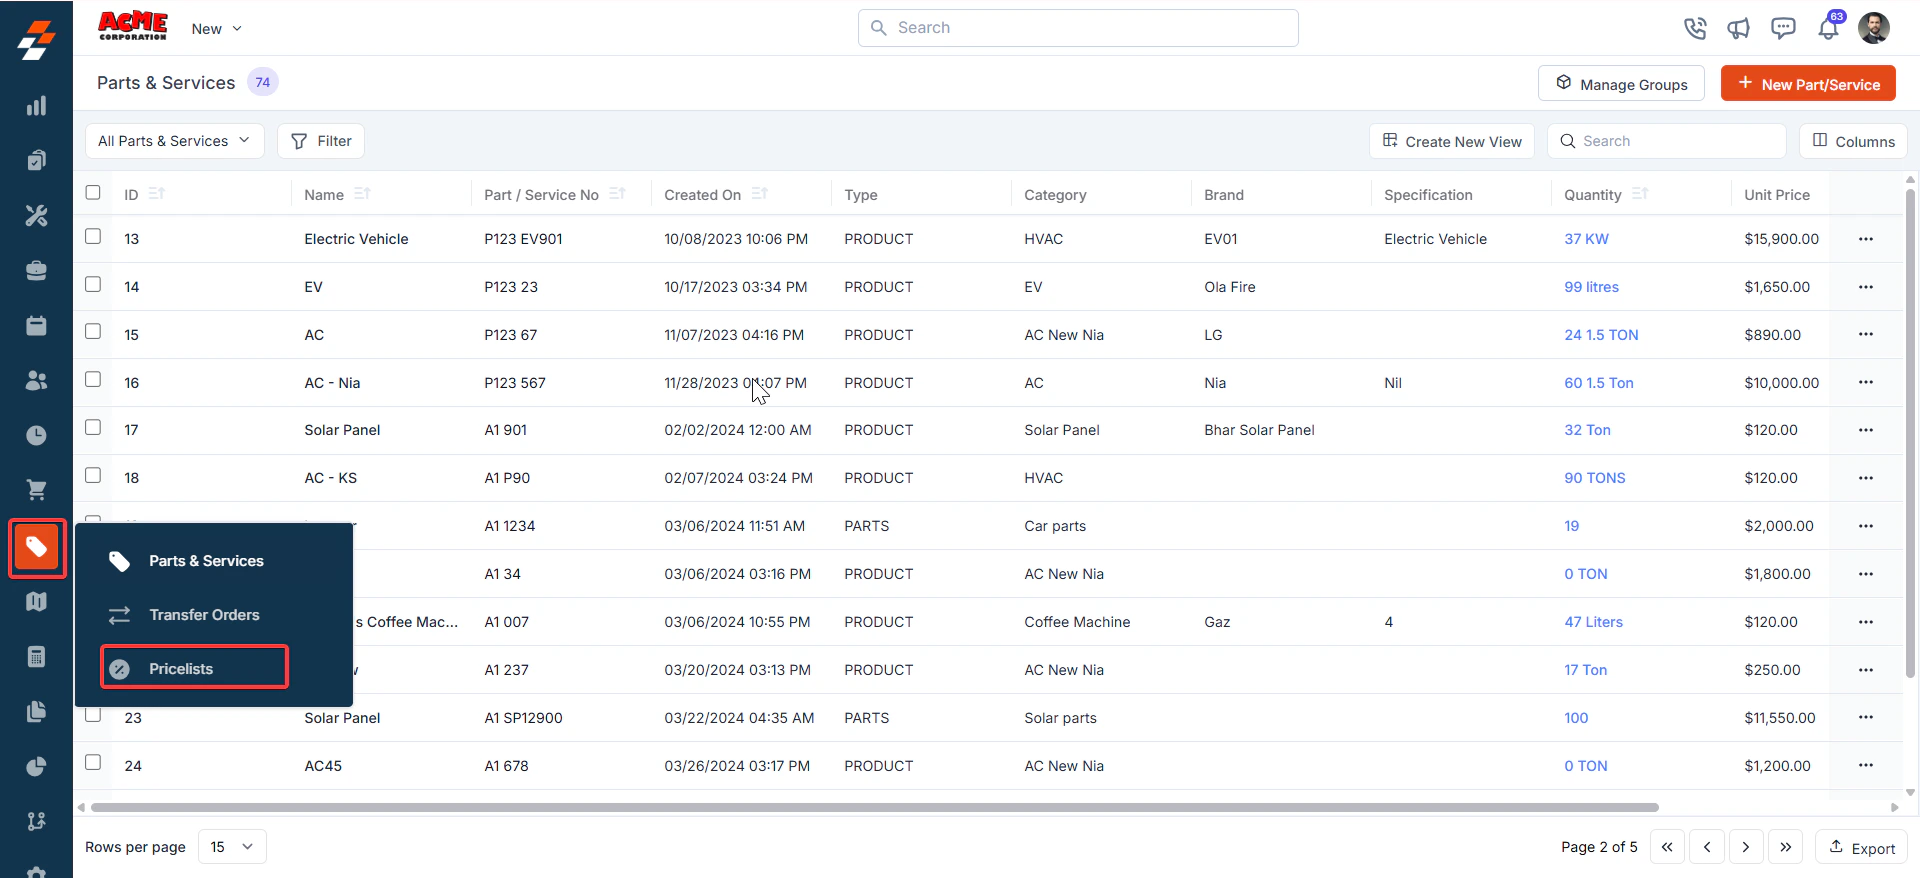
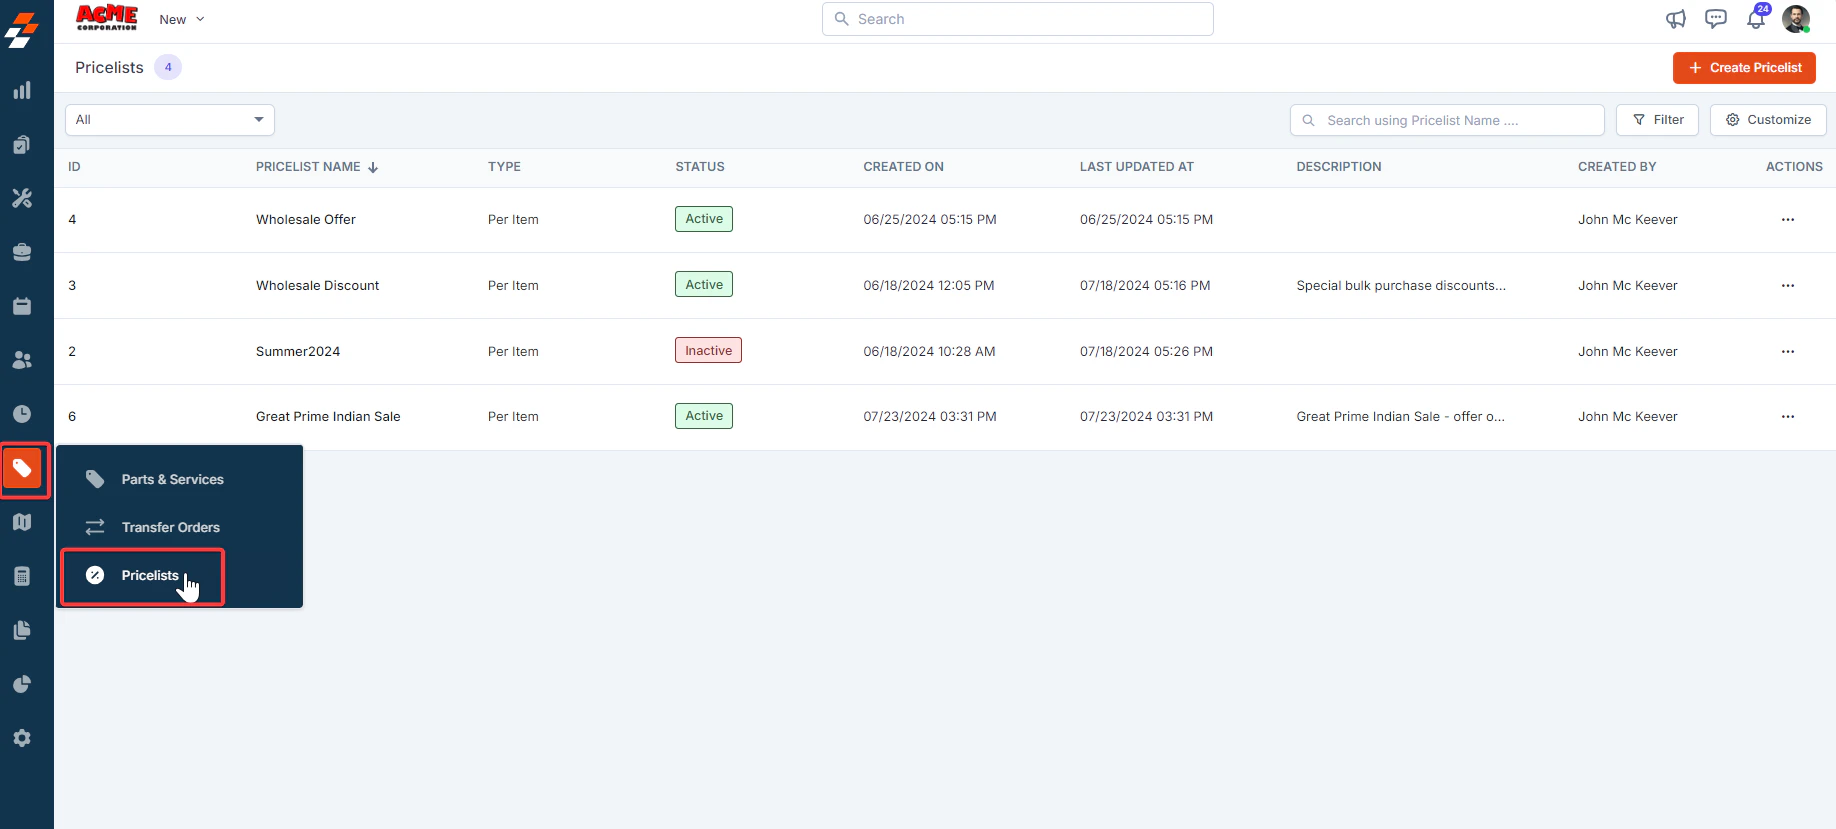
Navigation: Inventory & Pricebook -> Pricelists -> + Create Pricelist
Pinned filters
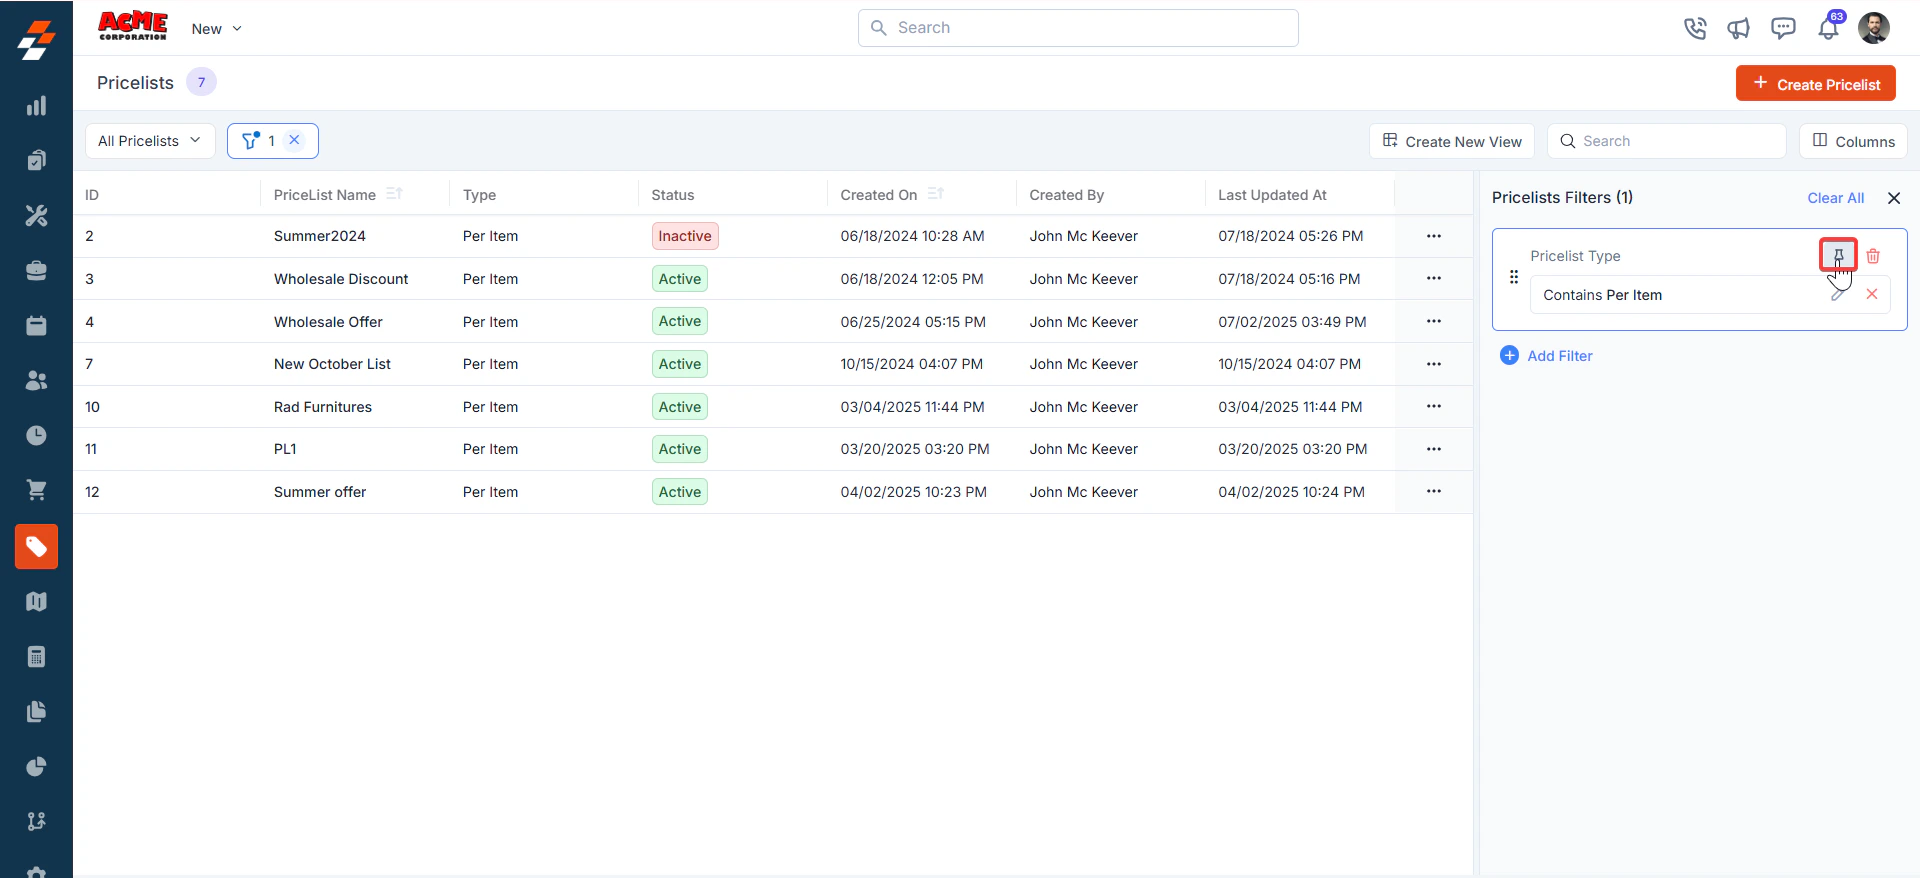
Zuper’s Pricelists module lets you use pinned filters to streamline your filter experience. Pinned filters keep your most-used criteria readily accessible for quick application.Navigation: Pricelists ->Filters -> Pinned Filter
- Select the “Inventory & Pricebook” module from the left navigation menu and choose “Pricelists.”
- Pin Filters for Quick Access
- Once your filters are set, click the Pin Filters button in the dialog box to save them as pinned.
- Pinned filters appear in the dialog box’s “Pinned Filters” section, allowing you to apply them with one click in future sessions.
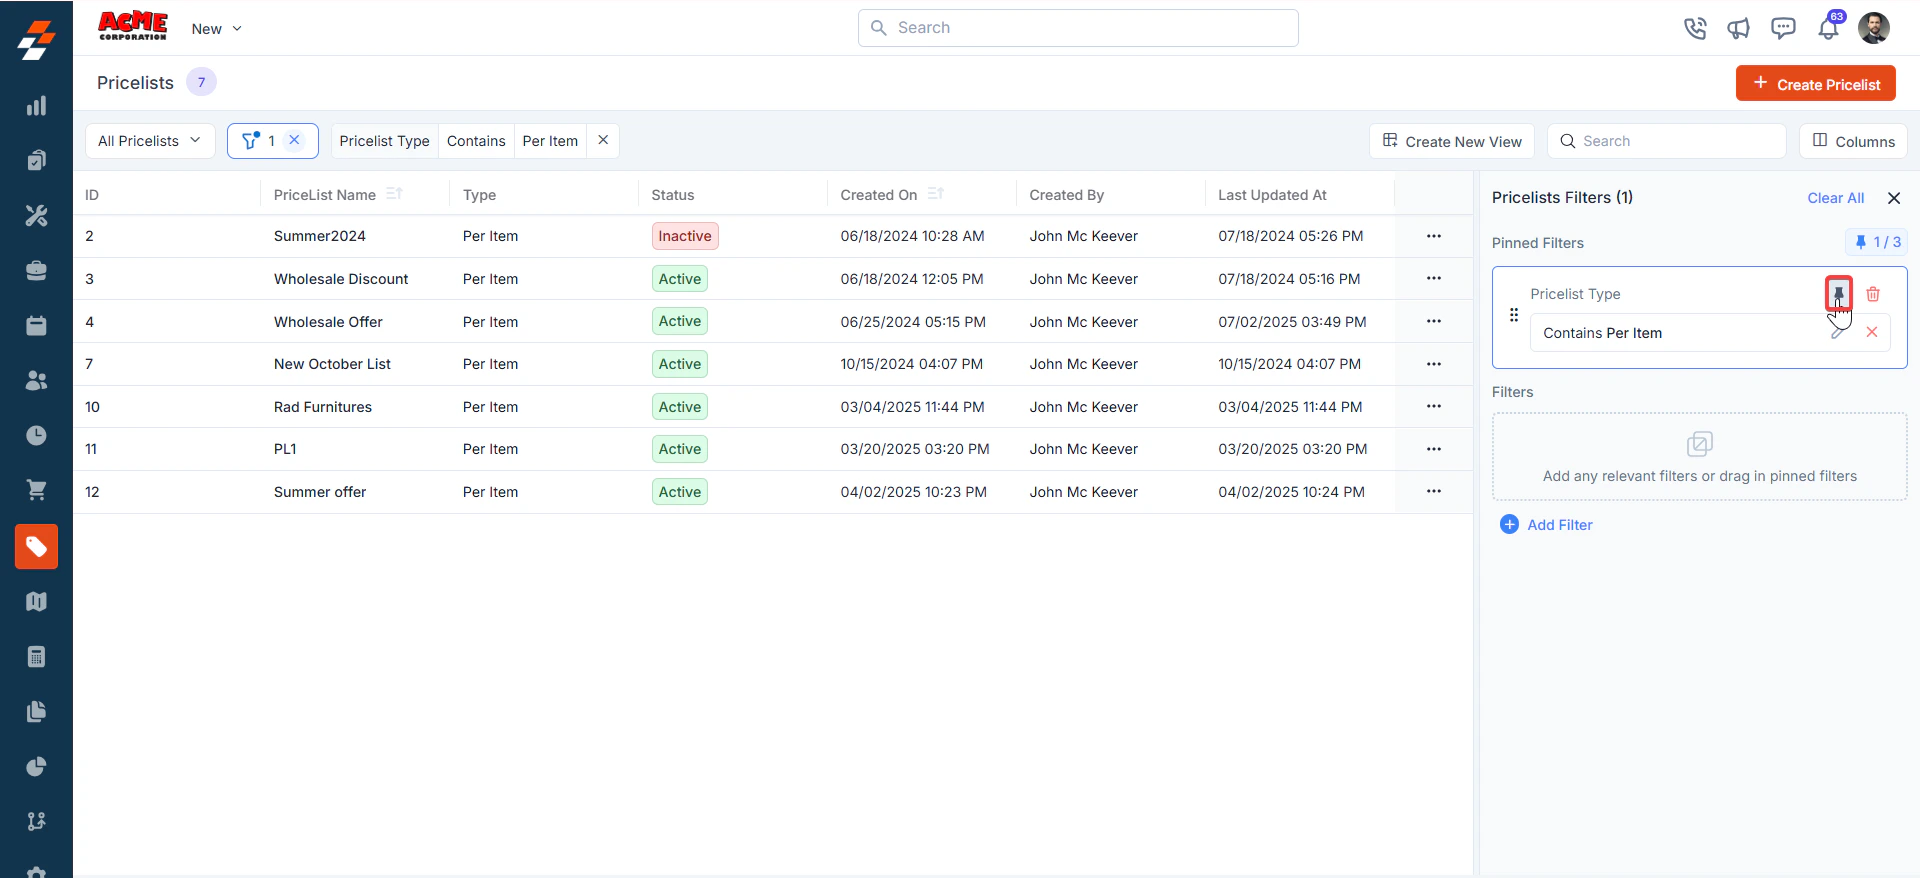
- To Unpin the filter:
- To unpin, select a pinned filter and click Remove.
- To apply pinned or default filters, open the dialog box and select them.
- Use Clear All to remove active filters.
Listing Views
Customize the Transfer Orders listing by adding/removing or reordering columns, then Update View to overwrite or save it as a new view. Update View- Click Update View to modify the current view after changes.
- Use the dropdown beside Update View → Save as new view.
- Enter the View Name (mandatory), choose Share with (User/Team) and add users, toggle Visibility to all users, and click Create.
- Click Reset View to restore the current view to the default.
- Edit: Add/remove/reorder columns; save as new or overwrite existing views.
- View-only: Apply views but can’t edit; can Save as new view to copy without altering the original.
- Manage view: Rename, adjust Visibility (Only Me/User/Team or global toggle), Duplicate, or Delete (creator only; reverts to default/another saved view).
- After filtering, click a Transfer Order Number or Transfer Order ID to view and manage details.
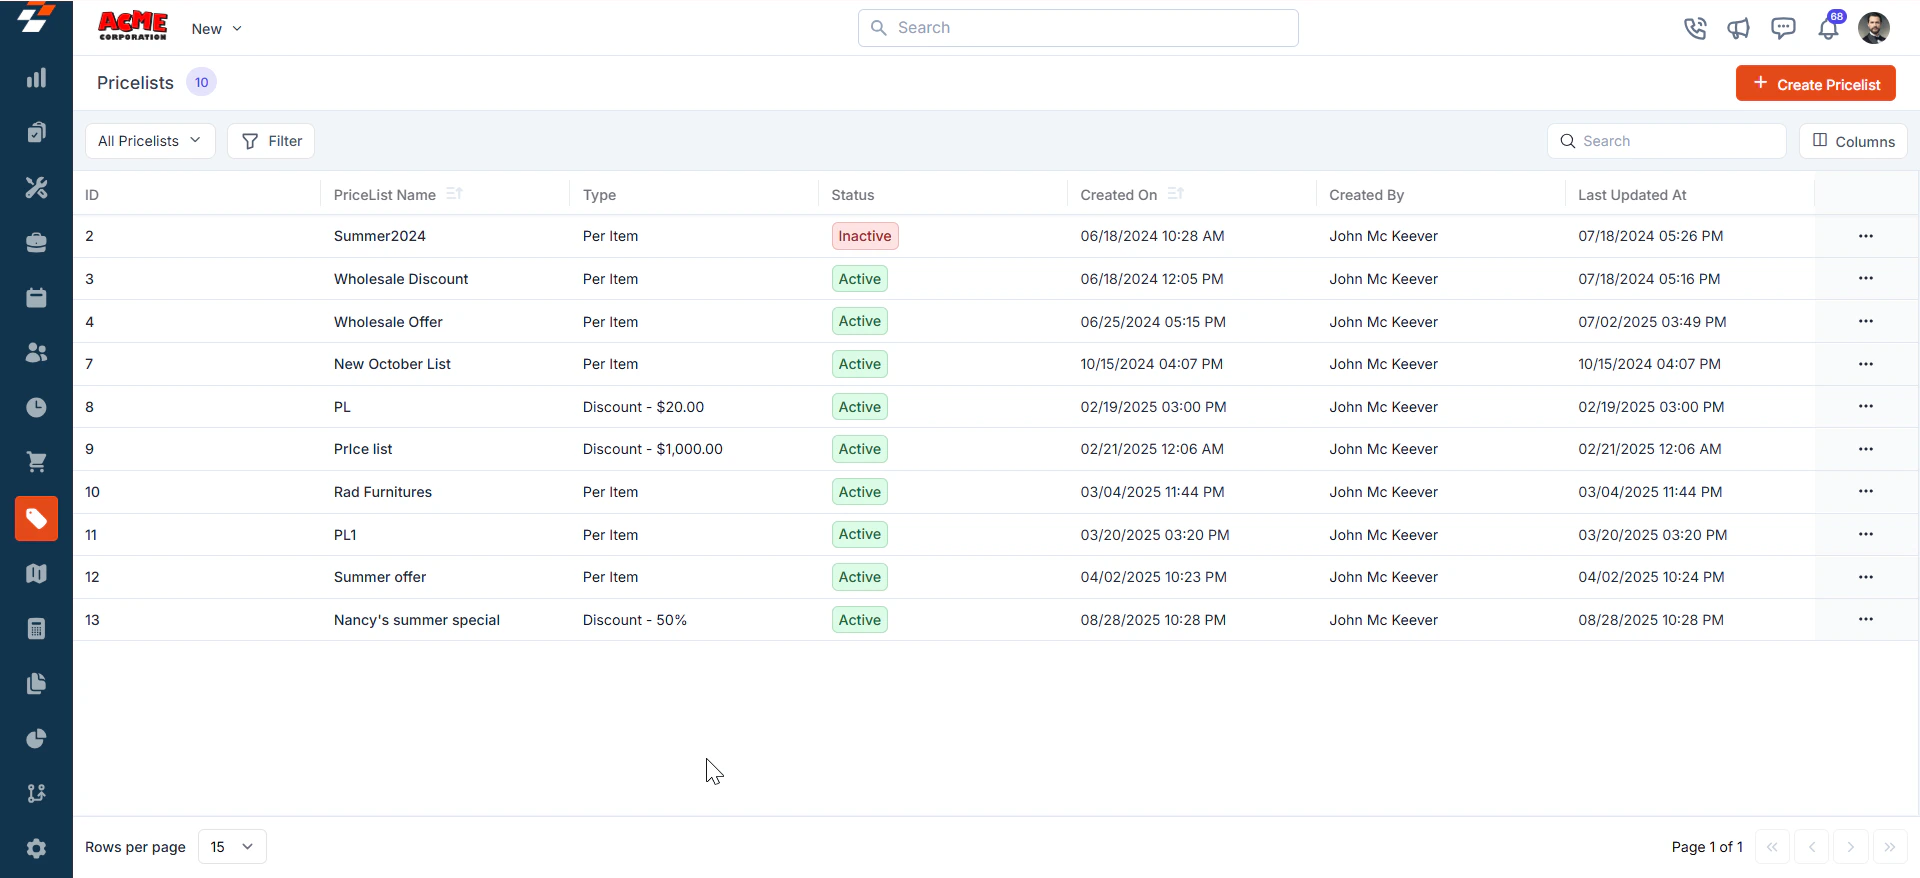
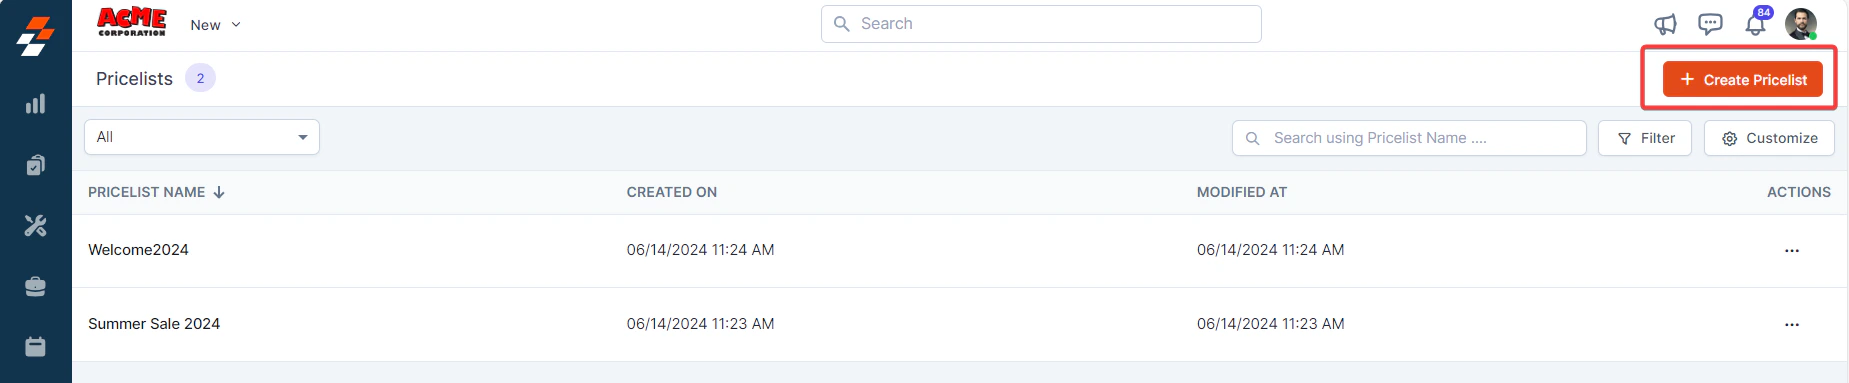
Create new pricelist
To create a new pricelist, follow these steps:- Select the “Inventory & Pricebook” module from the left navigation menu and choose “Pricelists.”
- The Pricelists listing page opens.
- Click the “+ Create Pricelist” button in the top-right corner of the page.
- A new Pricelist creation page appears. Fill in the following sections:
1. Primary Details section:
- Name (Mandatory): Enter a unique name for the pricelist.
-
Description: Add a brief description explaining the purpose or scope of the pricelist.
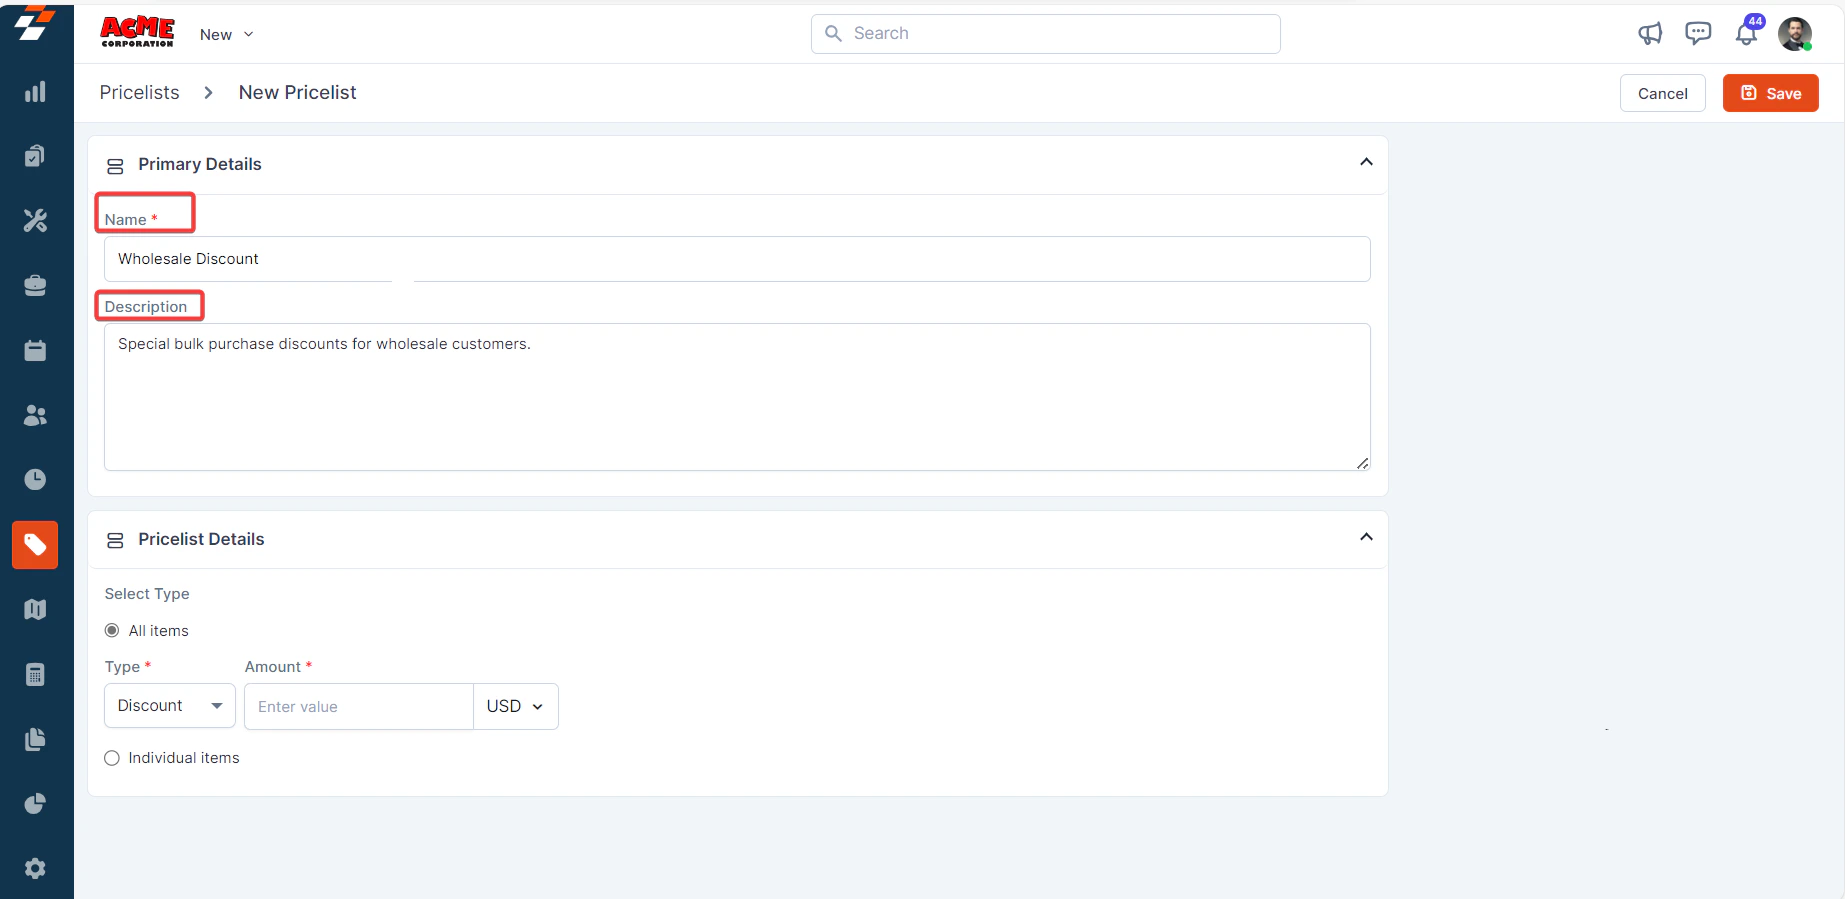
2. Pricelist Details section:
Choose the type of item, either “All items” or “Individual items.”All Items
All Items
Enter the following details:
- Type (Mandatory): Select either the “Discount” or “Margin” option.
Note: This selection applies to all parts and services when configured for all items.
- Amount (Mandatory): Enter the value.
-
Choose “USD” or “%” from the drop-down menu.

Individual Items
Individual Items
Enable the checkboxes to “Enable Discount” and/or “Margin”.
Note: You must activate the respective checkboxes during pricelist creation or editing to include a margin or discount in your pricing.
3. Parts / Services section:
- Add the relevant parts and products by clicking the “+ Add” button.
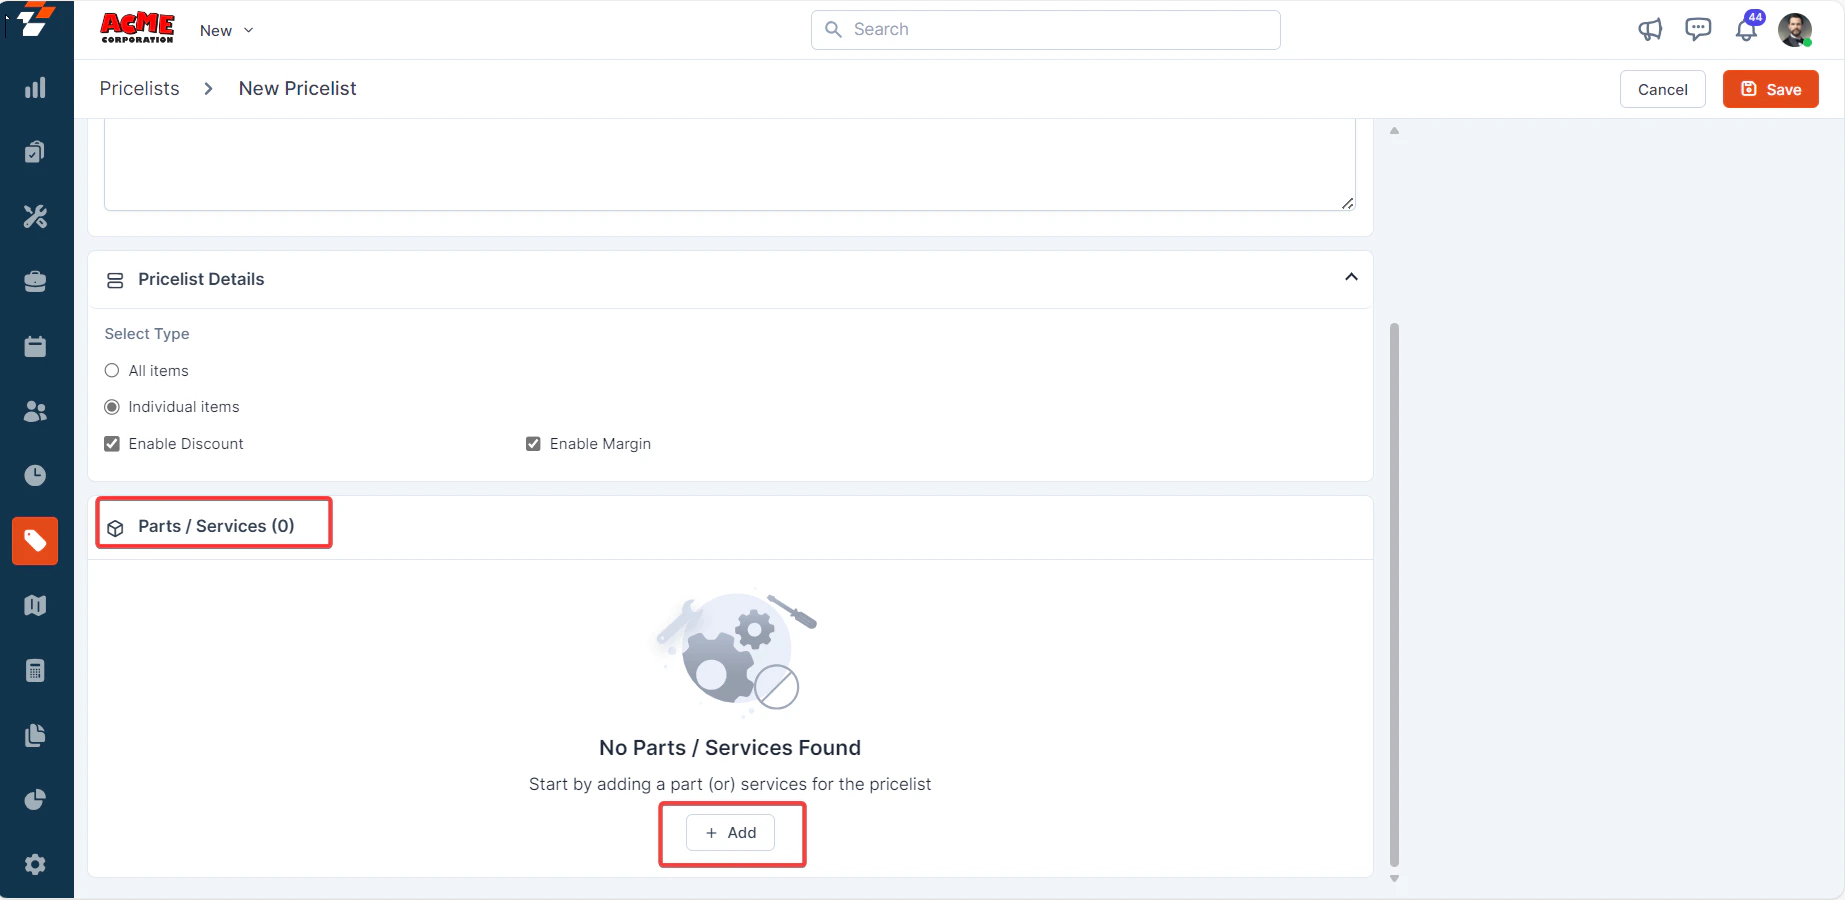
- A dialog box with the existing parts and products will appear.
- Select the part/product(s) and click the “Add” button.

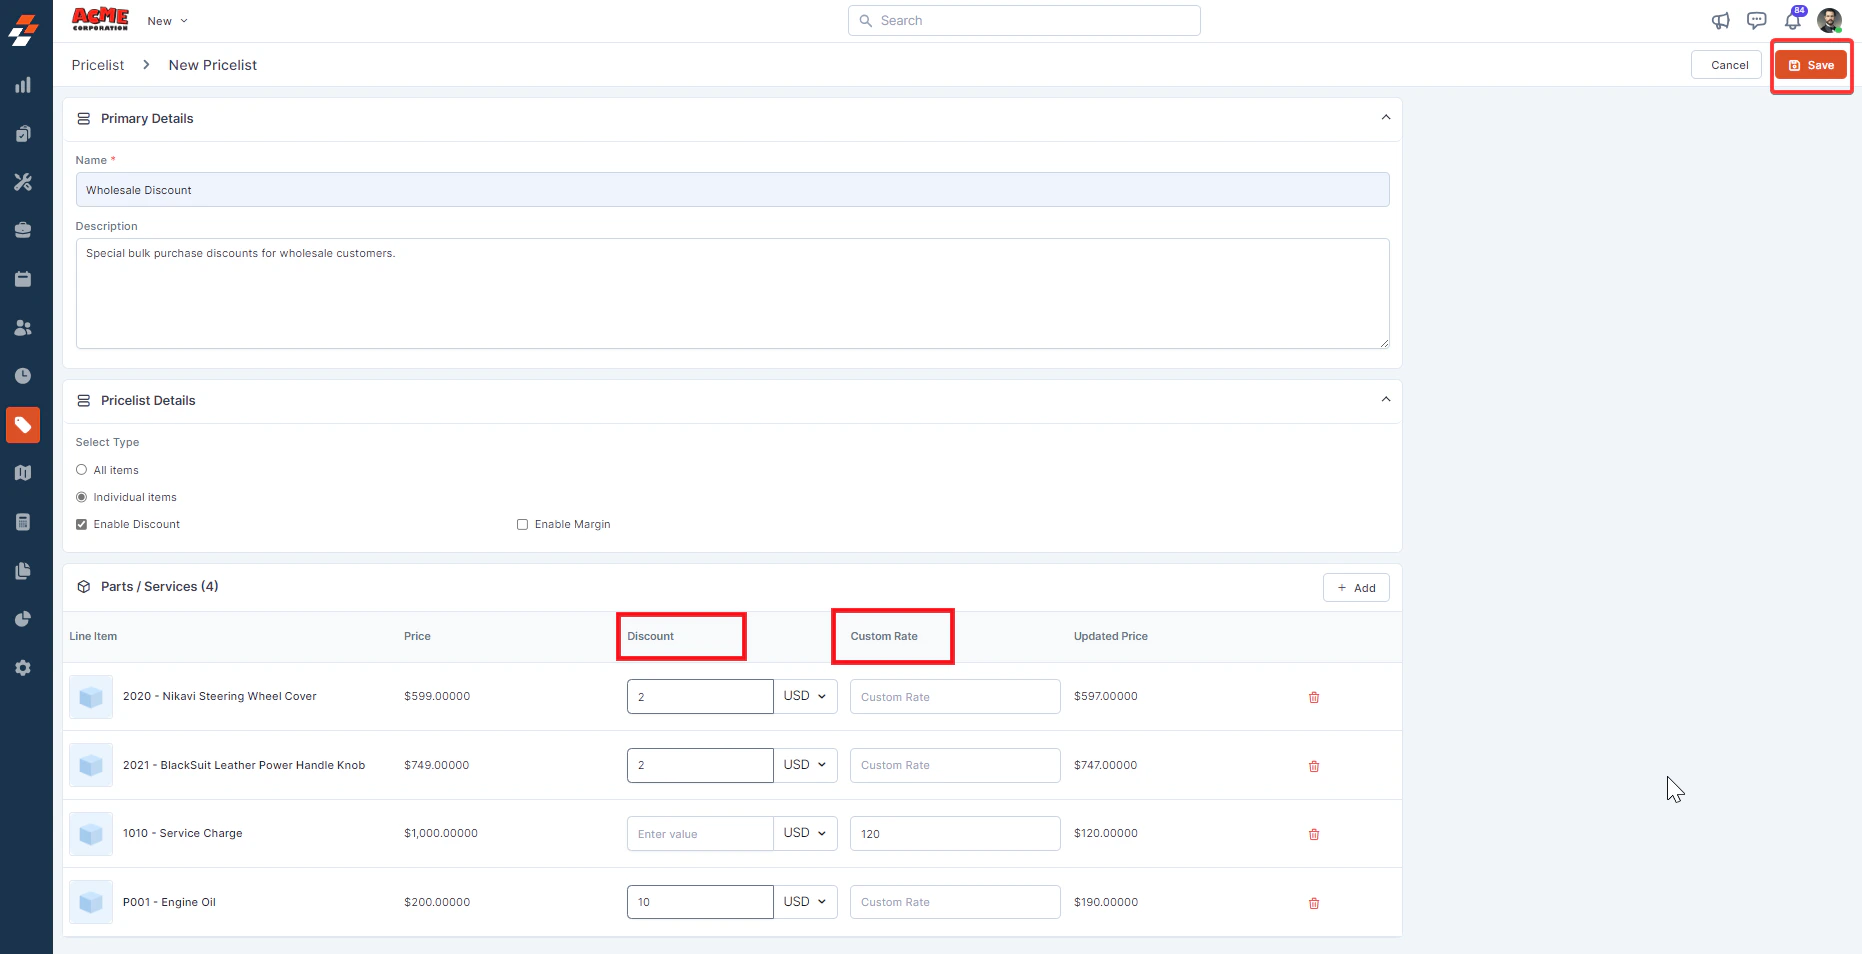
- You can specify either “Margin”, “Discount”, or “Custom Rate” for each item.
- Margin: An additional percentage or fixed amount added to the cost price of items to determine the unit selling price.
- Discount: A flat or percentage amount subtracted from the selling price you set in the master list for a part or service. The updated selling price, reflecting the applied discount, will be displayed accordingly in the Updated Price field.
- Custom Rate: A fixed rate or percentage applied to the item or service.
Note: Only one of these options, “Margin”, “Discount”, or “Custom Rate” can be selected for each item.
Edit a Pricelist
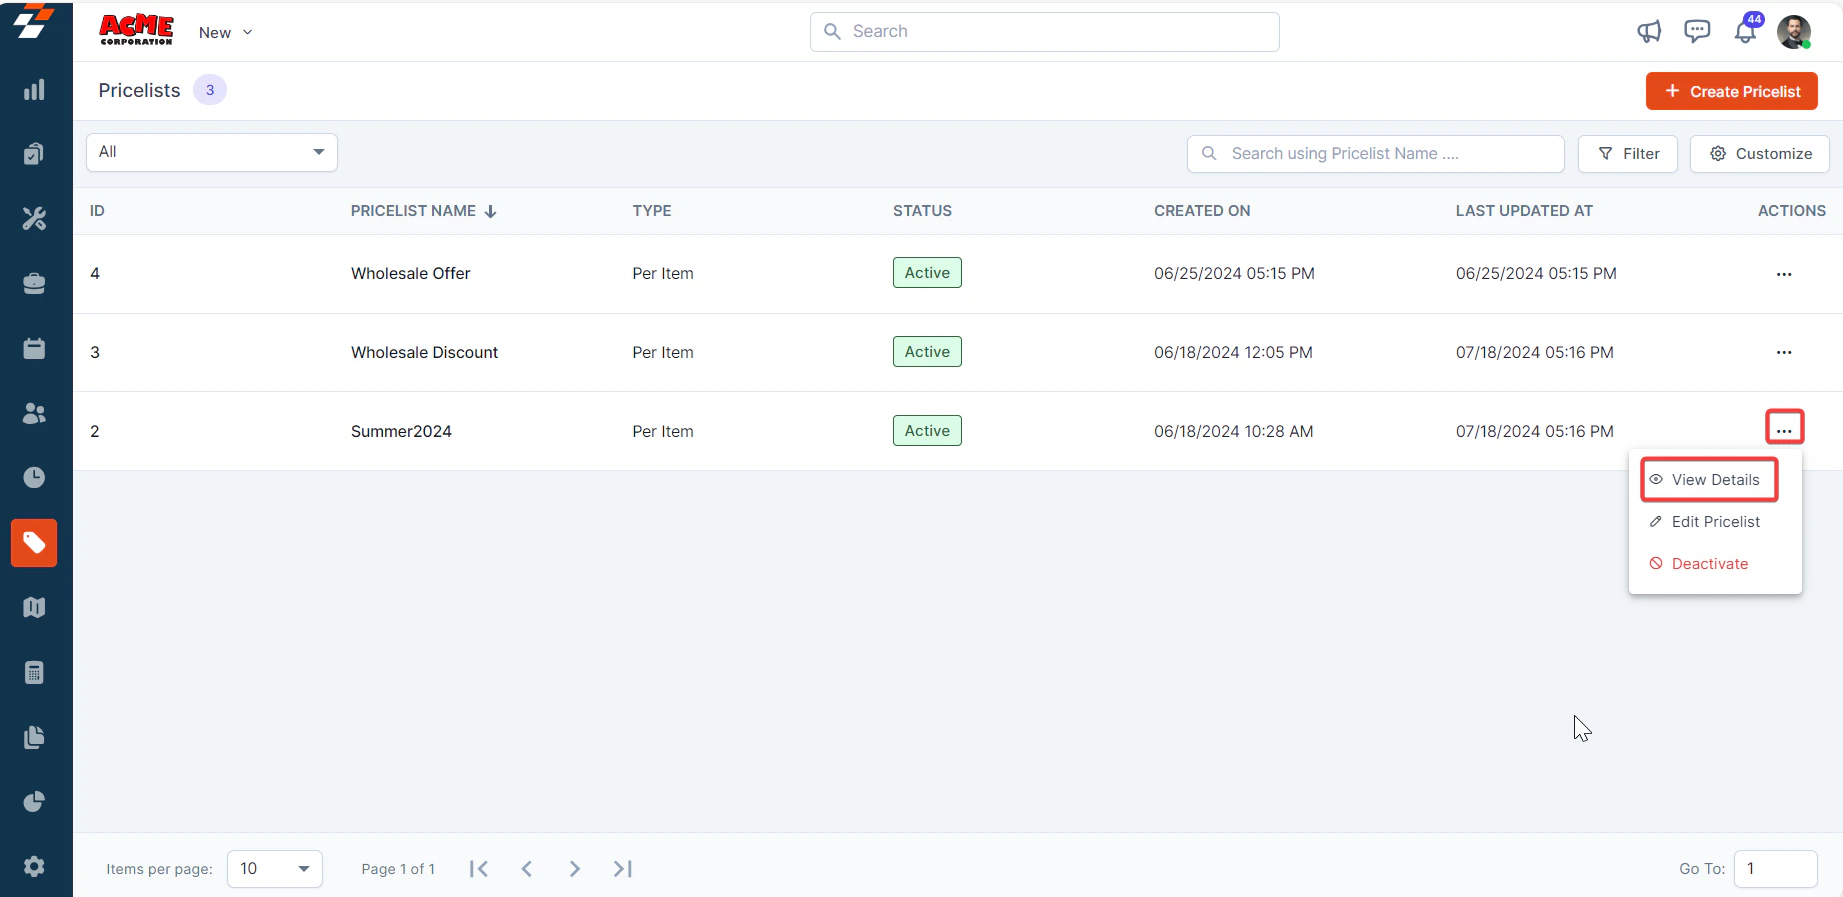
You can edit a pricelist from any one of the following pages:- From the Pricelists listing page
- From the Pricelist details page
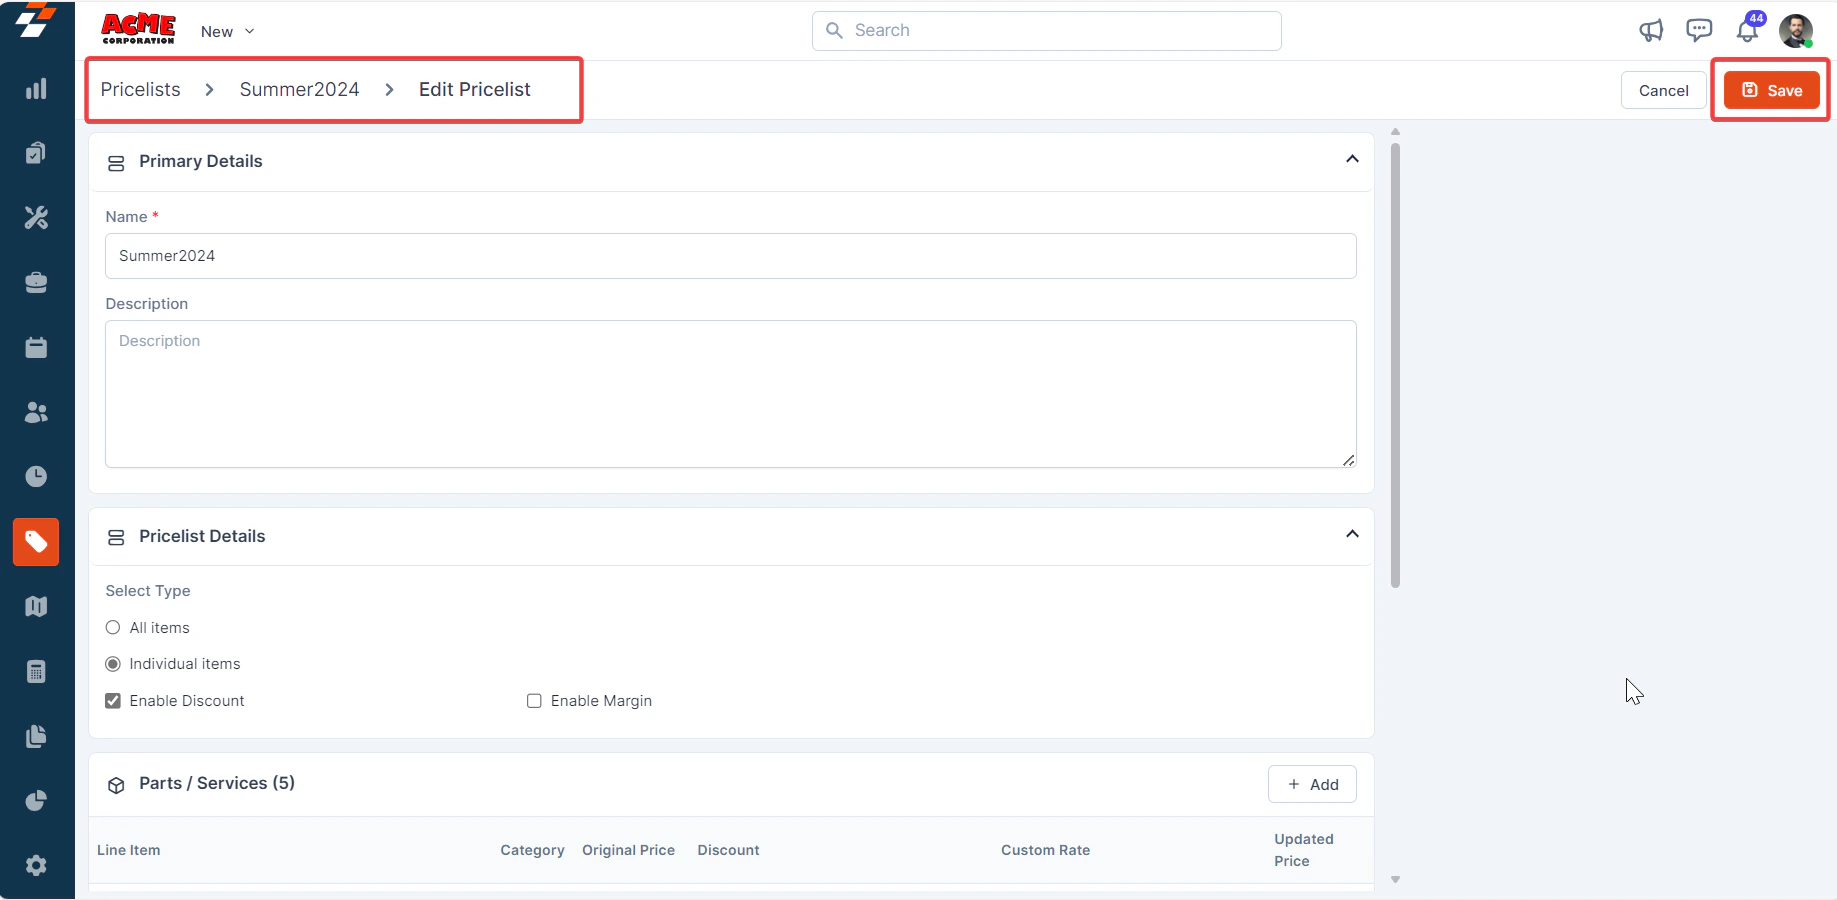
- Select the pricelist you want to edit on the listing page.
-
Click the “Ellipsis” icon under the “Action” column and select “Edit Pricelist”.
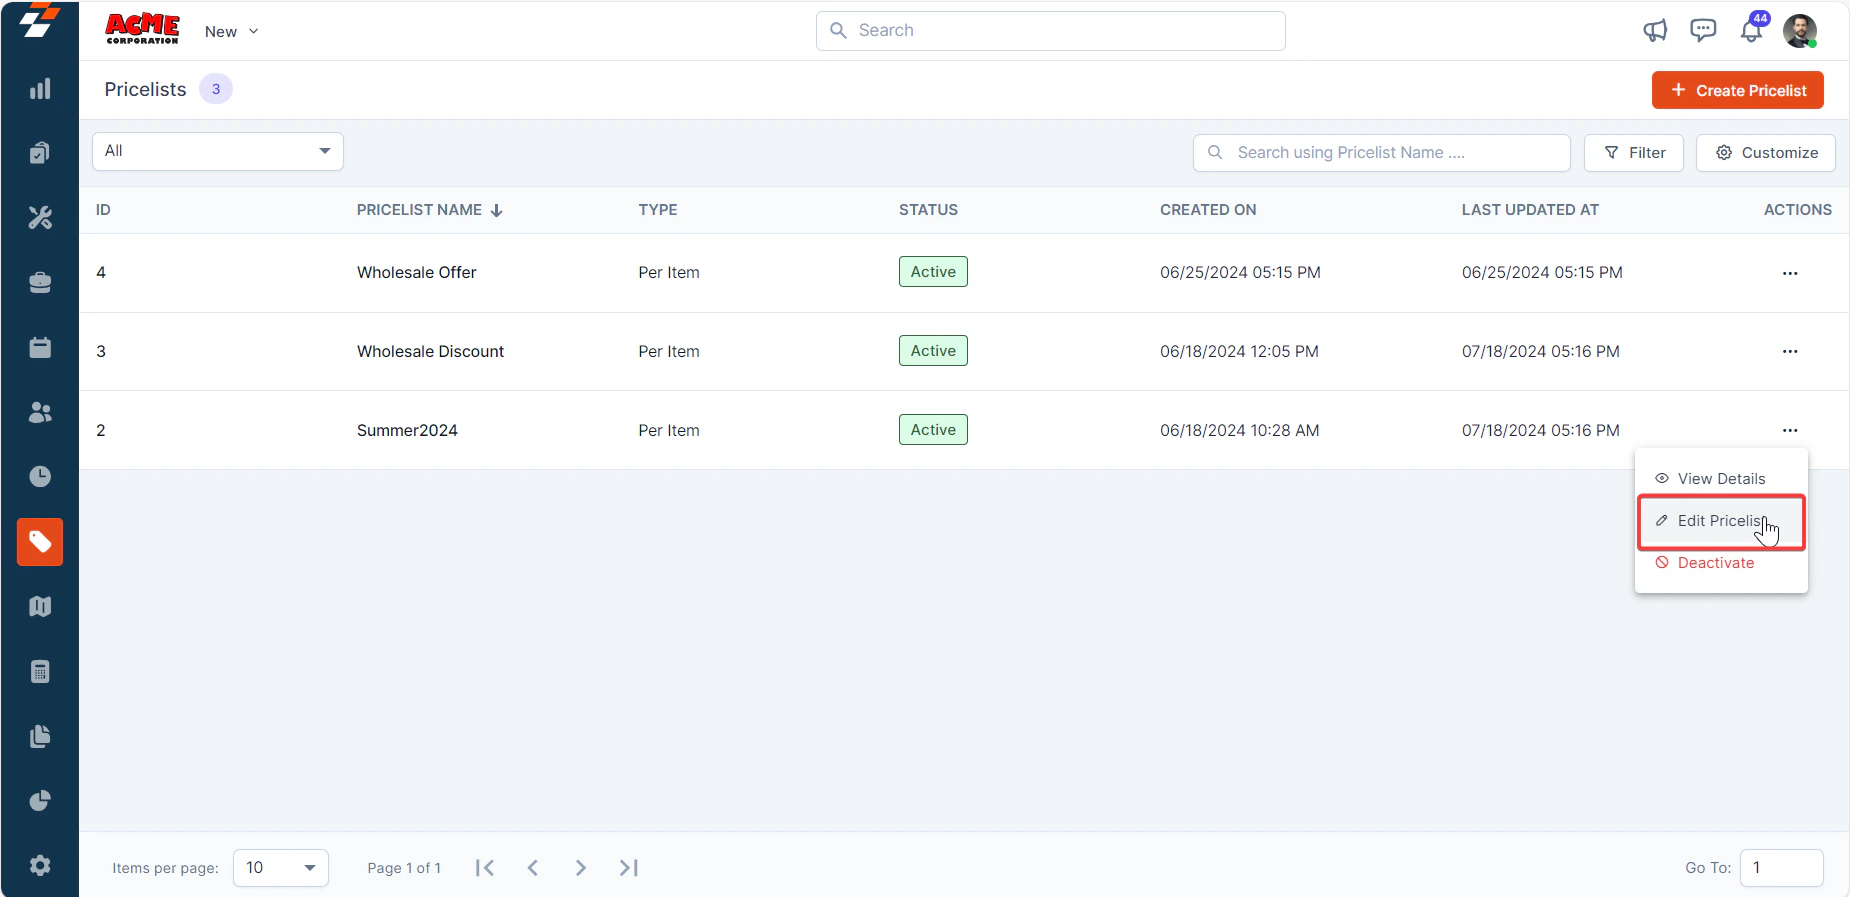
- Modify the necessary fields.
-
Click the “Save” button to update the pricelist.

- Select the pricelist you want to edit.
-
On the Pricelist details page, under “More Actions,” select “Edit Details.”
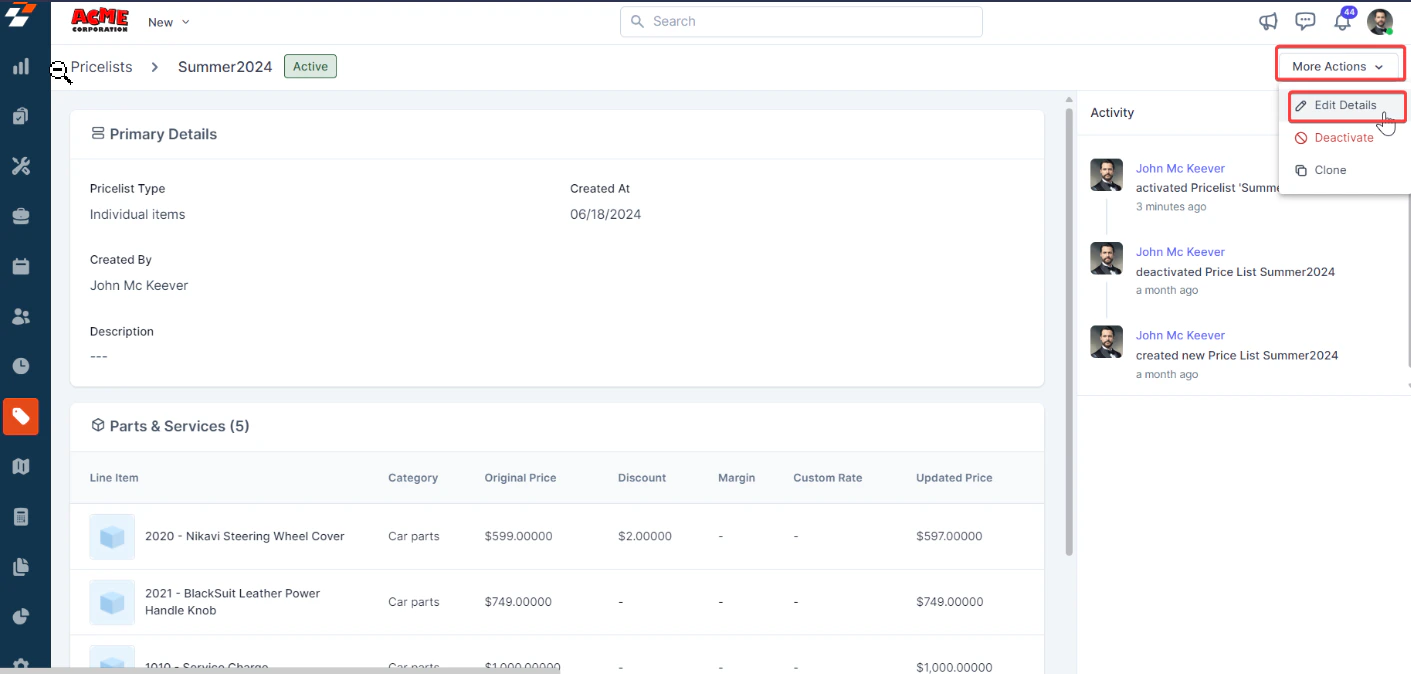
- Modify the necessary fields.
-
Click the “Save” button to update the pricelist.
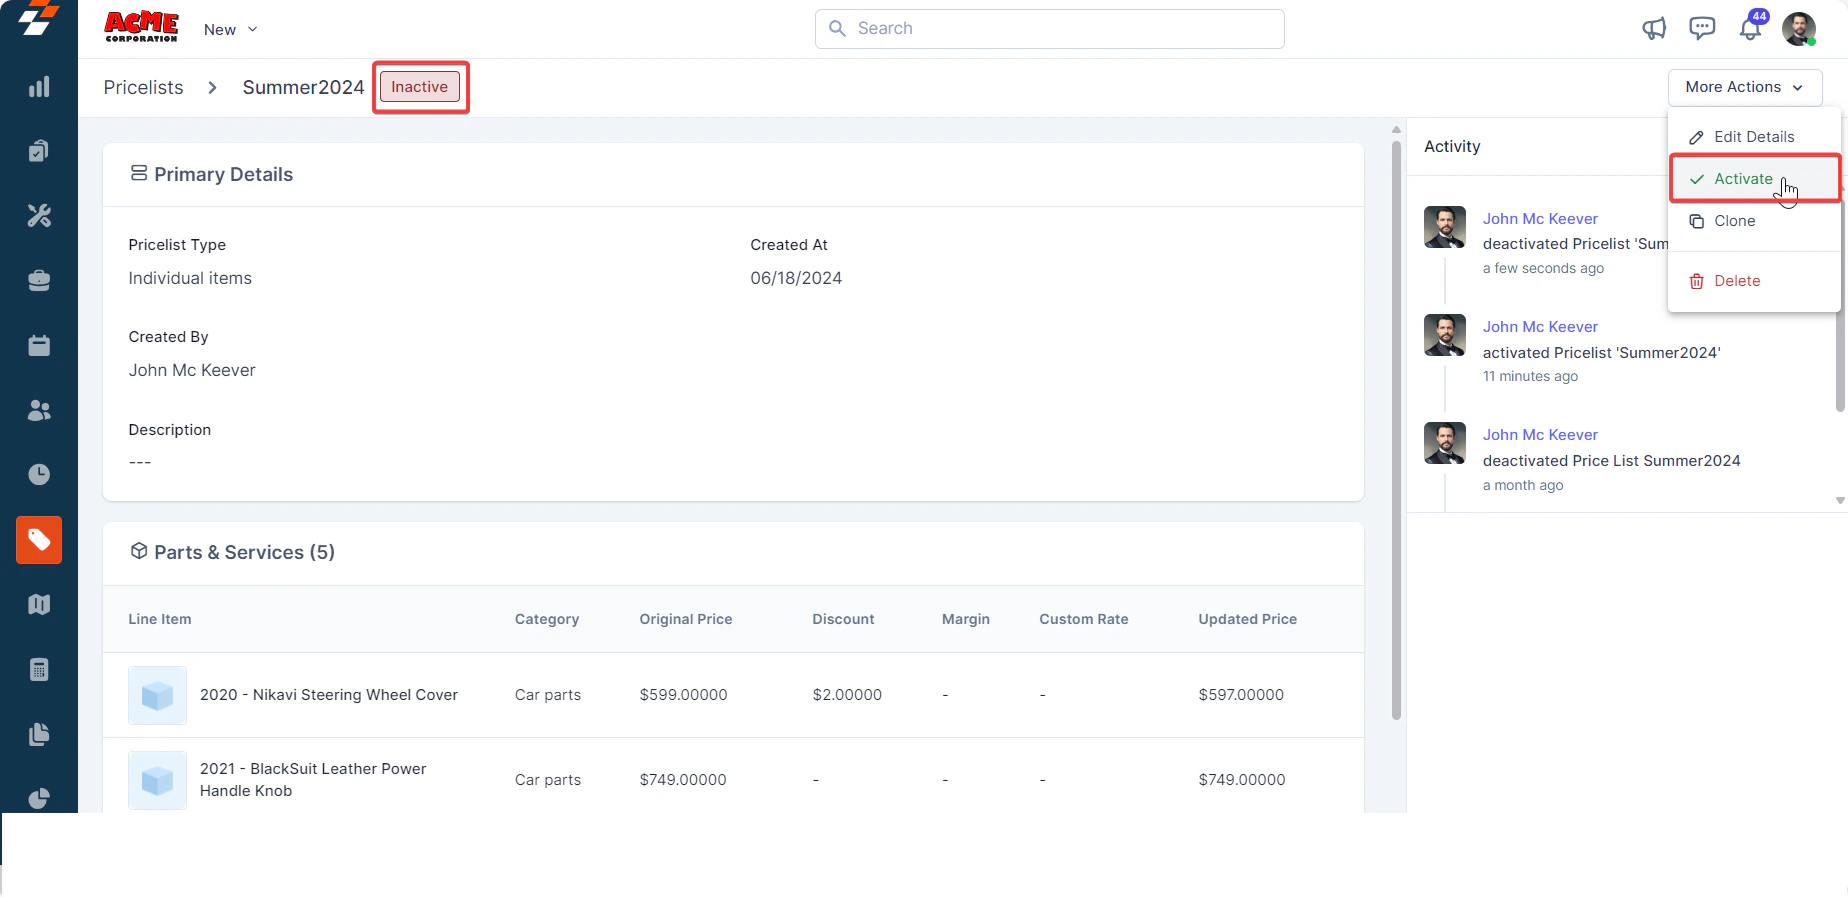
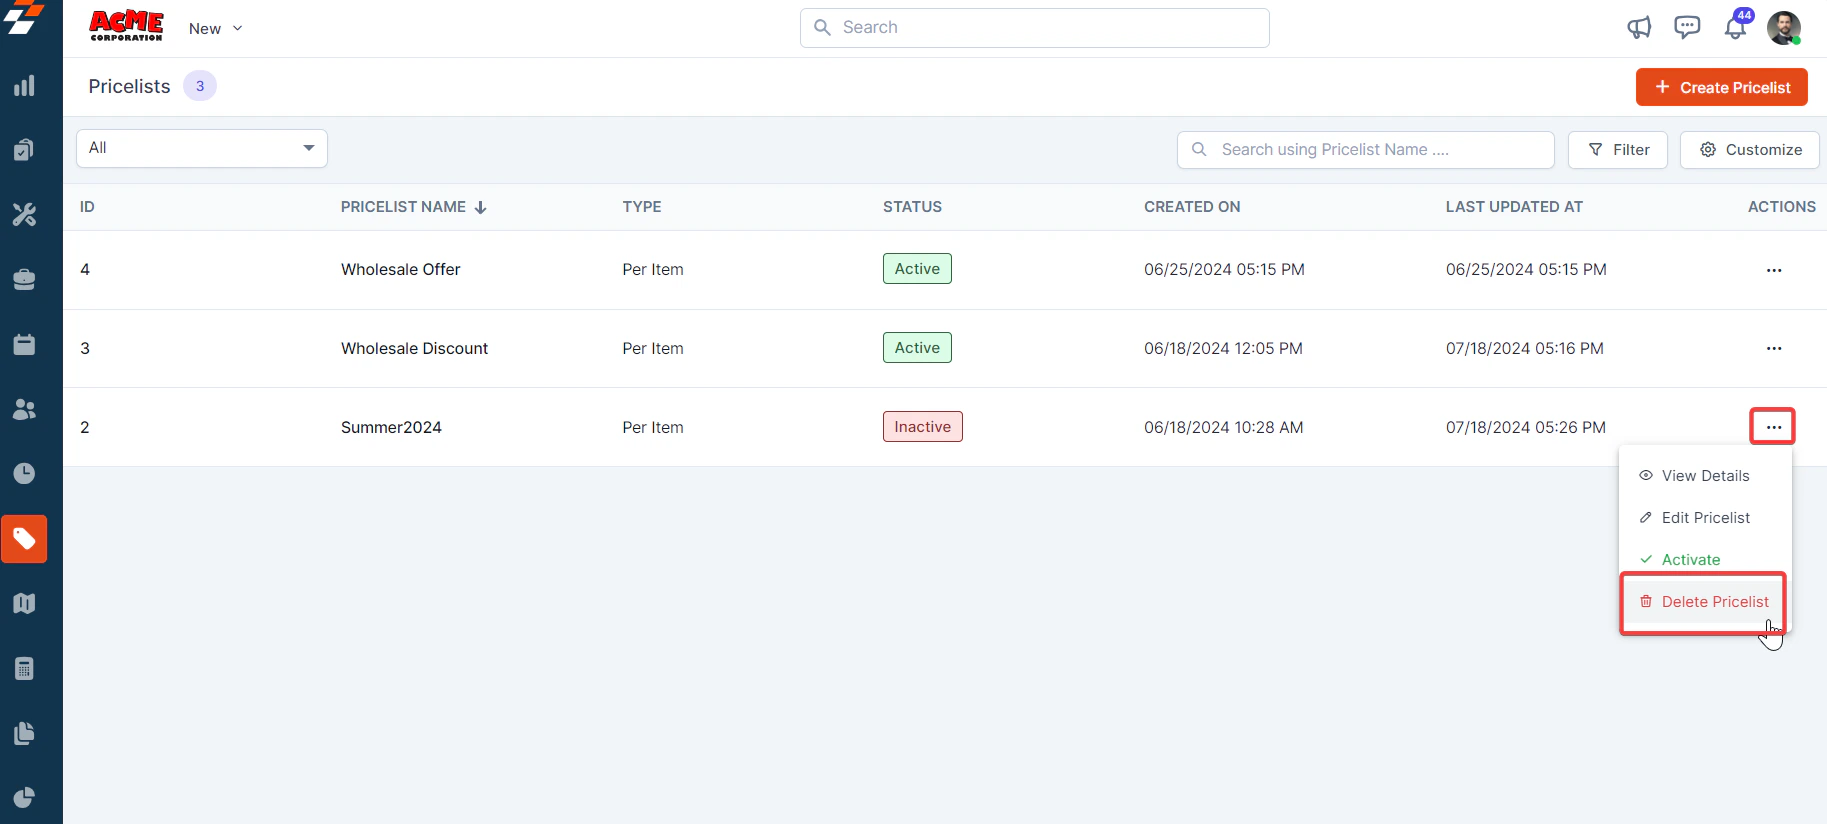
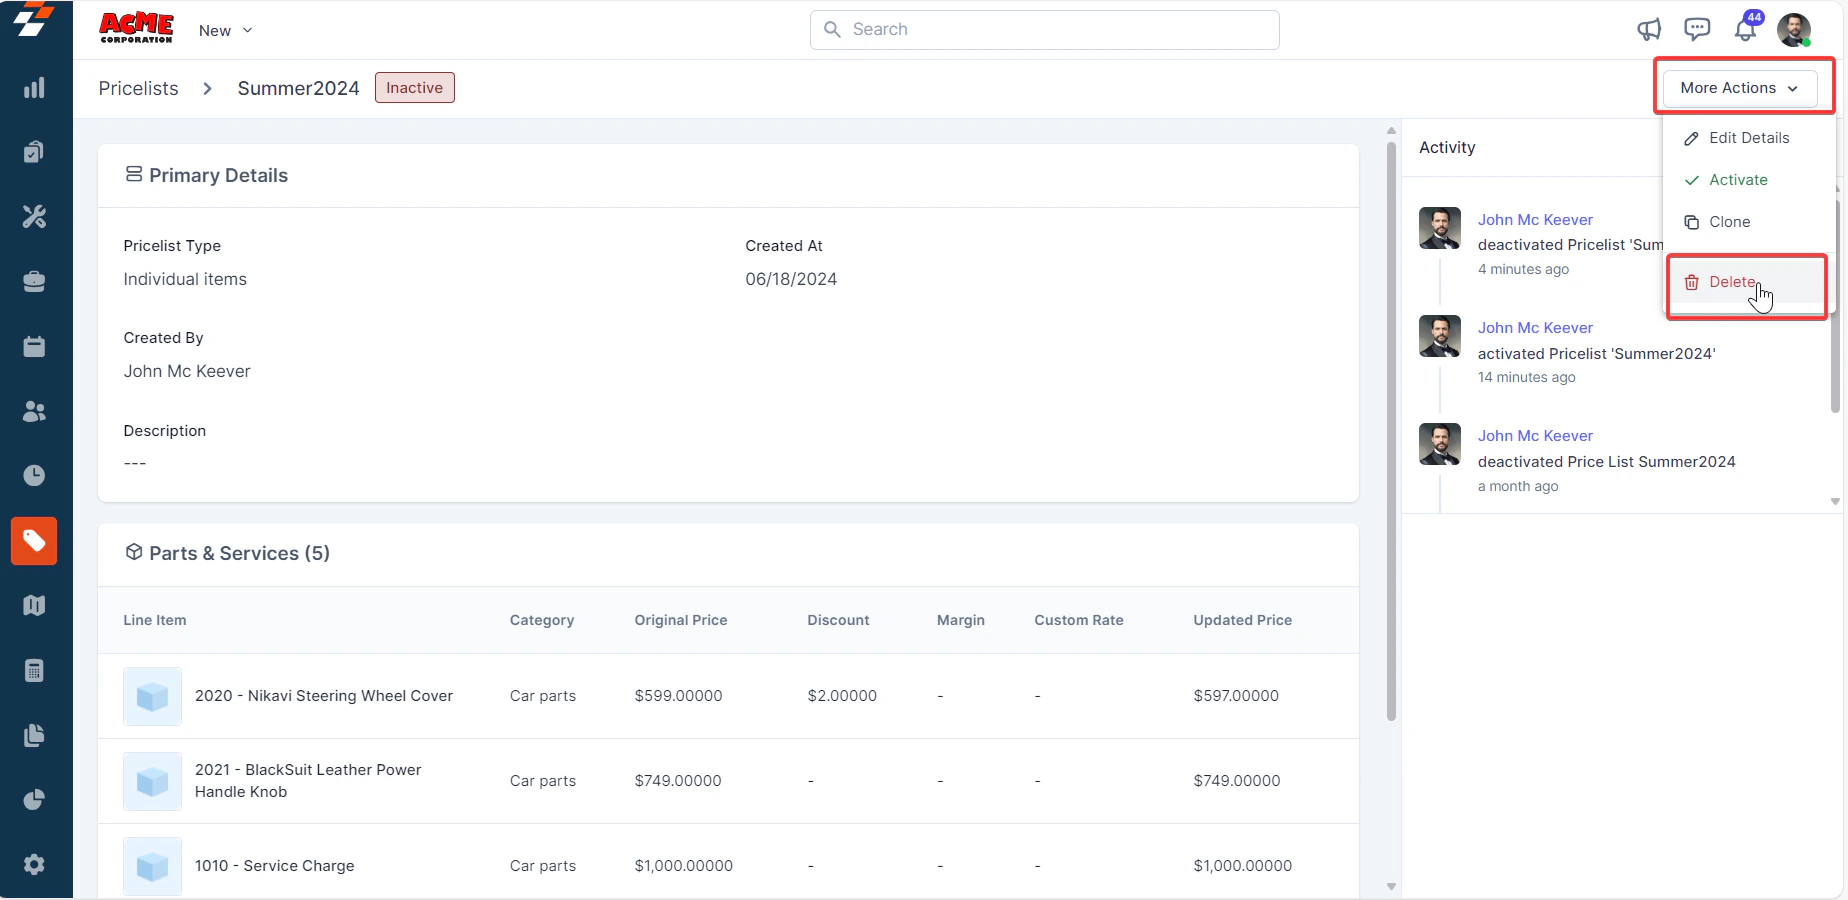
Deactivate/Delete a Pricelist
You can deactivate/delete a pricelist from any one of the following pages:- From the Pricelists listing page
- From the Pricelist details page
- On the Pricelists listing page, select the pricelist you want to deactivate.
-
Click the “Ellipsis” icon under the “Action” column and select “Deactivate”.
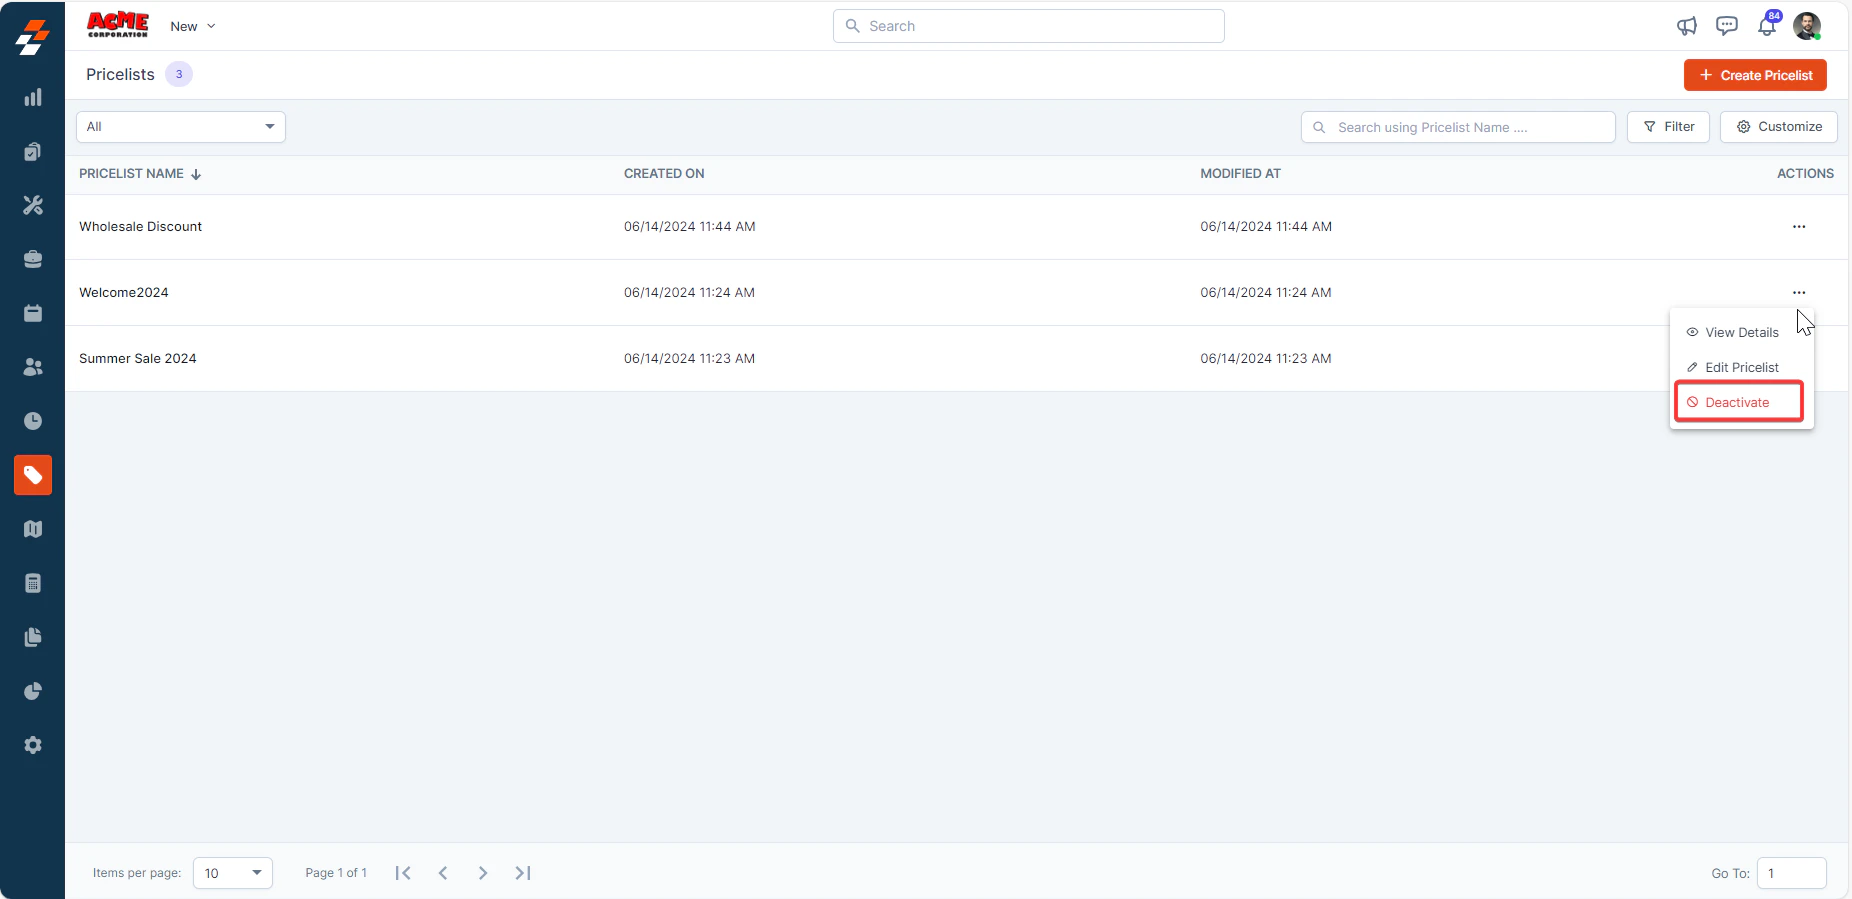
-
Alternatively, you can click the “Ellipsis” icon under the “Action” column and select “View Details”.
-
On the Pricelist details page, under “More Actions”, select “Deactivate”.
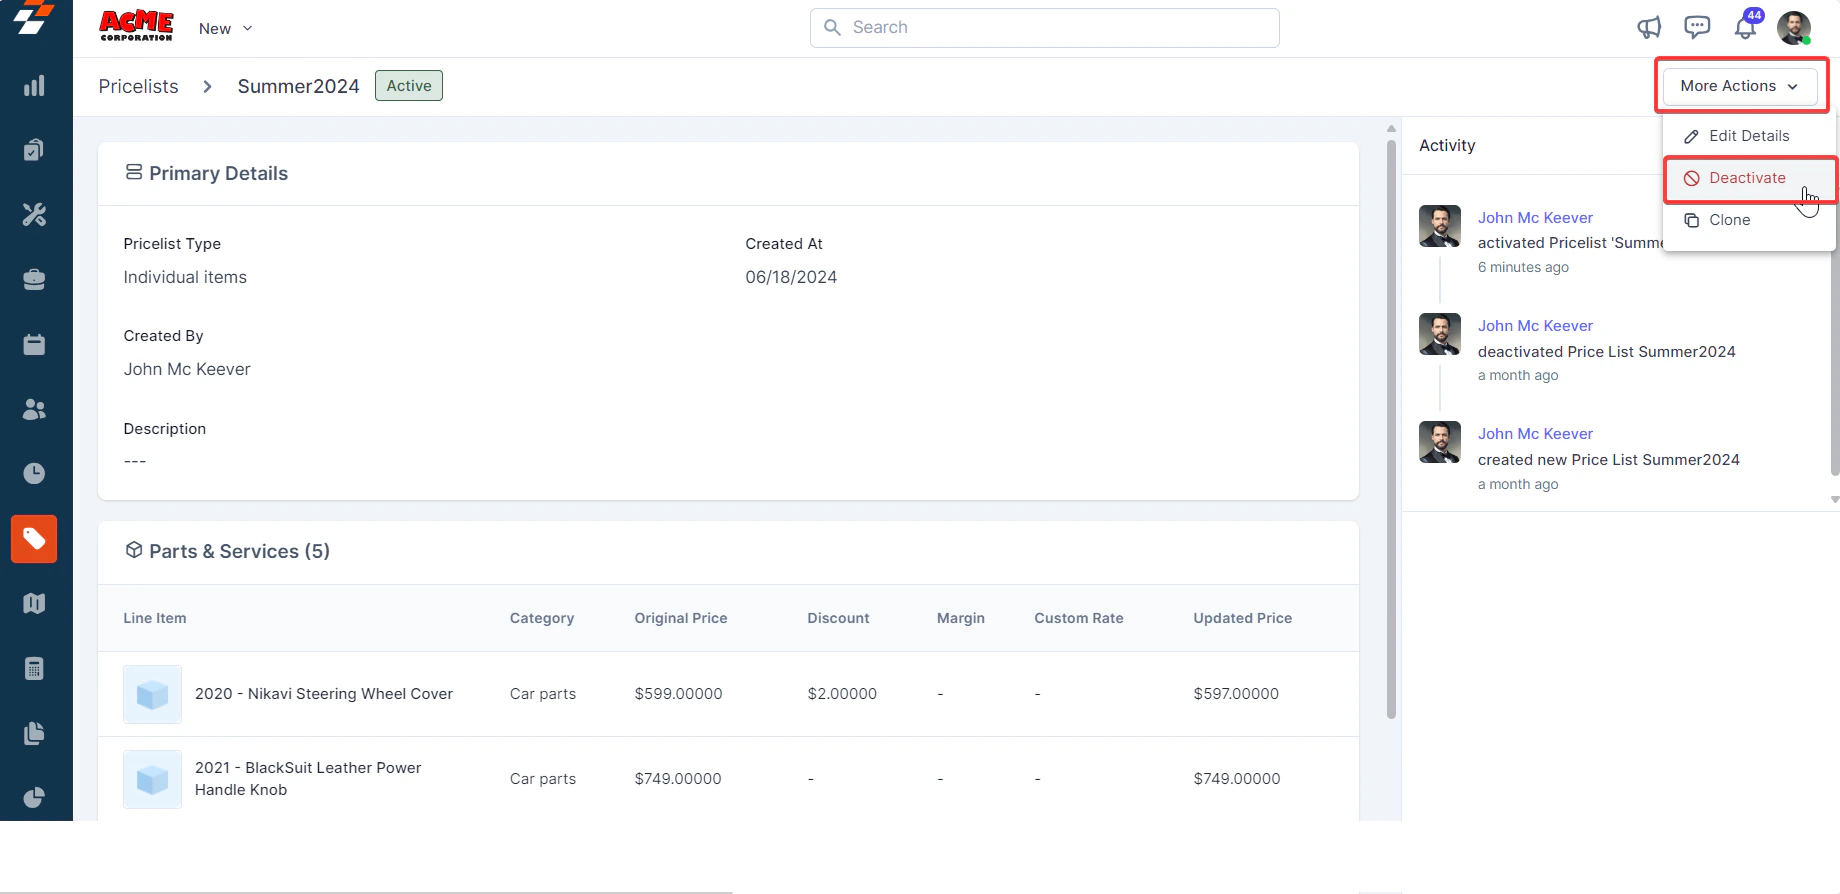
-
The pricelist will be deactivated successfully. To reactivate it, click “Activate”.
-
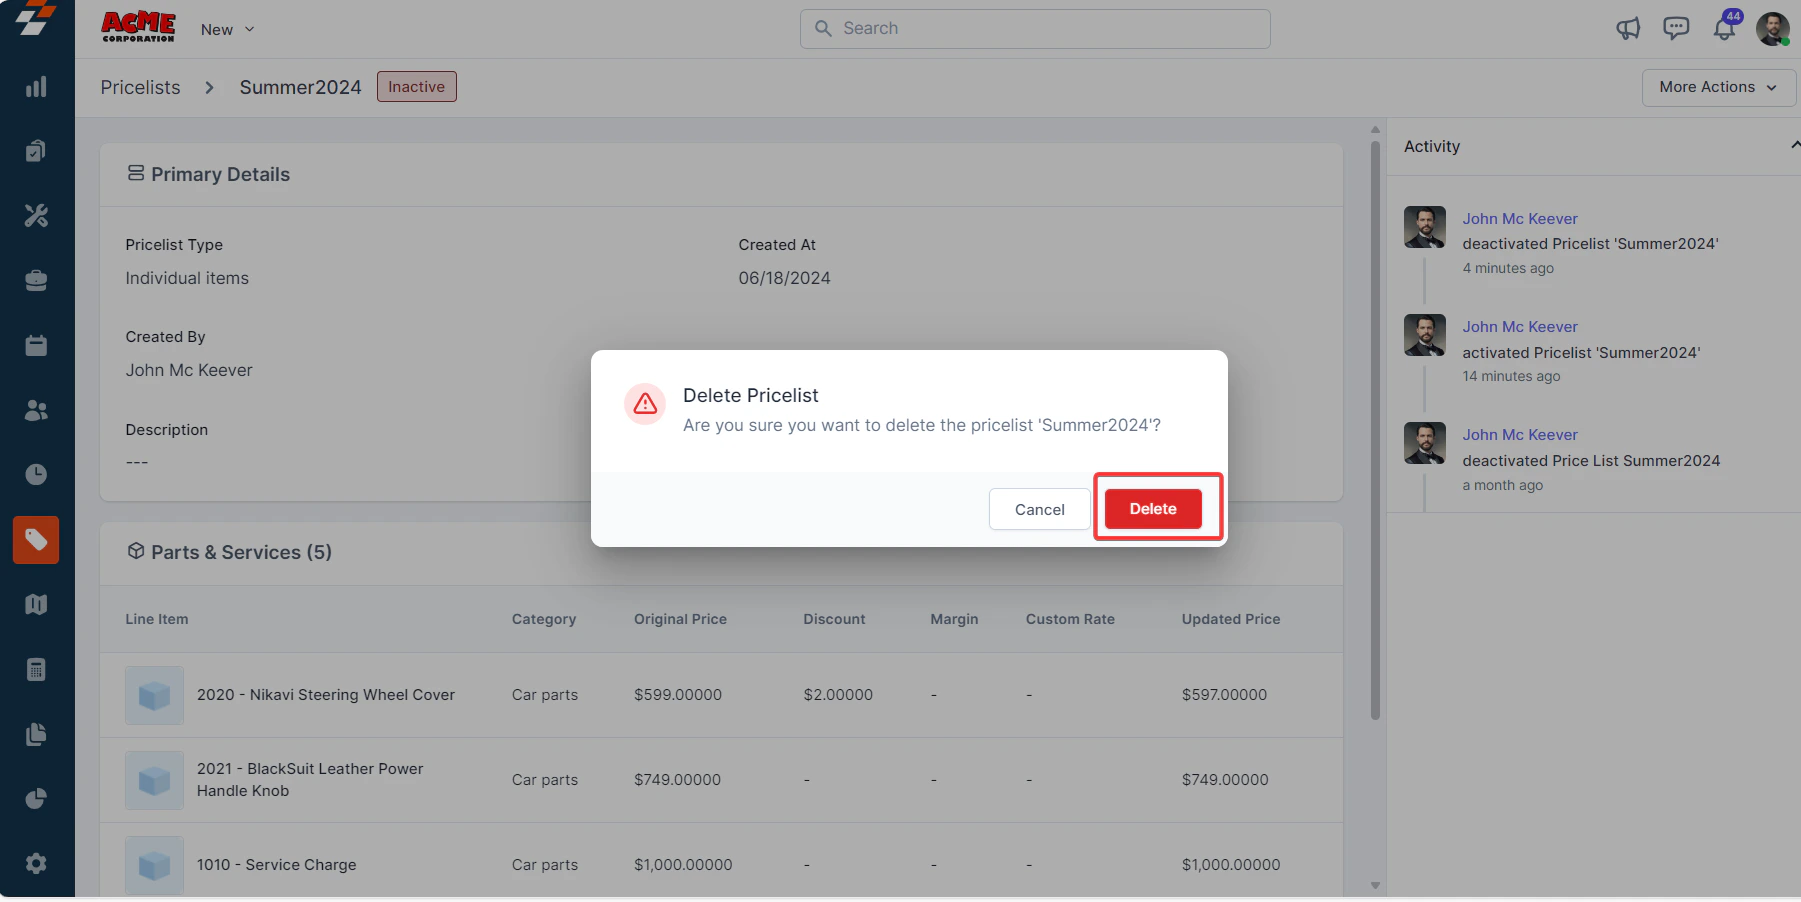
On the Pricelists listing page, select “Delete Pricelist” under “Action” to delete the pricelist.
-
Alternatively, you can delete the pricelist from the Pricelist detail page.
-
A pop-up message will appear. Click the “Delete” button to delete the pricelist.