Navigation: Settings -> Miscellaneous -> Outbound Email
What is SMTP? Email providers use SMTP (Simple Mail Transfer Protocol) to send messages. Connecting Zuper to your SMTP account means Zuper sends emails through your provider, instead of Zuper’s default email address.
Before you begin
Complete this setup before you send any customer-facing emails. Ensure you have the following:- Admin access to Zuper Settings.
- Your SMTP credentials: server address, port, username, and password.
- Access to your email provider’s dashboard to complete sender or domain verification.
Add provider-specific requirements
- For Gmail: two-factor authentication (2FA) enabled on your Google account, so you can generate an app password.
- For Microsoft 365: multi-factor authentication (MFA) enabled if your organization uses it, so you can generate an app password.
Accessing outbound email settings
- Select your profile icon, then select Settings. Alternatively, navigate to the Settings module from the Left Navigation menu.
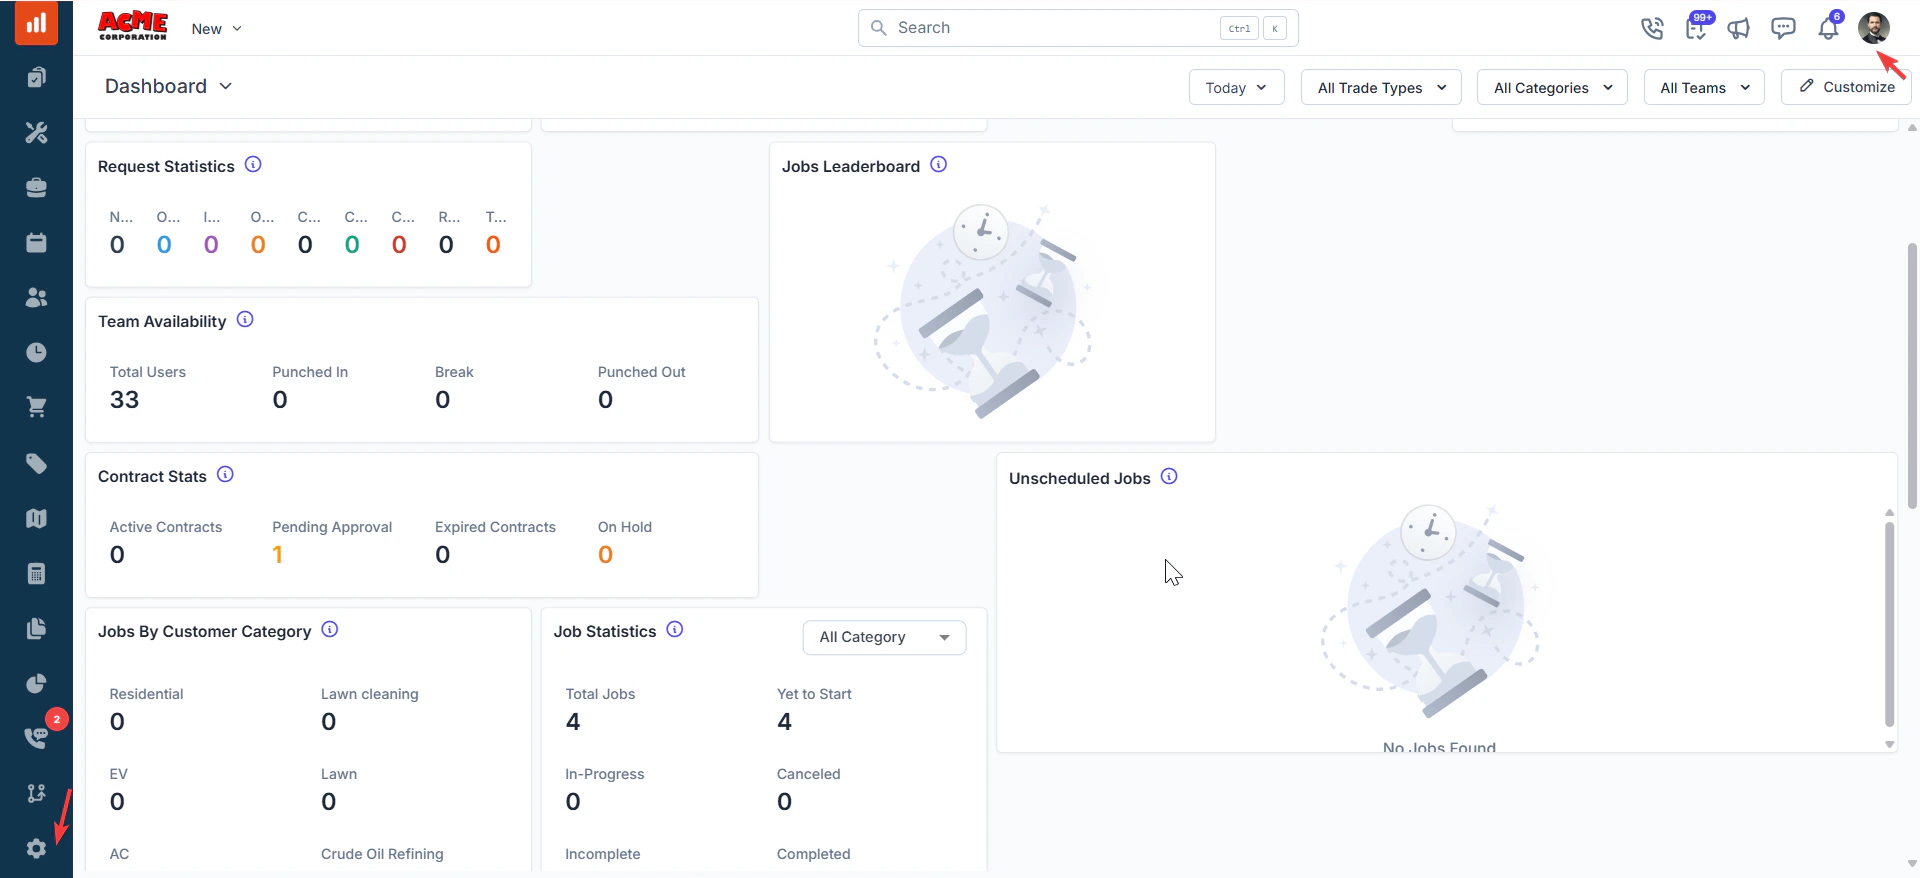
- Under Settings, select Miscellaneous from the left panel. Scroll to the Outbound Email Settings section.
Navigation: Settings -> Miscellaneous -> Outbound Email Settings
Adding a new outbound email account
1. In the Outbound Email Settings section, select + Add Email.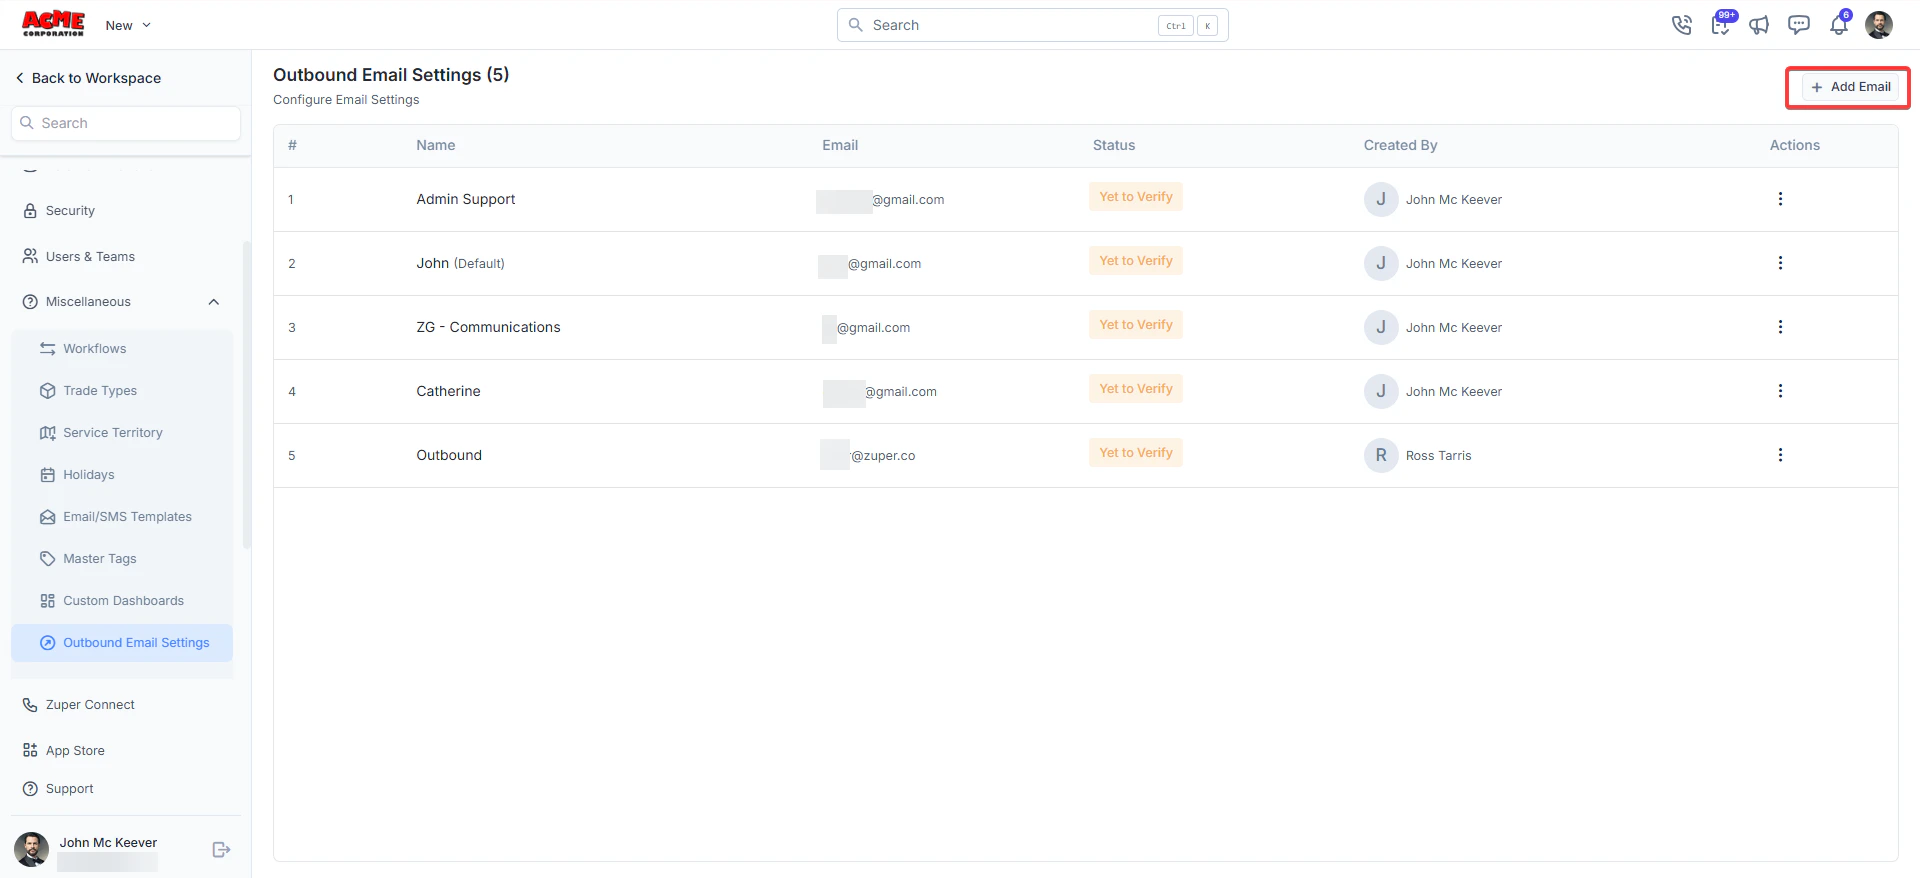
- Fill in the fields as described below and click Create.
Default SMTP
Note: If business SMTP is not configured or deleted, Zuper will use its default SMTP settings. In this case, all emails will be sent from notifications@email.zuperpro.com. To use your own sender address, please make sure your business SMTP settings are configured correctly. See General Job Settings – Default from email for more details.
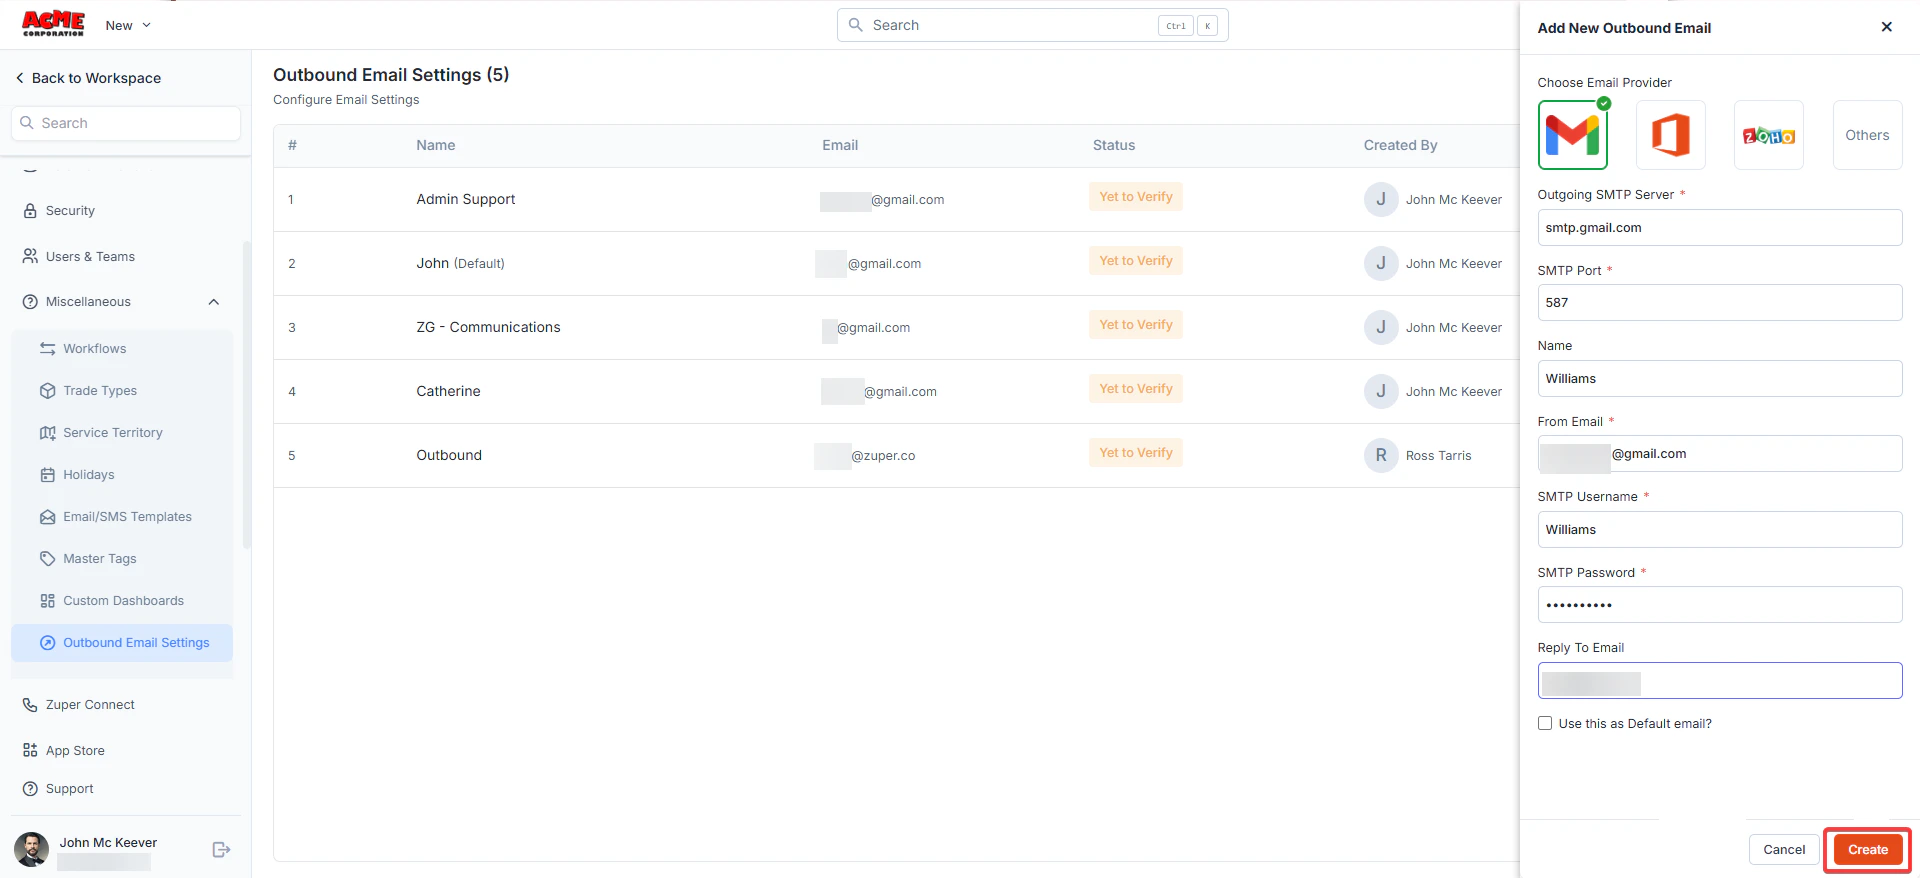
Email Configuration Fields
| Field | Description |
|---|---|
| Choose Email Provider | Select your provider: Gmail, Microsoft 365, or Others. |
| Outgoing SMTP Server | The SMTP server address. This auto-fills based on the provider you choose. Select Others to enter a custom server. |
| SMTP Port | The port number. This also auto-fills. You can edit it if needed. |
| Name | The display name that appears in your customers’ inboxes. |
| From Email | The email address you want to send from. |
| SMTP Username | The username your email provider uses to authenticate you. This is often your full email address. |
| SMTP Password | The password for your email account. For Gmail and Microsoft 365, this is an app password — see Setting up Gmail or Setting up Microsoft 365. |
| Reply To Email | Optional. Enter a different address if you want replies to go somewhere other than the From Email. |
Note: The account shows a Yet to Verify status until verification is complete. If the status still shows ‘Yet to Verify’ after a few minutes, check your credentials and confirm that you have verified your sending domain in your provider’s dashboard.
Setting up Gmail
Setting up Gmail
Setting up Gmail
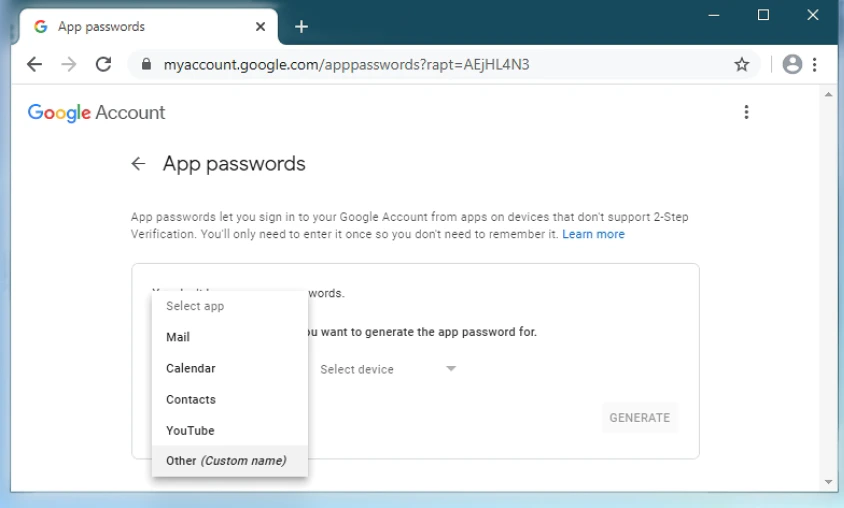
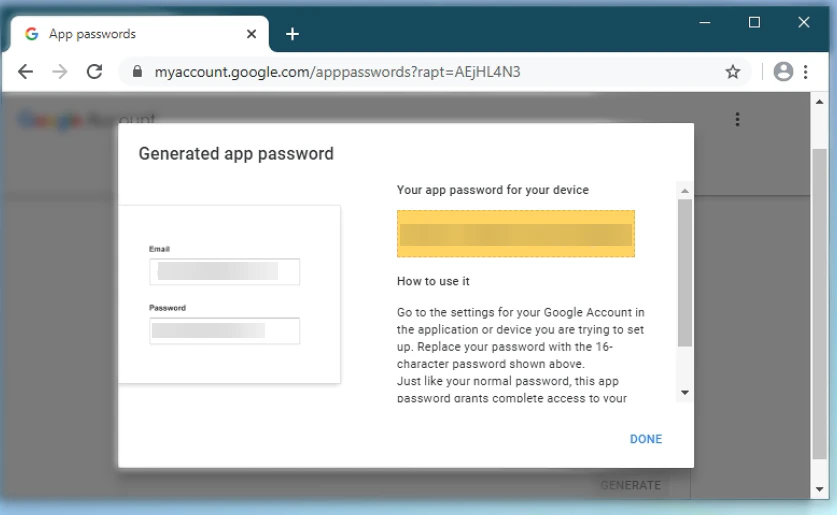
Google blocks third-party tools from logging in with your regular password as a security measure. Gmail requires an app password instead — a 16-character code that gives Zuper access to your account without using your main password. You must have 2-Step Verification enabled before you can generate one.1. Go to myaccount.google.com.2. Go to Security in the left panel.3. Under How you sign in to Google, select 2-Step Verification. If prompted, enter your password. The 2-Step Verification settings page opens.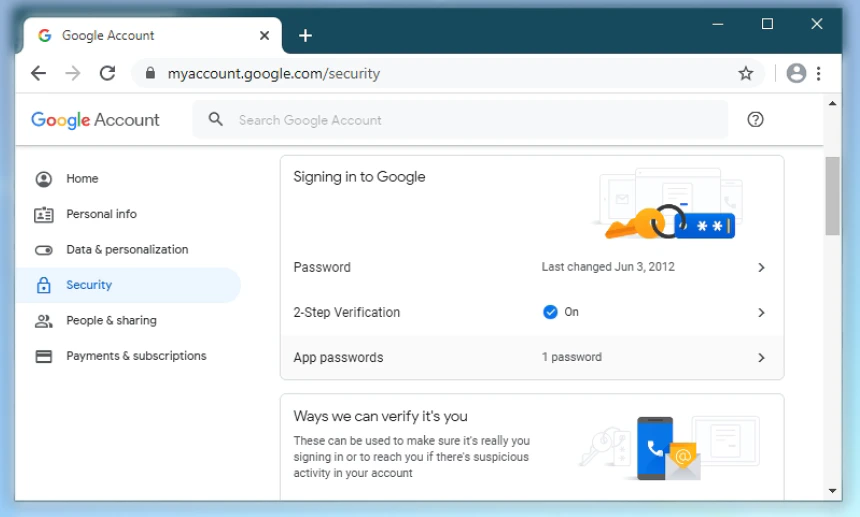
Setting up Microsoft 365
Setting up Microsoft 365
If your Microsoft 365 account has multi-factor authentication (MFA) enabled, you must generate an app password to use with Zuper. Using your regular account password will not work.
Setting up Microsoft 364
1. In Zuper, set Outgoing SMTP Server to smtp.office365.com.2. Set SMTP Port to 587.3. Go to account.microsoft.com and sign in.4. Select Security from the top navigation.5. Under Advanced security options, select App passwords.6. Select Create a new app password. Microsoft generates and displays the password.7. Copy the generated password.8. Go back to Zuper, paste the generated password into the SMTP Password field, and select Create.For more details, see Microsoft’s SMTP guide.Setting up a custom SMTP provider
Setting up a custom SMTP provider
Setting up a custom SMTP provider
If you use a provider other than Gmail or Microsoft 365, such as Mailgun, SendGrid, SMTP2GO, Zoho, Brevo, or any other provider, select Others as your email provider.1. In the Outgoing SMTP Server field, enter your provider’s SMTP server address.2. In the SMTP Port field, enter the correct port. Usually, this is 587 (TLS, a secure connection type) or 465 (SSL, an older secure connection type).3. Enter your SMTP username and password from your provider’s dashboard.Managing outbound email accounts
Edit or delete an account
1. Go to Settings → Miscellaneous → Outbound Email Settings. 2. Find the email account in the listing. 3. Select the three-dot menu (⋮) next to the account. 4. Select Edit or Delete. Update the details and select Save.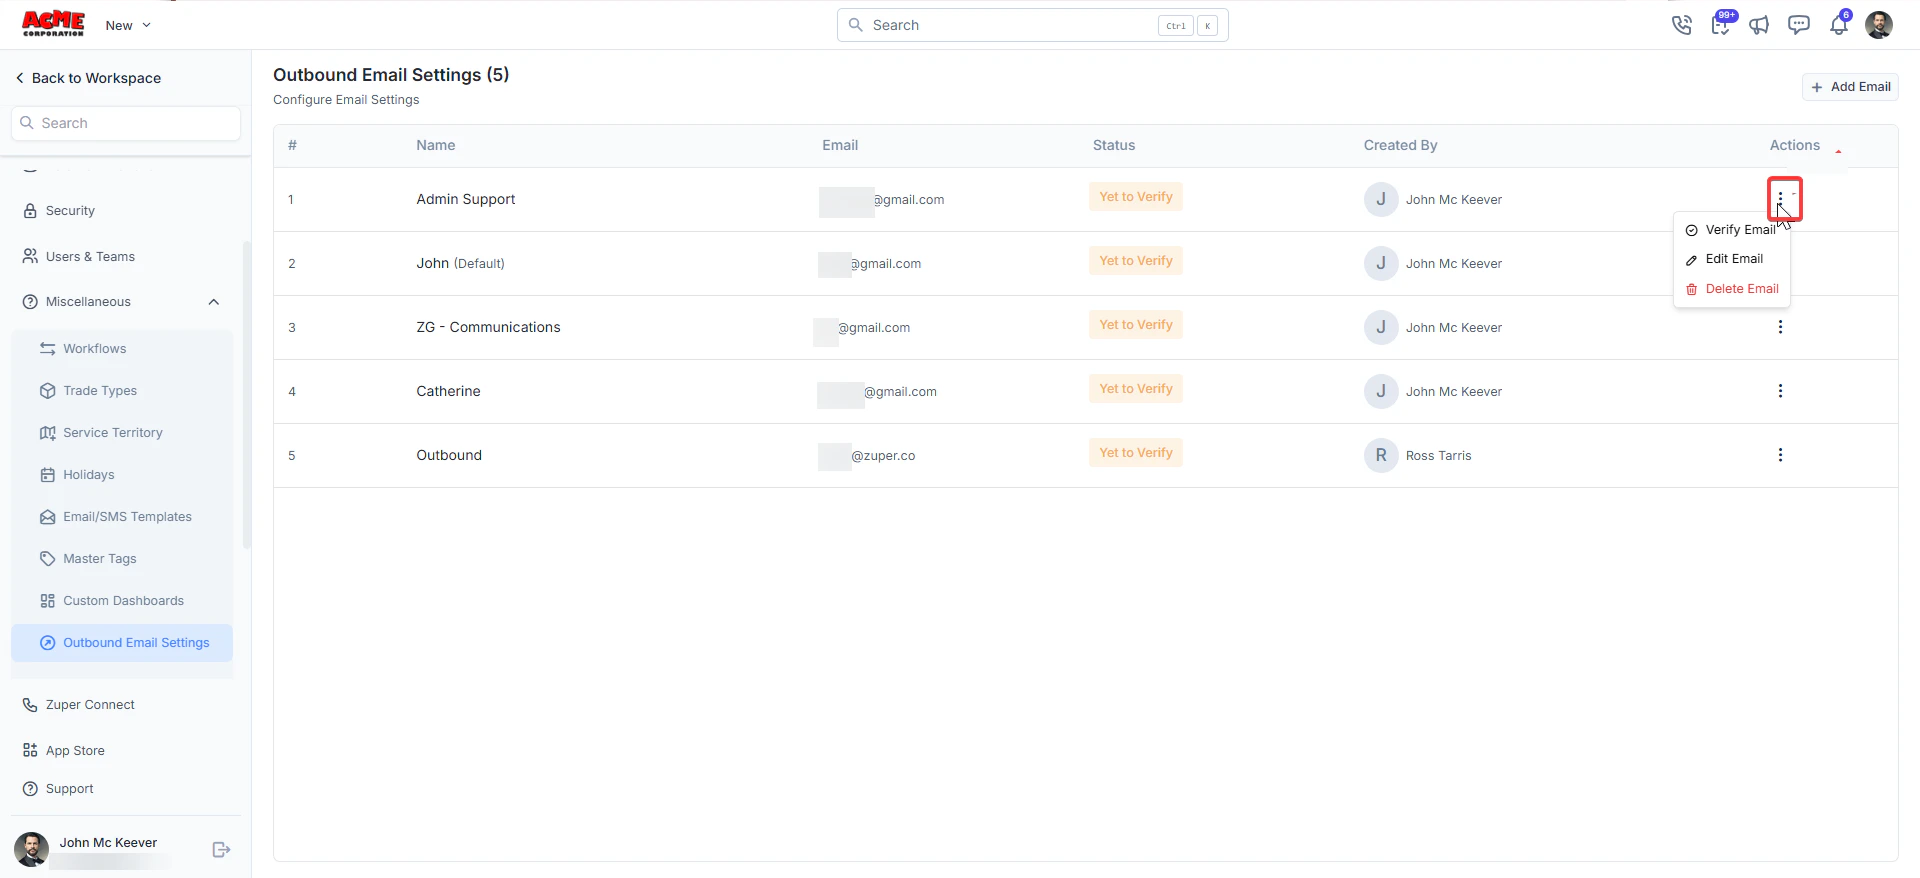
Set a default account
The default account is what Zuper uses to send all customer-facing emails, unless a workflow or template specifies otherwise. 1. Select the three-dot menu (⋮) next to the account and select Edit. 2. In the panel that opens, select Set as default. 3. Select Update.
Troubleshooting
Emails not sending after SMTP setup
Emails not sending after SMTP setup
If your emails are not sending after you have configured your SMTP settings, work through the steps below.
Use a free tool like MXToolbox or DMARC Analyzer to check that your DNS records are set up correctly.To set up these records, log in to your domain provider and add the values provided by your SMTP provider. Most providers — including Mailgun, SendGrid, and SMTP2GO — show the exact records you need under a section called Domain Verification or Sender Authentication in their dashboard.Step 5 — Send a test email
Step 1 — Verify your SMTP configuration
Check that the following details in Zuper match exactly what your email provider gave you:- SMTP host
- SMTP port
- SMTP username
- SMTP password
- Encryption type (TLS or SSL)
| Provider | Where to check |
|---|---|
| Microsoft 365 / Outlook | Microsoft SMTP guide |
| Gmail | Gmail SMTP guide |
| Mailgun | Mailgun dashboard |
| SendGrid | SendGrid sender authentication |
| SMTP2GO | SMTP2GO verified senders |
Step 3 — Confirm sender email and domain verification
Most SMTP providers require you to verify your sending domain before they will send emails on your behalf. In your provider’s dashboard, check that:- Your domain is verified.
- Your sender email address is verified.
- ·The From Email you entered in Zuper matches the verified domain.
Step 4 — Check your DNS records
Your domain needs three types of DNS records. Each one helps email servers trust that your messages are genuine. Add these in your domain provider’s dashboard (GoDaddy, Cloudflare, Namecheap, or Google Domains).| Record | Purpose |
|---|---|
| SPF | Tells email servers which servers are allowed to send on behalf of your domain. |
| DKIM | Adds a digital signature to your emails to prove they came from you. |
| DMARC | Use SPF and DKIM together to improve security and deliverability. |
- Send a test email from Zuper.
- Check whether it arrives in the intended inbox.
- Review the outbound email logs in Zuper.
- Check your SMTP provider’s logs for delivery details if your plan includes log access.
FAQs
- Why does my email show “Yet to verify” status?
Your account has been saved but has not completed verification yet. This might mean the SMTP credentials are incorrect, or that your provider has not finished processing the connection. Check your credentials and confirm you have verified your sending domain in your provider’s dashboard. See “Setting up Gmail” or “Setting up Microsoft 365” above for the step-by-step process.
- Can I add more than one outbound email account?
Yes. You can add as many accounts as you need. Each one appears in the listing. You can set any one of them as the default at any time.
- What is the difference between “From Email” and “Reply To Email”?
From Email is the address your customers see as the sender. Reply To Email is where replies go when a customer selects Reply in their email app. If you do not fill in Reply To Email, replies go to the From Email address.
- What happens if I do not set up outbound email?
Zuper sends all customer-facing emails from notifications@email.zuperpro.com. Your customers might not recognize this address, which increases the chance of emails going to spam. We recommend setting up your own SMTP account.
- Can I use a shared mailbox or alias as the From Email?
This depends on your email provider. Most providers support shared mailboxes as sending addresses, provided you have verified the address and your SMTP credentials have permission to send from it. Check your provider’s documentation for details.
- My emails are going to spam. What should I do?
Check that your SPF, DKIM, and DMARC records are correctly set up for your domain. See Step 4 in the Troubleshooting section above. Misconfigured or missing DNS records are the most common reason emails land in spam.